This Wild Season

Sharing what I'm learning in the kitchen as well as outside of it.

Navigation
  • Home
  • Blog
  • Recipes
    • Appetizer
    • Breakfast/Brunch
    • Side Dish
    • Main Course
    • Dessert
    • Drinks
    • Personal
  • About

How to: Make Roasted Garlic

March 13, 2015 by Asharae Leave a Comment

Tim and I are the kind of people who sit down to eat our dinner, take a few bites, and then start running through ideas of what we would want to do differently next time. I noticed it last night as we were devouring fish tacos with cilantro lime slaw and our favorite mango salsa. Lately our nights of actually spending time cooking delicious dinners have been few and far between, so this was a treat!

I started laughing at ourselves as we began imagining Tim’s mango salsa recipe made with peaches or grilled pineapple instead, wishing we’d added more heat to the slaw, and wondering if we could learn how to beer-batter our own fish rather than buying the kind out of the frozen food aisle.

This sort of criticism for us isn’t done in a negative way to pick apart our meal (and we would never dream of doing it at a friend’s house – please keep inviting us over, friends! We only critique our own cooking!) Instead, for us, this is a part of the creative process. We know what all went into our dinner, we’re genuinely enjoying what we’ve made, and we’re just dreaming of how we could re-create it, and maybe make it better in the future!

There are definitely times when critique is merited, however. When I’ve added too much thyme to the soup (it’s always too much thyme!) Or put entirely too much salt into a salsa. Or the days when I make a recipe that’s a complete flop – and we muscle our way through it, only to HAVE to throw the leftovers away when they’re still in the fridge weeks later. Or, heaven forbid, the times I burn the garlic bread – I’m notorious for burning the garlic bread!

We had a few of my college roommates over one weekend and I pointed to my friend while placing the garlic bread under the broiler, “When that timer goes off in one minute, make sure I take the bread out.” She looked at me incredulously, “Are you serious?” “Um. Completely.” I wasn’t sure how to tell her that I’m immune to the cry of the kitchen timer any time it involves garlic bread in the oven. Really and truly. Little burnt garlic breads haunt me in my nightmares.

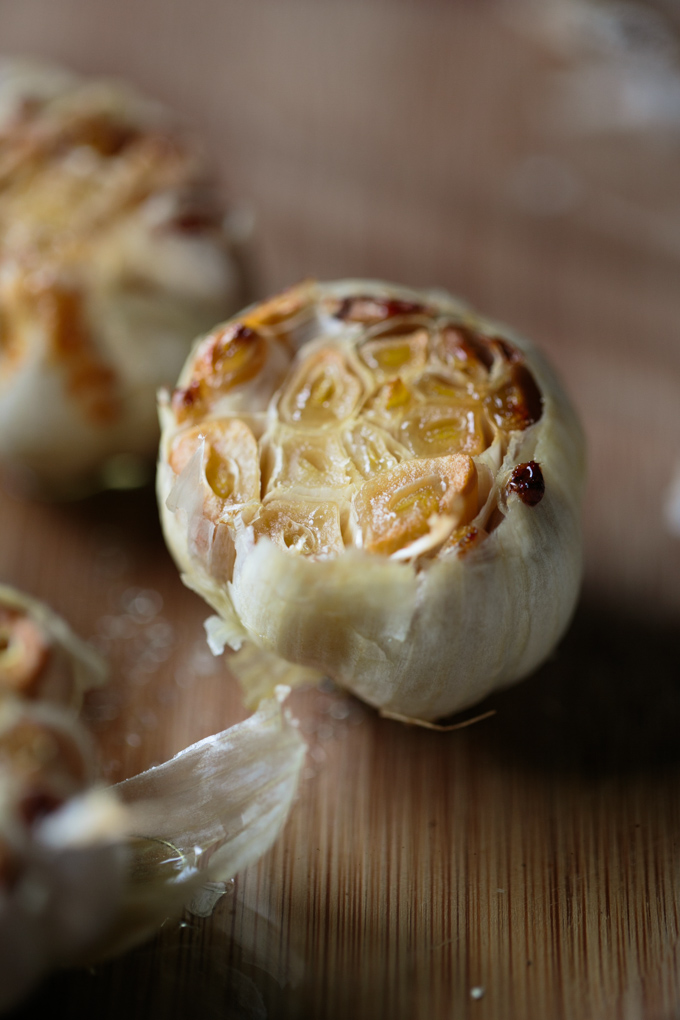
Well, I’m here to tell you that I think I’ve discovered the secret to amazing garlic bread. Psssst – you should roast your garlic! It’s sweet heavenly deliciousness. Mash up a several cloves of this garlic with a pinch or two of kosher salt to create a paste, slather some butter and your garlic paste onto the bread, sprinkle on a little cheese, place it under the broiler for a minute or so – and voila! I will not promise I’ve discovered the secret to not burning your garlic bread, but if you can manage that one yourself, you’re on your way to a delicious dinner!

You’ll find more ideas for using your newly-found-garlic-roasting-talents below the recipe!

Roasted Garlic by thiswildseason.com -1 Roasted Garlic by thiswildseason.com -2 Roasted Garlic by thiswildseason.com -3 Roasted Garlic by thiswildseason.com -4 Roasted Garlic by thiswildseason.com -5 Roasted Garlic by thiswildseason.com -6 Roasted Garlic by thiswildseason.com -7 Roasted Garlic by thiswildseason.com -8

How to: Make Roasted Garlic

Adapted from How Sweet It Is
Print Recipe Pin Recipe
Prep Time 5 mins
Cook Time 45 mins
Total Time 50 mins

Ingredients
  

  • 3-4 heads of garlic or more
  • 3-4 tsp olive oil about 1 tsp oil per head of garlic

Instructions
 

  • Heat your oven to 375 degrees F
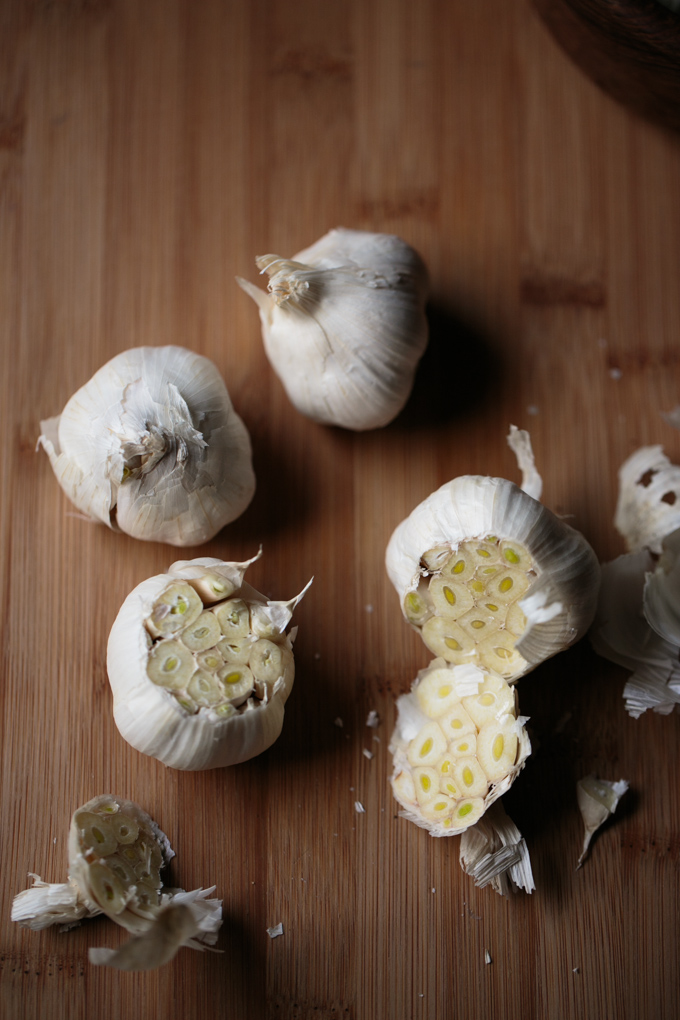
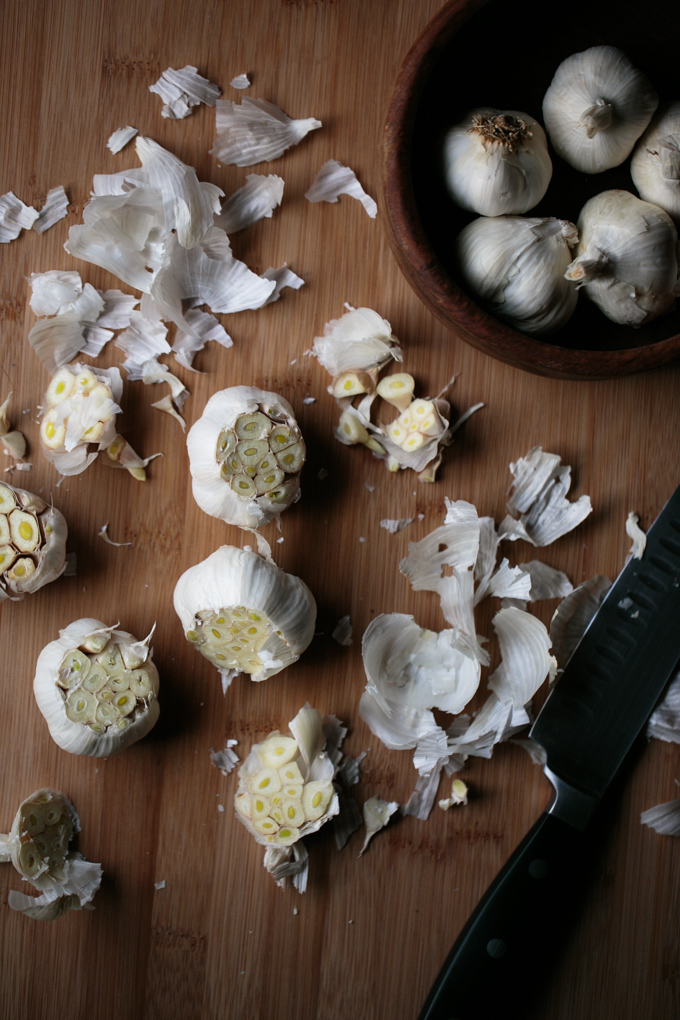
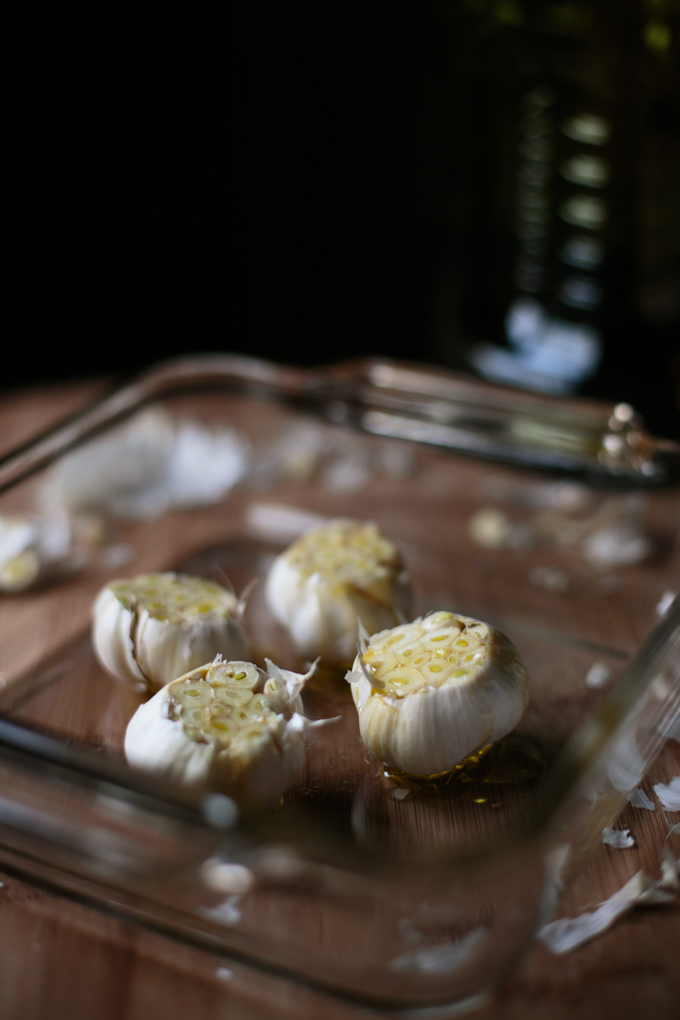
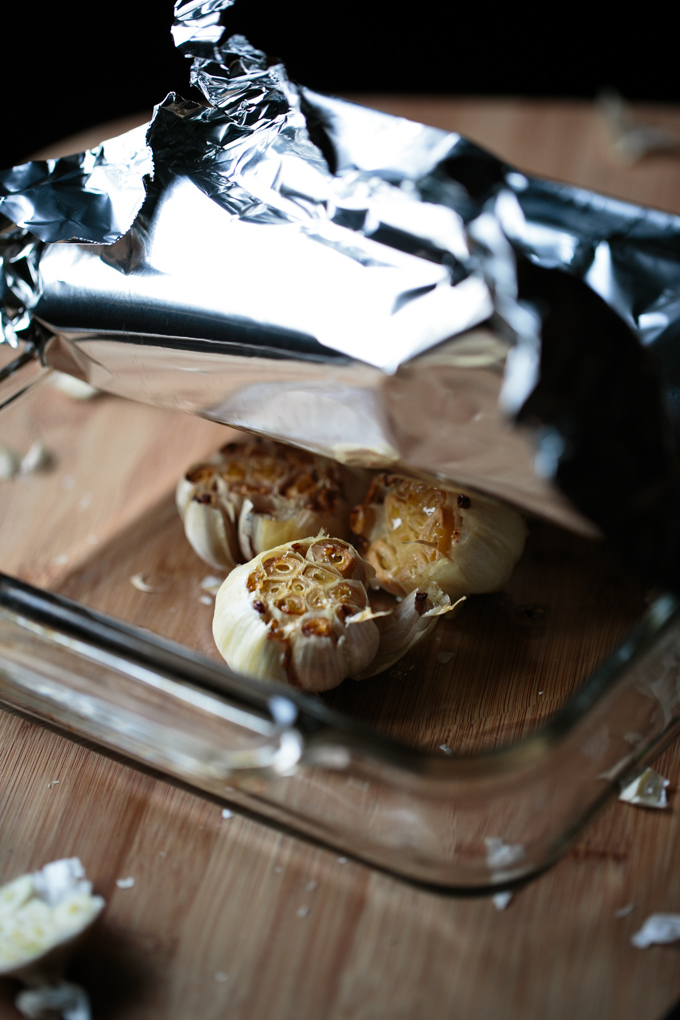
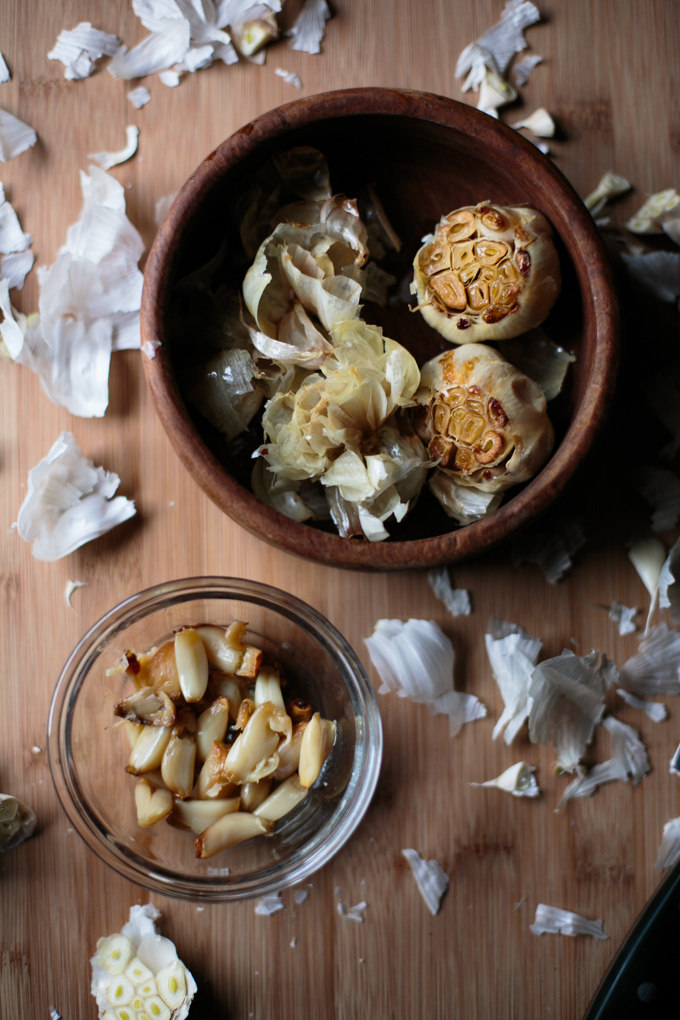
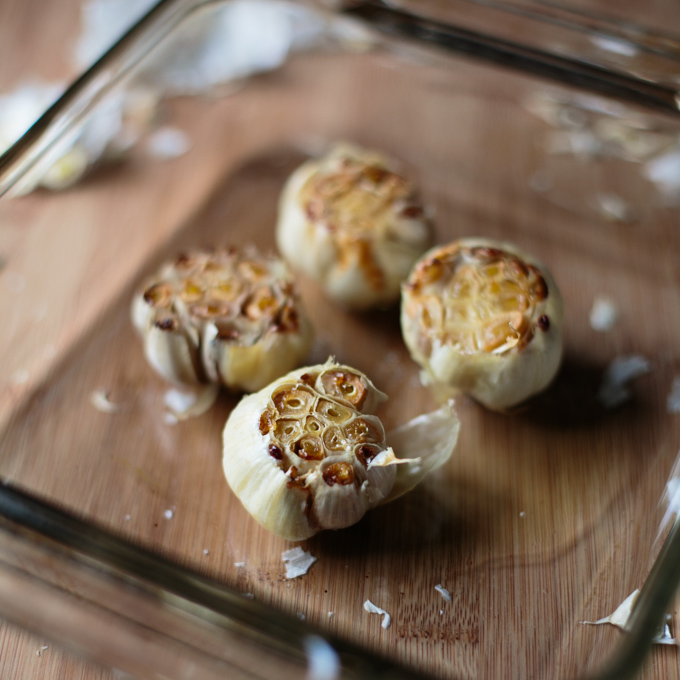
  • Carefully cut the top off each head of garlic. You want to expose most of the cloves of garlic. Peel away a bit of the papery outside and place the heads of garlic in a small baking dish. Drizzle each head of garlic with a tsp or so of olive oil. Cover with aluminum foil, bake for around 45 minutes, or until golden and delicious looking!
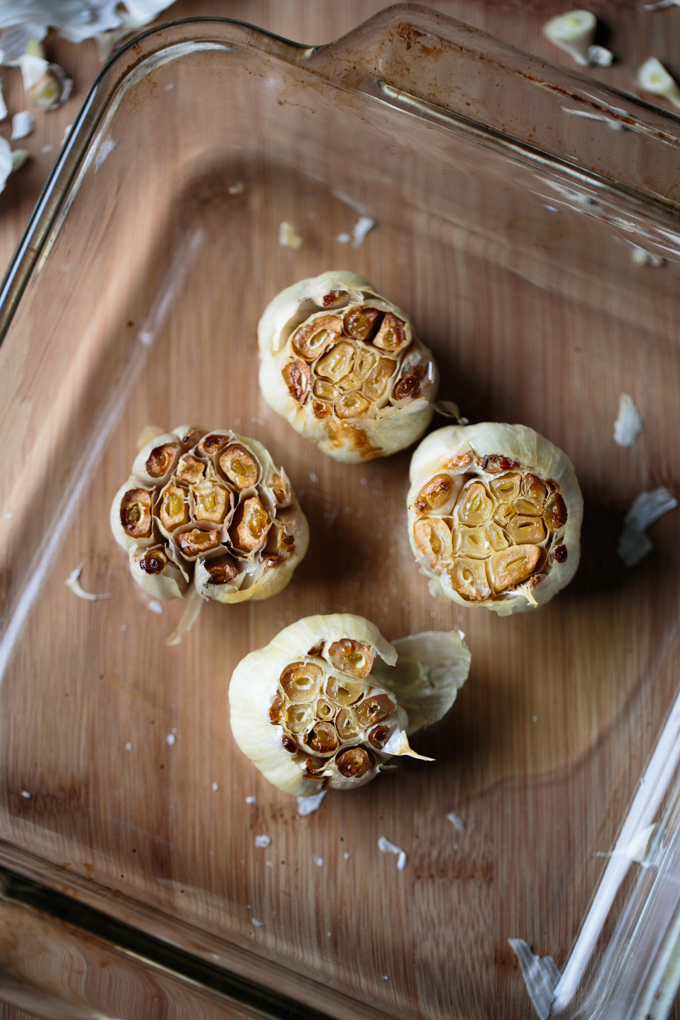
  • Remove from the oven, carefully remove the aluminum foil, and let rest till they're cool enough to handle. You can squeeze the cloves of garlic from the bottom up to remove them. Use in a recipe, spread on buttered toast, or store in an airtight container in the fridge for up to a few days.

Now that you’ve learned how to roast garlic, it’s time to put that knowledge to good use! Here are a few recipes to try!

Roasted Garlic Mashed Potatoes from The Pioneer Woman

Roasted Garlic Hummus from Cooking Classy

Roasted Garlic Rosemary Artisan Bread from Fabtastic Eats

Roasted Garlic Butter from Whipperberry

Roasted Garlic Blender Salsa from Mountain Mama Cooks

Filed Under: How To Tagged With: How To

Simple Granola

March 5, 2015 by Asharae Leave a Comment

Do you ever stand in the cereal aisle, lusting over the boxes of granola, wondering to yourself, “Why are those boxes so tiny? And why on earth are they so expensive??” Me too, my friend. Me too.

Making your own granola really isn’t difficult at all. I’ve adapted this recipe from Deb Perelman’s The Smitten Kitchen Cookbook – she’s already done the hard work of perfecting the granola crunch, sweetness ratios, and all that. I just simplified it a bit further by only using what I had on-hand. She uses a 1/4 c of wheat germ in her recipe, and I’ve yet to find it at our local grocery store – so mine has no wheat germ. Feel free to add it back in if you like! I also added a bit of nutmeg and let the nuts be an optional addition. If I’ve got some on-hand, I’ll add them. But this granola is still delicious without!

I remember when my mom would make granola it always seemed to be a big production – huge bowls of ingredients, multiple pans in the oven at a time, and all that stirring. So much stirring.

For this recipe you just need one bowl (okay two actually), one pan, and you only have to stir the granola once in the middle of baking. Super simple. And delicious. Enjoy.

Simple Granola by thiswildseason.com -2 Simple Granola by thiswildseason.com -3 Simple Granola by thiswildseason.com -4 Simple Granola by thiswildseason.com -5 Simple Granola by thiswildseason.com -6 Simple Granola by thiswildseason.com -7 Simple Granola by thiswildseason.com -8 Simple Granola by thiswildseason.com -9 Simple Granola by thiswildseason.com -10


Simple Granola

Adapted from Deb Perelman
Print Recipe Pin Recipe
Prep Time 10 mins
Cook Time 45 mins
Total Time 55 mins

Ingredients
  

  • 3 c old fashioned rolled oats
  • 1 c sweetened shredded coconut
  • 1 c walnuts optional
  • 1/4 tsp ground cinnamon
  • Dash of nutmeg
  • 1/2 tsp coarse salt
  • 2 Tbs olive oil
  • 1/2 c real maple syrup
  • 1 large egg white

Instructions
 

  • Preheat oven to 300 F.
  • Stir together oats, coconut, walnuts (optional), cinnamon, nutmeg, and salt.
  • Add olive oil and maple syrup to oat mixture, stir together.
  • Whisk egg white in a small bowl until frothy. Add to oat mixture and stir well to combine.
  • Spread oat mixture on a parchment-lined rimmed baking sheet.
  • Bake for 20 minutes, remove from oven and use a spatula to turn granola, being careful not to break the pieces too much. Bake for 25-30 more minutes, or until granola is brown and toasted.
  • Let granola cool completely on the pan. Move to an airtight container and store up to two weeks.
  • Serve with milk, over ice cream, or sprinkled over plain Greek yogurt with a drizzle of honey and some dried cranberries - that's my favorite!

Notes

If you're wondering what to do with the egg yolk you're left with after making this granola, you could always make these cookies! They call for one egg and one egg yolk.


Filed Under: Breakfast/Brunch Tagged With: breakfast recipe, brunch recipe, easy recipe, simple recipe

Roasted Winter Veggies and Israeli Couscous

February 26, 2015 by Asharae Leave a Comment

Today we’re snuggled up in our house, trying to avoid taking part in anything pertaining to the outdoors. Last night we had a big storm come through, but the promised 8-10 inches of snow simply didn’t happen at our house. Our yard is a slushy muddy mess at the moment, and I confess I’m jealous of all our friends posting photos that look like Narnia.

One big snowfall. That’s all I ask of winter in North Carolina. Until then, I’m going to stay holed up in my house, pretending spring is just around the corner. Last week I shared a blood orange strawberry limeade that’s perfect for warding off the winter blues! This week I wanted to share one of my new favorite dinner recipes that’s great for all the same reasons.

Between the Israeli couscous, the vinaigrette, and the fresh veggies, this meal is a light alternative to the hearty, filling dishes I typically think of for winter meals. Since all the veggies I included in this recipe are still in season, they’ll be cheaper at the store and they’ll taste better than veggies that come into season later in the year!

Roasted Winter Veggies and Israeli Cous Cous Bowl by thiswildseason.com -2 Roasted Winter Veggies and Israeli Cous Cous Bowl by thiswildseason.com -3 Roasted Winter Veggies and Israeli Cous Cous Bowl by thiswildseason.com -4 Roasted Winter Veggies and Israeli Cous Cous Bowl by thiswildseason.com -5

I was inspired by several sources while coming up this recipe. Be sure to check each of these out for even more delicious winter recipe ideas!

Winter Buckwheat + Shaved Brussels Sprouts Bowl by Dolly and Oatmeal // Winter’s Bounty Buddah Bowl by Vegenista’s Kitchen // Winter Pasta Salad by Victoria McGinley

The idea for the vinaigrette also came from a couple places: Shaved Root Vegetable Salad with Goat Cheese and Hazelnuts by Salt & Wind // Basic Vinaigrette by Shauna Niequist in her book Bread & Wine

Roasted Winter Veggies and Israeli Couscous

Print Recipe Pin Recipe

Ingredients
  

Couscous and Veggies

  • 1 1/4 c of israeli couscous I used this couscous from World Market
  • 3 medium carrots washed, peeled, sliced into rounds
  • 1 turnip washed, peeled, diced
  • 8 oz brussels sprouts outer leaves removed, ends trimmed, quartered
  • 2-3 leaves kale finely chopped
  • Shelled pistachios or sliced almonds for garnish

Vinaigrette

  • 1/4 c white balsamic vinegar
  • 2 tsp dijon mustard
  • 1 tsp maple syrup
  • 1/4 tsp salt
  • 1/8 tsp pepper
  • 1/2 c olive oil

Instructions
 

  • Preheat oven to 400 degrees F
  • Combine all vinaigrette ingredients except olive oil in a small jar with a lid. Cover with lid and shake to combine. Add olive oil, cover again, and shake to combine. Set aside.
  • Heat a pot of water for the couscous (follow the package instructions - my couscous called for 1 3/4 c water to 1 1/4 c couscous). While the water is heating, chop your veggies. Cook your Israeli couscous according to the package instructions.
  • Toss sliced carrots and diced turnips on a rimmed baking sheet, drizzle with 1-2 Tbs olive oil, toss to combine, sprinkle with salt and pepper and roast in 400 degree oven for 10 minutes. Remove from oven, flip veggies with a spatula, and roast 5 more minutes.
  • Toss cleaned, chopped brussels sprouts in 1 Tbs of olive oil. Remove veggies from the oven, add brussels sprouts to the pan, roast for 5 more minutes. Chop the kale while you're waiting. Add kale to the pan, sprinkle with salt and pepper if desired, and roast the veggies one final time for 5-10 minutes, until kale is slightly crispy.
  • Combine veggies and cooked Israeli couscous in a large bowl, toss to combine. Serve with vinaigrette on the side so each person can add the amount they like. Garnish with almonds or pistachios if you wish!

This post contains affiliate links, but all opinions are my own.

Filed Under: Main Course Tagged With: easy recipe, roasted vegetables, salad dressing, simple recipe, vegetarian, vinaigrette

Blood Orange Strawberry Limeade

February 18, 2015 by Asharae 7 Comments

Let’s all take a moment to step away from our declarations of love for snow days, snowmen, and all things winter. And let’s pretend that warm weather is here! This limeade hits the spot if you’re feeling the winter blues – it’s beautiful and delicious and it just screams summer!

Blood oranges are still in season too – if you’ve never tried a blood orange, drop everything and go to the store. I’m not a huge fan of regular oranges – but I could eat blood oranges all day long. They only have a short season, so hop to the grocery store before they disappear!

Blood Orange Strawberry Limeade by thiswildseason.com -2 Blood Orange Strawberry Limeade by thiswildseason.com -3 Blood Orange Strawberry Limeade by thiswildseason.com -4 Blood Orange Strawberry Limeade by thiswildseason.com -5 Blood Orange Strawberry Limeade by thiswildseason.com -6

A couple notes on making this recipe even simpler! I highly recommend using a juicer like this one – it’s perfect for juicing limes and oranges and even grapefruits as it has two different sides for smaller or larger fruits. We got ours as a Christmas gift and I have been using it every chance I get!

I also tried something new for blending my ingredients together – instead of hauling out the blender and having to wash it once I was finished, I used our immersion blender to do the heavy lifting. This is genius I tell you.

Go now, and buy your own immersion blender. It’ll be the best $35 you’ve ever spent on a kitchen appliance. If you’re wondering what else you could use a blender like this for, see this smoothie recipe, blueberry lemonade, or even this butternut squash soup.

I included a range for the amount of sugar you can use for this limeade – if you want it to be more tart, use 1/4 c sugar, and if you’d rather it be sweet, use 3/4 c. I think that 1/2 c is probably the perfect amount for a limeade – not too sweet and not too tart. Adjust the flavors to suit your preferences.

Blood Orange Strawberry Limeade

Asharae Kroll
Print Recipe Pin Recipe

Ingredients
  

  • 1 c strawberries thawed if frozen
  • 1/2 c fresh squeezed blood orange juice
  • 1/4 c fresh squeezed lime juice
  • 1/4-3/4 c sugar less for a tart limeade, more to make it sweeter
  • 1 c hot water
  • 3 c cold water

Instructions
 

  • Combine strawberries, blood orange juice, lime juice, sugar, and hot water in a blender (or a pitcher and use an immersion blender to blend). Blend until strawberries are pureed and the sugar has dissolved.
  • Using a sieve to remove the pulp, strain into a large pitcher.
  • Add cold water, stir to combine, and chill at least 1 hour before serving.

This post contains affiliate links, but all opinions are my own.

Filed Under: Drinks Tagged With: drink recipe, easy drink recipe, easy recipe, juice, lemonade, limeade

  • « Previous Page
  • 1
  • …
  • 12
  • 13
  • 14
  • 15
  • 16
  • …
  • 27
  • Next Page »

Hello there!

My name is Asharae. I’m a photographer by trade, wife to an amazing man, and mama to three little ones. I am passionate about creating good food, sharing meaningful conversation around the table, trying new things, and encouraging others to do the same.

Welcome to This Wild Season! This is a place for sharing what I’m learning in the kitchen and outside of it. Most of all, it is a challenge to myself and to you to slow down, be present in the moment, and re-learn how to savor food and conversation around the table.

About

Search

Connect

  • Facebook
  • Instagram
  • Pinterest
  • Twitter
  • Vimeo

Find my book on Amazon:

Recent Posts

  • Emmeline’s Birth Story, The Story of Her Name
  • Emmeline’s Birth Story, Birth Day Part 2
  • Emmeline’s Birth Story, Birth Day Part 1
  • Emmeline’s Birth Story, My Pregnancy
  • Emmeline’s Birth Story, An Introduction
Follow on Bloglovin
Visit This Wild Season's profile on Pinterest.

Copyright © 2025 · Foodie Child Theme by Shay Bocks · Built on the Genesis Framework · Powered by WordPress