This Wild Season

Sharing what I'm learning in the kitchen as well as outside of it.

Navigation
  • Home
  • Blog
  • Recipes
    • Appetizer
    • Breakfast/Brunch
    • Side Dish
    • Main Course
    • Dessert
    • Drinks
    • Personal
  • About

Lemon Glazed Blueberry Donuts

March 28, 2014 by Asharae 3 Comments

This week has been SO FULL for Tim and I. In the absolute best way possible.

Monday we had our first food photography gig with Zebra Restaurant in Charlotte and we are STOKED about how the photos turned out! We also got to have dinner with two of our wonderful new friends from the small group we joined last fall. They’re big dreamers like we are and it was so fun to sit and chat and dream about future travels and business ideas!

Tuesday we met with a bunch of fabulous local photographers at a little meetup at Heist Brewery in NoDa – definitely worth a visit – the atmosphere was so fun! (More about our little meetup next week!)

Wednesday we had a meeting with a wonderful bride as well as a consultation for getting new carpeting in our house! (The lime green, brown, and dirty beige carpeting that’s 1970s original has got to go!) Tim and I also got to have a rare date night out for margaritas, mexican food, and many a brainstorm about our business.

Thursday I had the most wonderful time with my hair stylist as she trimmed my shaggy locks and we chatted about all things from adoption and going into the mission field, to the ups and downs of everyday life and God’s hand it all of it. We laughed that after 6 years or so of her doing my hair, we’re just now realizing that we really are kindred spirits – the best kind of realization!

After that, Tim and I chatted with our friends Jonny & Michelle – the fabulous husband and wife photo duo that make up Paper Antler (if you’re not familiar with their work, you should go check it out!) They’re starting a new and exciting venture called Weddings for Freedom and we are SO thrilled to join them in opening a chapter here in NC. The mission is to join forces with other local wedding vendors and each donate $1000 per year to a local organization that works to fight modern day slavery. It really feels like God is opening the door to do something big with this vision that they have – we’re so privileged to be a part of it! Imagine how much a chapter of 15 or 25 or 45 wedding vendors could donate to fight trafficking within their own community – what a huge impact that would make! If you know any wedding vendors across the US that might be interested in joining our stand against human trafficking, send them to Weddings for Freedom! Help us spread the word! We’re excited to see how many people will stand with us.

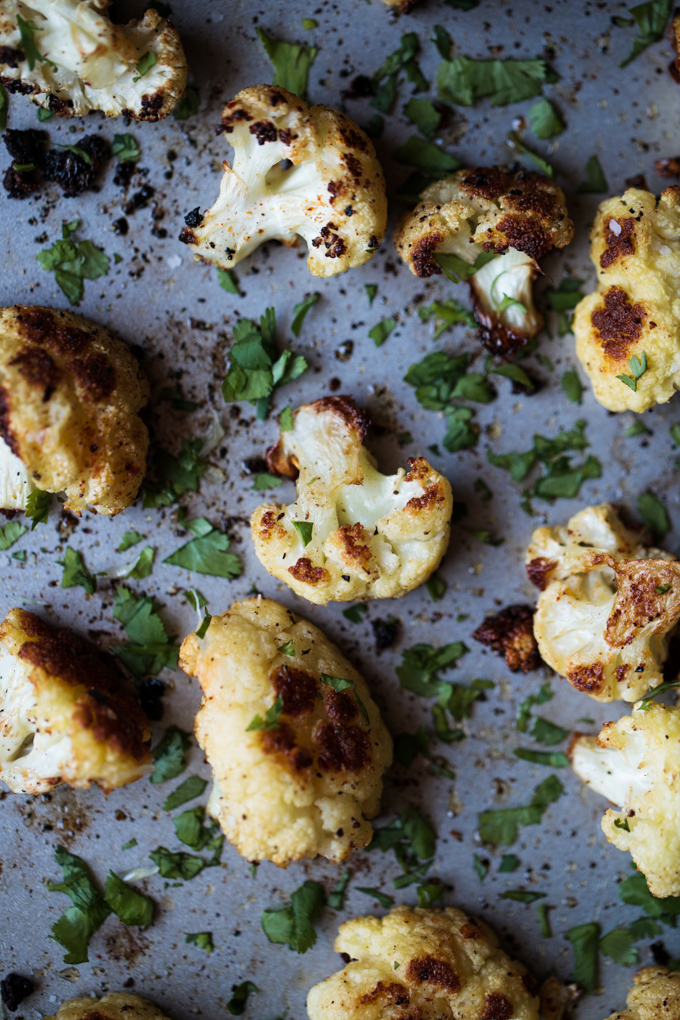
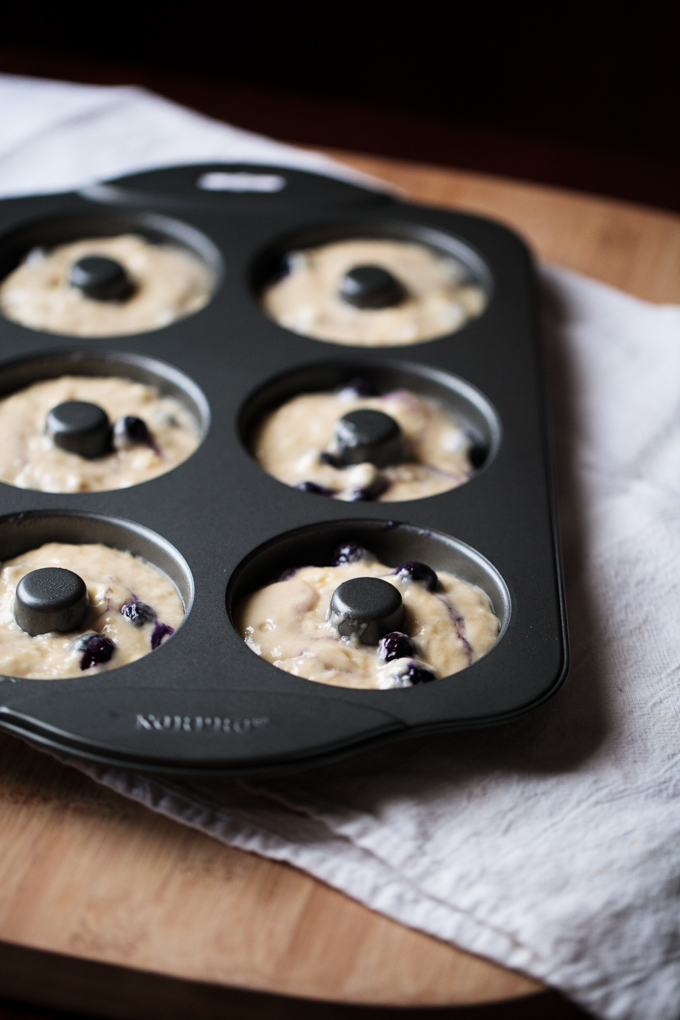
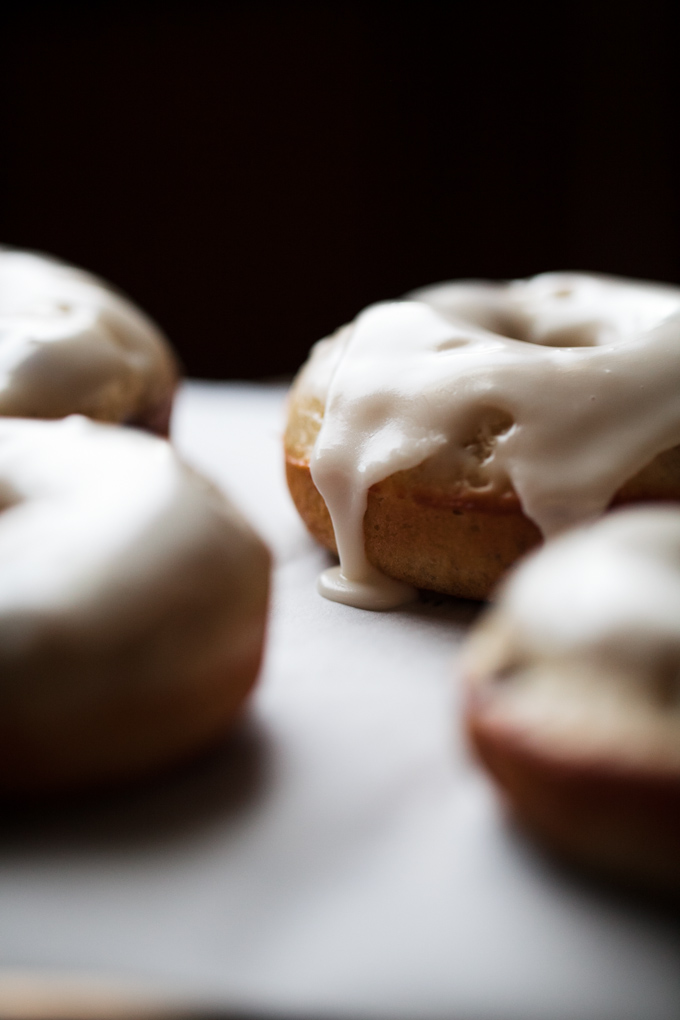
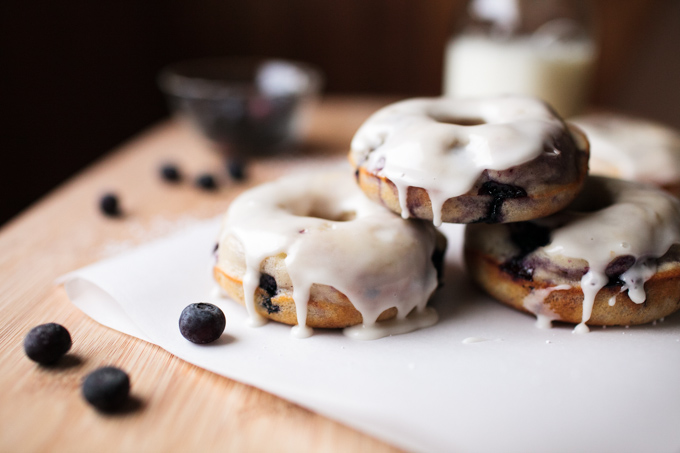
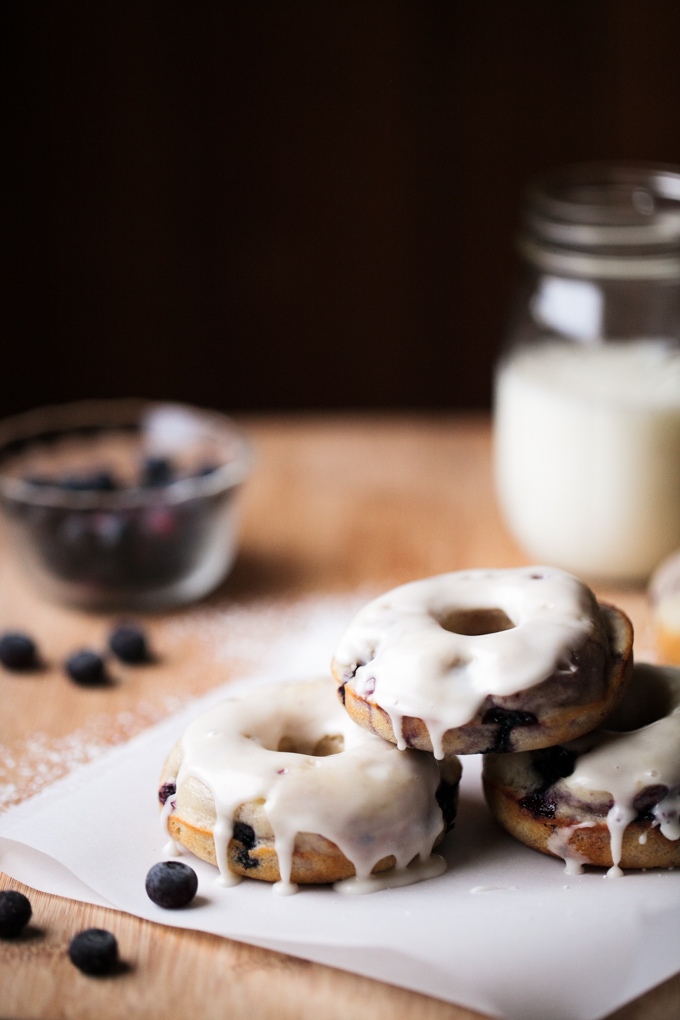
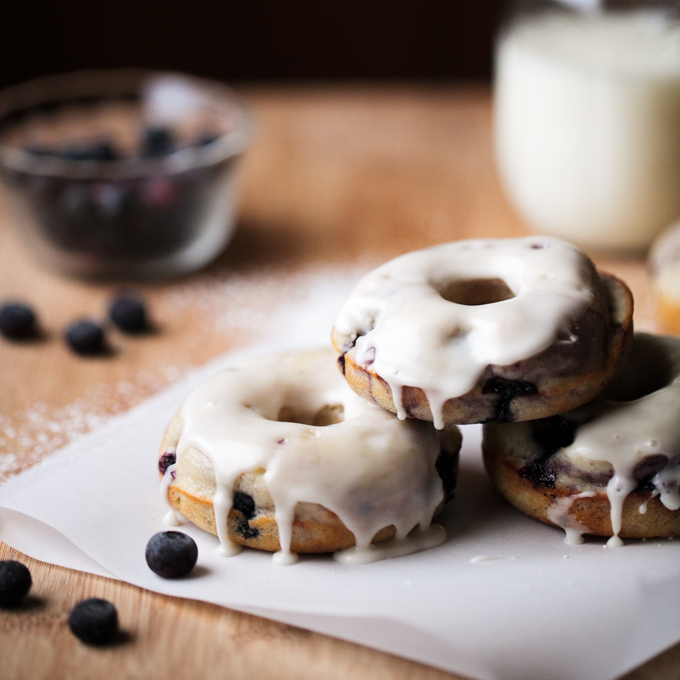
All that to be said, I’m ready for a bit of a mental and emotional break this weekend. What about you? How do you unwind on your days off? Any particular places you go, people you see, foods you eat? I think these donuts are perfect for a lazy weekend treat – enjoy!

Lemon-Glazed-Blueberry-Donuts_This-Wild-Season-2 Lemon-Glazed-Blueberry-Donuts_This-Wild-Season-3 Lemon-Glazed-Blueberry-Donuts_This-Wild-Season-4 Lemon-Glazed-Blueberry-Donuts_This-Wild-Season-5 Lemon-Glazed-Blueberry-Donuts_This-Wild-Season-6 Lemon-Glazed-Blueberry-Donuts_This-Wild-Season-7 Lemon-Glazed-Blueberry-Donuts_This-Wild-Season-8

Lemon Glazed Blueberry Donuts

From A Kitchen Addiction
Print Recipe Pin Recipe

Ingredients
  

For the Donuts

  • 1 C all-purpose flour
  • 1 C whole wheat pastry flour or use all all-purpose flour
  • ½ C sugar
  • 2 tsp baking powder
  • 1 tsp salt
  • ½ tsp lemon zest
  • 4 tsp fresh lemon juice
  • ¾ C non-fat buttermilk We never have buttermilk, so I cheated with this method using lemon juice and discarding 1/4 c of the full cup that was made
  • 2 eggs lightly beaten
  • 3 tbsp butter melted and cooled
  • 1 tsp vanilla extract
  • ⅔ C fresh blueberries I used frozen, but they did turn my batter a lovely shade of blue!

For the Glaze

  • ¾ C confectioner’s sugar
  • 1 tbsp fresh lemon juice
  • ¼ tsp vanilla extract

Instructions
 

  • Preheat oven to 350. Lightly spray donut pan with non-stick cooking spray.
  • In a bowl, stir together flours, sugar, baking powder, salt, and lemon zest. Set aside.
  • In a small bowl, whisk together lemon juice, buttermilk, egg, melted butter, and vanilla extract.
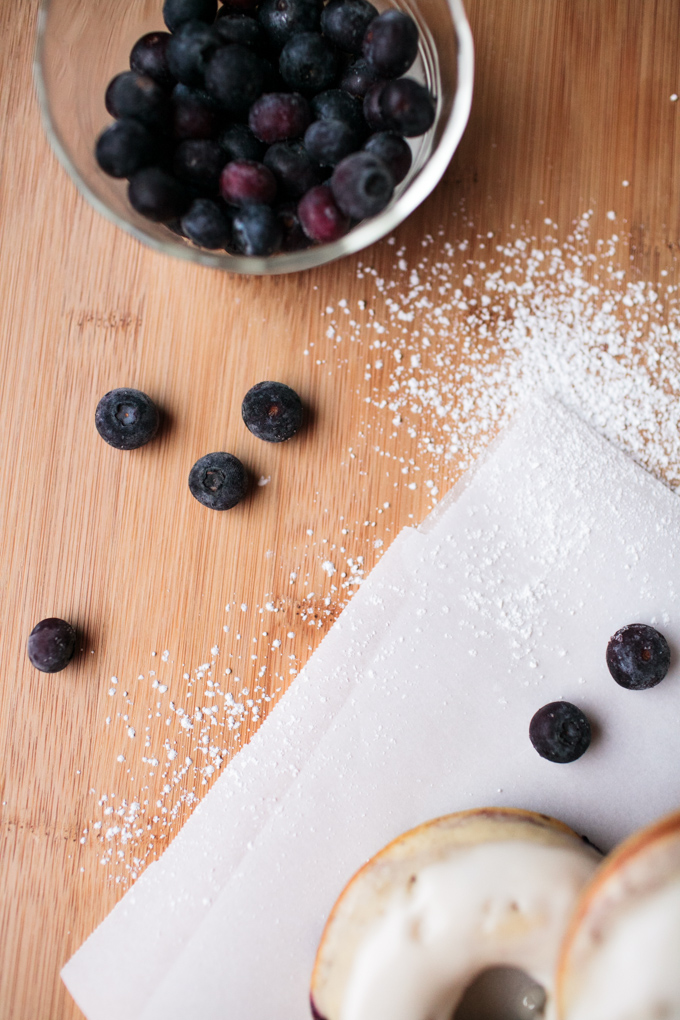
  • Add wet ingredients to dry ingredients and stir until just combined. Gently fold in blueberries.
  • Using a pastry bag or a plastic bag with the tip cut off, pipe batter into prepared donut pan. Fill about ⅔ full. (I think it's easier to spoon the batter into the donut molds, but that's just because I'm lazy!)
  • Bake for 10-12 minutes or until edges of donuts just start to turn golden brown.
  • Remove from oven to a wire rack to cool for 5 minutes before removing from pan.
  • Repeat until batter is gone.
  • While donuts are cooling, stir together all glaze ingredients until smooth.
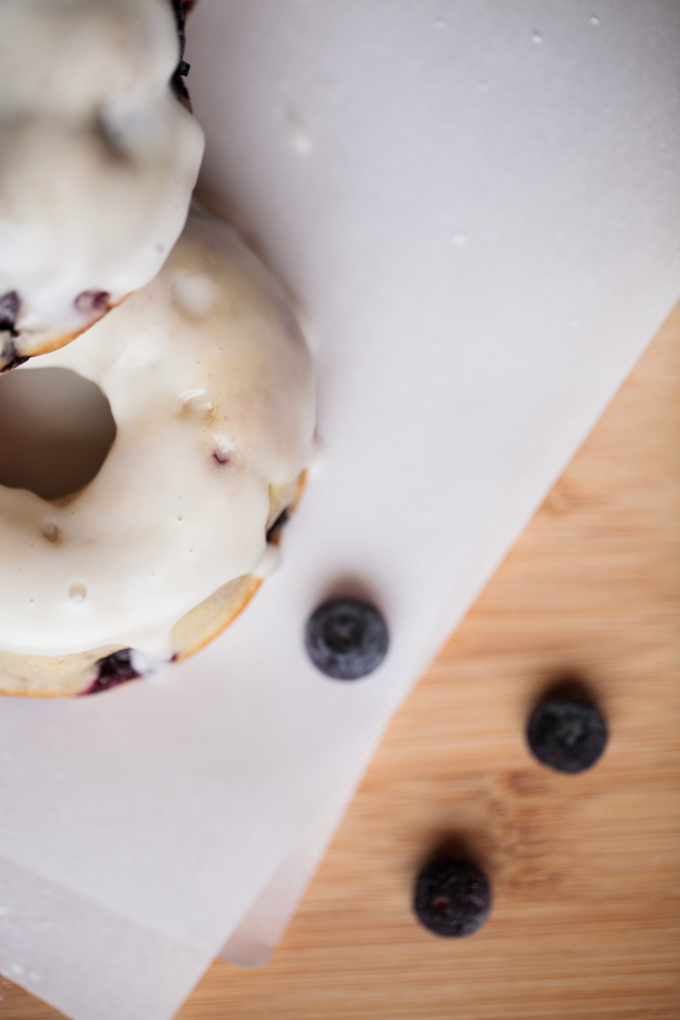
  • Dip cooled donuts in glaze. Allow glaze to harden before serving.
  • While these donuts are best served fresh, leftovers can be stored in a loosely covered container. (We found that they were definitely best the day-of!)


Filed Under: Breakfast/Brunch Tagged With: breakfast recipe, brunch recipe, donuts

Udon Noodles with Tofu

March 25, 2014 by Asharae 3 Comments

Do not fear the tofu. I promise it’s not as scary as you think. For a long time I dismissed tofu as this gross blob of something I didn’t even want to consider eating. I’d heard nightmares about the awful texture and how bland it is. I didn’t realize that when it’s prepared the right way it can actually be delicious! And, can I let you in on a secret? Are you on a tight budget like we are? If you are, go find the tofu at your grocery store – it’s surprisingly inexpensive! There are all sorts of ways tofu can be prepared – I really enjoyed reading this little article about various methods for using and preparing tofu. My favorite way we’ve prepared it so far was to press, marinate, then pan fry it – that yielded a crispy outside and the tofu soaked up all the delicious flavor of the marinade.

For this recipe you can purchase extra-firm tofu, and it’s totally up to you whether you want to press it or not. The original recipe didn’t call to press it, but the next time I make this I might try it that way. Pressing tofu is typically done to help the tofu absorb flavor and stand up better to the heat – I’m not so sure it’s that important in soup, but I’m happy to hear arguments to the contrary! I’m fairly new to the tofu world and would love to hear if you have any tips or hints for me!

If you decide to press your tofu, give yourself about a half hour before you start the soup. Line a cutting board with towels, place your tofu in the middle, cover it with another layer of towels, and place something heavy and evenly weighted on top – big cookbooks work great for this! I like to layer mine up like this – cutting board, towel, tofu, towel, cutting board, books – that way my books don’t get wet at all from the moisture that gets pressed out of the tofu. Allow the tofu to press for 20-30 minutes before cutting it down to size.

Today is one of those try-new-things recipe days. Have you ever made Udon noodles? We found ours at World Market and we were curious to try them – if you’re okay not being authentic, you could probably cook up some spaghetti noodles for a similar meal. I found this recipe over on the PBS website and loved the little video and story that went along with it – if you have time you can watch that here! The recipe’s author Alice shares how she cooks this meal for her two sons – I just love seeing kiddos eating food I never would have considered eating when I was their age! Here’s to hoping we have adventurous eaters one day!

Udon-Noodles-and-Tofu_This-Wild-Season-2 Udon-Noodles-and-Tofu_This-Wild-Season-3 Udon-Noodles-and-Tofu_This-Wild-Season-4 Udon-Noodles-and-Tofu_This-Wild-Season-5 Udon-Noodles-and-Tofu_This-Wild-Season-6 Udon-Noodles-and-Tofu_This-Wild-Season-7 Udon-Noodles-and-Tofu_This-Wild-Season-8

Udon Noodles with Tofu

Adapted from PBS's Kitchen Explorers
Print Recipe Pin Recipe
Prep Time 10 mins
Cook Time 10 mins
Total Time 20 mins

Ingredients
  

  • 1/2 - 1 lb. frozen or fresh Udon noodles prepared according to package directions The original recipe called for 1 lb of noodles, but I felt like 1/2 lb was plenty since I was using dried udon noodles.
  • 4 cups vegetable broth
  • 2 cloves garlic minced
  • 1/2 inch piece fresh ginger peeled and minced
  • 2 tablespoons soy sauce I used 1 Tbs soy and 1 Tbs fish sauce
  • 1 tablespoon sesame oil
  • 2 teaspoons sugar
  • 1 cup extra firm tofu cubed
  • 1 cup broccoli florets
  • 1/2 cup matchstick carrots I chopped baby carrots into little sticks since that's what I had on hand
  • 2 cups spinach
  • 1/2 cup sliced mushrooms
  • 1 tablespoon sesame seeds I didn't have these, but if you do - I'd be impressed
  • Optional protein: Feel free to add a protein like thinly sliced fish or a runny fried egg on top.

Instructions
 

  • Prepare udon noodles according to package directions, then drain and set aside.
  • Bring broth, garlic, ginger, soy sauce, sesame oil and sugar to a boil for one minute and reduce heat to a simmer.
  • Add tofu, broccoli, carrots, spinach, mushrooms and cook for three minutes or until broccoli is tender. (My broccoli took longer to become tender)
  • Divide Udon between four bowls with a pinch of sesame seeds on top.
  • Optional protein: Feel free to add a protein like thinly sliced fish or a runny fried egg on top.
  • Optional: Top with Sriracha, hoisin sauce, lime juice, or whatever flavors you like!


Filed Under: Main Course Tagged With: comfort food, noodles, soup

Quinoa and Veggies

March 20, 2014 by Asharae 1 Comment

I absolutely love this recipe I came across over on Reclaiming Provincial. Although it’s meant to be a breakfast recipe, I’ve eaten it for every meal of the day. I love that it’s wildly adaptable to suit your tastes, easily doubled or tripled depending on the number of people you’re feeding, and it’s super simple to make!

If you’ve never cooked quinoa, today’s your day! And if you’ve never dared to say the word quinoa aloud, well, today’s your day for that too – it’s pronounced more or less like keen-wa. Say it with me – keen-wa – keen-wa – quinoa. Easy. It’s pretty much like cooking rice – the first couple times you’re not entirely sure if you’ve done it right, but you’ll get the hang of it! And it’s totally worth it – quinoa is this wonderful, healthy blank canvas that you can adapt to suit your preferences! It’s perfect if you like to have a vegetarian night every once in a while because it’s incredibly high in protein too.

Quinoa-and-Veggies-Recipe_This-Wild-Season-2 Quinoa-and-Veggies-Recipe_This-Wild-Season-3 Quinoa-and-Veggies-Recipe_This-Wild-Season-4 Quinoa-and-Veggies-Recipe_This-Wild-Season-5 Quinoa-and-Veggies-Recipe_This-Wild-Season-6

This particular recipe calls for broccoli, mushrooms, spinach, and green onions, but you can use whatever you have on hand! It’s great if you have random veggies left in your fridge and aren’t sure what to do with them. My only tip is that you make sure you rinse your quinoa in a mesh strainer before cooking it – it can have a bitter flavor if you skip that step. Enjoy! Let me know if you adapt this recipe – I’d love to hear how you tried it!

Quinoa and Veggies

Adapted from Reclaiming Provincial
Print Recipe Pin Recipe
Prep Time 5 mins
Cook Time 15 mins
Total Time 20 mins
Servings 1

Ingredients
  

  • 1/2 cup quinoa rinsed
  • 1/2 cup water
  • 1/2 cup milk
  • handful of broccoli cut into bite-sized pieces
  • handful of mushrooms rinsed and sliced
  • handful of spinach
  • cheddar cheese or cheese of your choice
  • green onions diced
  • salt and pepper to taste

Instructions
 

  • Heat a little olive oil or coconut oil in a pan over medium high and sauté broccoli and mushrooms till cooked, about 5 minutes. (Mine took closer to 10 minutes.)
  • Add spinach, stir, and remove from heat once slightly wilted.
  • While the veggies are cooking rinse your quinoa in a mesh sieve and drain.
  • Then combine quinoa, water, and milk in a sauce pan and bring to boiling. Immediately reduce heat to a simmer and cover. Let cook 8-10 minutes, or until done, stirring occasionally. Quinoa is done when you can see the little ring around each grain and it no longer crunches when you bite into it.
  • Once quinoa is finished, add veggies and combine. Salt and pepper to taste.
  • Serve topped with cheese and green onions.

Notes

This recipe is wildly adaptable according to your tastes! Add onions or bell peppers or tomatoes if you like! Top with feta and a drizzle of balsamic vinaigrette. Add walnuts and dried cranberries. Top with a fried egg! The possibilities are endless - Let me know what you try in the comments!


Filed Under: Breakfast/Brunch, Main Course, Side Dish Tagged With: brunch recipe, easy recipe, easy side dish, quinoa

Spicy Roasted Cauliflower

March 18, 2014 by Asharae 2 Comments

A few weeks ago we were making dinner with our friends Brandon and Christy, and we decided to tackle a recipe we came across on the internet for roasted cauliflower. It called for some specialty type of Mexican chile pepper, and since we didn’t have any on-hand, Christy and I figured we could substitute red pepper flakes and it would probably be fine. We even lessened the amount the recipe called for, because we knew that red pepper flakes are spicy! Knowing something is spicy and knowing how much of it to use are two different things apparently. We took the cauliflower out of the oven and although it was delicious, it nearly lit our faces on fire. Good thing we like spicy food!

This particular recipe for spicy roasted cauliflower is inspired by that dinner with Brandon and Christy, and I promise it won’t set your mouth on fire! If you don’t like spicy food, eliminate the red pepper flakes and cayenne altogether! And feel free to adjust the spices to your liking – I’d love to know if you try something new that you really enjoy!

Spicy-Roasted-Cauliflower-Recipe_This-Wild-Season-2 Spicy-Roasted-Cauliflower-Recipe_This-Wild-Season-3 Spicy-Roasted-Cauliflower-Recipe_This-Wild-Season-4 Spicy-Roasted-Cauliflower-Recipe_This-Wild-Season-5 Spicy-Roasted-Cauliflower-Recipe_This-Wild-Season-6

Spicy Roasted Cauliflower

Asharae Kroll
Print Recipe Pin Recipe
Prep Time 5 mins
Cook Time 20 mins
Total Time 25 mins
Servings 4

Ingredients
  

  • 1 head of cauliflower
  • Olive oil
  • 1/4 tsp cumin
  • 1/4 tsp garlic powder
  • 1/4 tsp red chili flakes more or less depending on preference
  • 1/8 tsp chili powder
  • pinch of cayenne pepper
  • Salt and pepper to taste
  • Lime juice and cilantro

Instructions
 

  • Preheat oven to 425F
  • Rinse cauliflower and chop into medium size pieces. Pat dry with a paper towel.
  • Place cauliflower on a rimmed baking sheet.
  • Drizzle lightly with olive oil and toss.
  • Combine spices in a small bowl and sprinkle over cauliflower.
  • Sprinkle lightly with salt and pepper and toss.
  • Roast for approximately 20 minutes, turning the cauliflower half way through. Keep a close eye on it after flipping to make sure it doesn't burn.
  • Adjust salt and pepper to taste, squeeze fresh lime juice over the top, and sprinkle with fresh chopped cilantro.


Filed Under: Side Dish Tagged With: cauliflower, easy side dish, roasted vegetables

  • « Previous Page
  • 1
  • …
  • 23
  • 24
  • 25
  • 26
  • 27
  • Next Page »

Hello there!

My name is Asharae. I’m a photographer by trade, wife to an amazing man, and mama to three little ones. I am passionate about creating good food, sharing meaningful conversation around the table, trying new things, and encouraging others to do the same.

Welcome to This Wild Season! This is a place for sharing what I’m learning in the kitchen and outside of it. Most of all, it is a challenge to myself and to you to slow down, be present in the moment, and re-learn how to savor food and conversation around the table.

About

Search

Connect

  • Facebook
  • Instagram
  • Pinterest
  • Twitter
  • Vimeo

Find my book on Amazon:

Recent Posts

  • Emmeline’s Birth Story, The Story of Her Name
  • Emmeline’s Birth Story, Birth Day Part 2
  • Emmeline’s Birth Story, Birth Day Part 1
  • Emmeline’s Birth Story, My Pregnancy
  • Emmeline’s Birth Story, An Introduction
Follow on Bloglovin
Visit This Wild Season's profile on Pinterest.

Copyright © 2025 · Foodie Child Theme by Shay Bocks · Built on the Genesis Framework · Powered by WordPress