This Wild Season

Sharing what I'm learning in the kitchen as well as outside of it.

Navigation
  • Home
  • Blog
  • Recipes
    • Appetizer
    • Breakfast/Brunch
    • Side Dish
    • Main Course
    • Dessert
    • Drinks
    • Personal
  • About

Beckett’s Birth Story, An Introduction

May 8, 2017 by Asharae 4 Comments

I’ve been debating whether or not I wanted to share Beckett’s birth story, and how I wanted to share it if I did. I’ve gone back and forth on how I felt about it – not sure if I wanted to keep it to myself, as a story for just our family, or if it’s one I wanted to share to somehow encourage other moms-to-be.

So many of the birth stories I’ve heard or read are difficult ones. They’re often told with an undertone of disappointment because things didn’t happen as planned. Even many of my friends have really difficult pregnancy and birth stories, ones that didn’t turn out the way they expected or hoped. I know those aren’t the only stories out there (in fact, just this weekend I heard a very joy-filled birth story!), but the difficult stories are often the ones that stand out the most.

I’ve hesitated to tell my story – Beckett’s story – because it’s not one of those. My pregnancy went as smoothly as it could have, and labor and delivery was an incredible experience. I look back at his birth day with so much joy.

That’s not to say the process of bringing him into this world wasn’t painful, or that everything happened exactly as I expected it to, or even that there aren’t a couple things I wish could have been different. But overall, that afternoon, night, and morning that I was in labor are some of my favorite hours of my life. I’ve never felt more present to a life experience before. Never felt more in-the-moment, or more alive. I know that’s a weird thing to think, and I assure you it’s an even weirder one to try and put into words.

Birth stories are a funny thing – they’re deeply personal, told with pride, terror, or some combination thereof, and sometimes they’re told with entirely too many details. When I was pregnant, I felt like every birth story I heard was meant to scare me. Anyone that saw my round belly suddenly felt inclined to share with me how their aunt’s half-sister’s friend’s cousin was in labor for 30-someodd hours, or how the mom that was hellbent on having a natural birth ended up with a C-section (spoken, of course, like a curse word), or the mom who needed three epidurals because the first two didn’t work, or any number of stories involving words like foreceps, vacuum extraction, tearing, and stitches. YALL. STOP. These are NOT the stories a soon-to-be-mom needs to hear!

We need to stop telling birth stories like 13-year-old boys at camp telling scar stories, each trying to one-up the last one. I should pause here to say – if it’s your own birth story, you have every right to share it. Please share your story with someone. And while you’re at it, write it down so you always remember your own story – it’s amazing how quickly the details fade if you don’t put words to paper. But please please please, think before you blurt out the worst details of other mom’s stories, or even the worst details of your own story to an expecting mom. It’s not kind and it’s certainly not helpful. Once she’s had her baby, or if she asks specifically, by all means, share all the details if she’d really like to know them. If she’s anything like me though, she’ll want to be spared those details till after she’s experienced labor and delivery for herself.

Truthfully I’ve been afraid of sharing Beckett’s story at the risk of coming across like another scar story, or seeming like I’m wearing our story like a badge of honor. That’s not my intention at all. I know now that I needed a little time for myself to make sure I was in a good place to share our story of bringing him into the world.

I wrote the story of Beckett’s arrival in the weeks after he was born, mostly typing it on my phone while nursing him in the middle of the night, but I haven’t shared it till now. The past few weeks (okay, months – I’ve been stalling on posting this) I feel I’ve been hounded by the idea that sharing our own stories is important. So, in an effort to fully embrace my story, especially my birth story of bringing Beckett into the world, I’m sharing these words with you now. I hope my story can encourage even just one mom-to-be.

A note – If birth stories are a sore spot for you, feel free to skip on over these posts. If you’ve struggled to get pregnant or stay pregnant, I won’t be the least offended – nor will I know – if you choose not to read. I pray healing over you if that is your story. But if you’re in a spot where you need to hear a happy, encouraging birth story – especially if you’re an expecting mom – then read on.

You can find the next part of our story here.

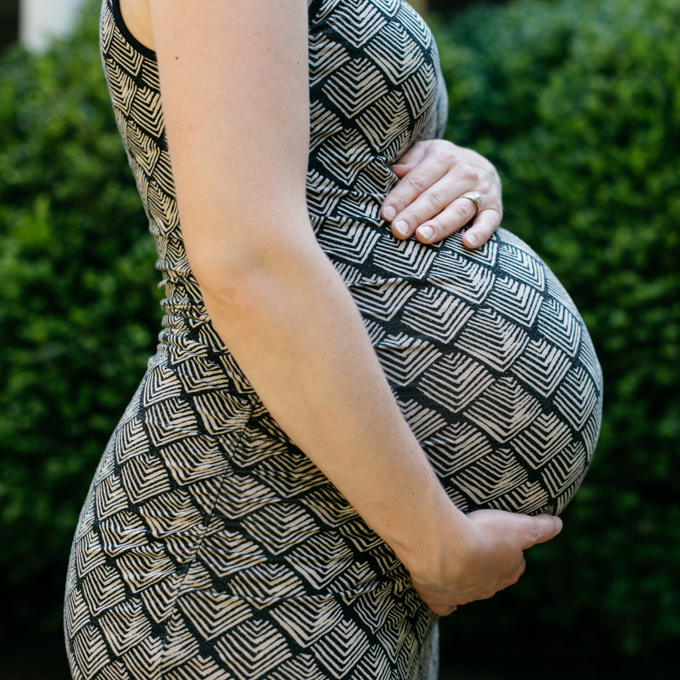
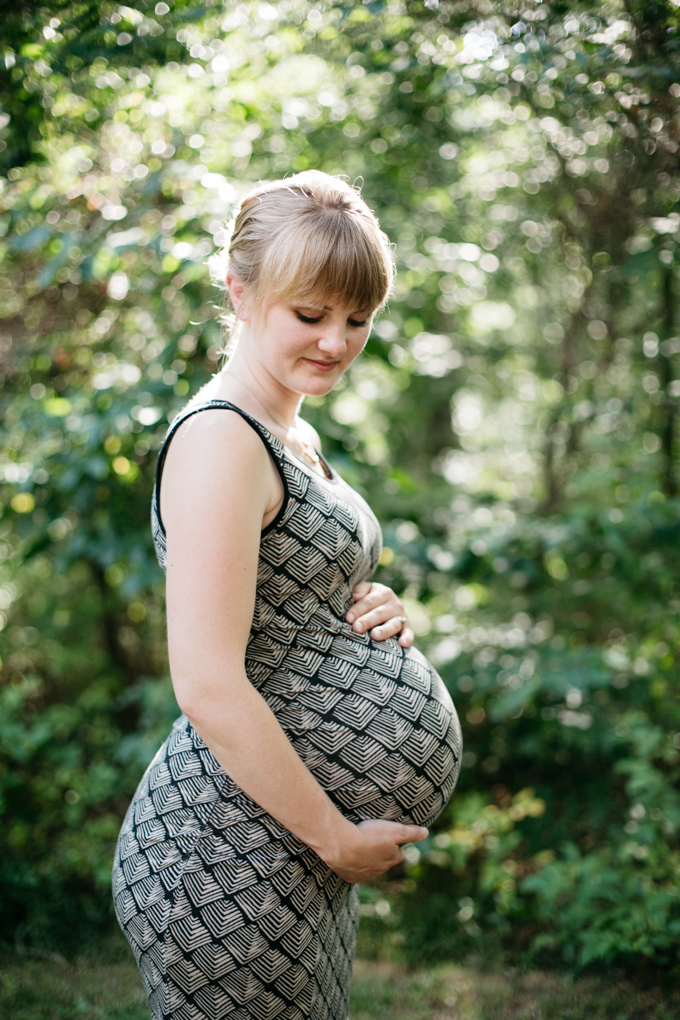
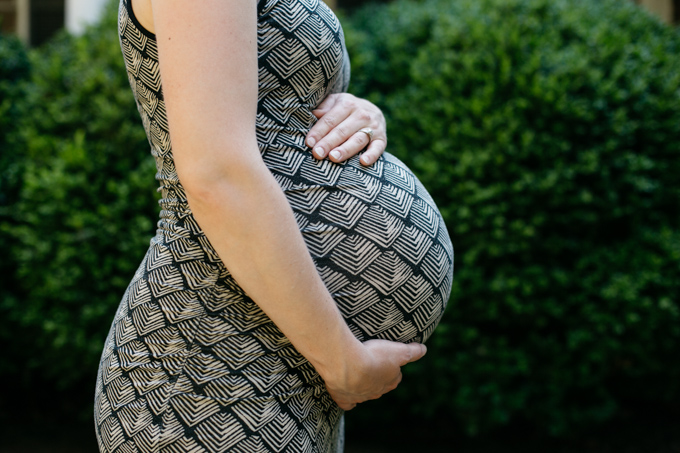
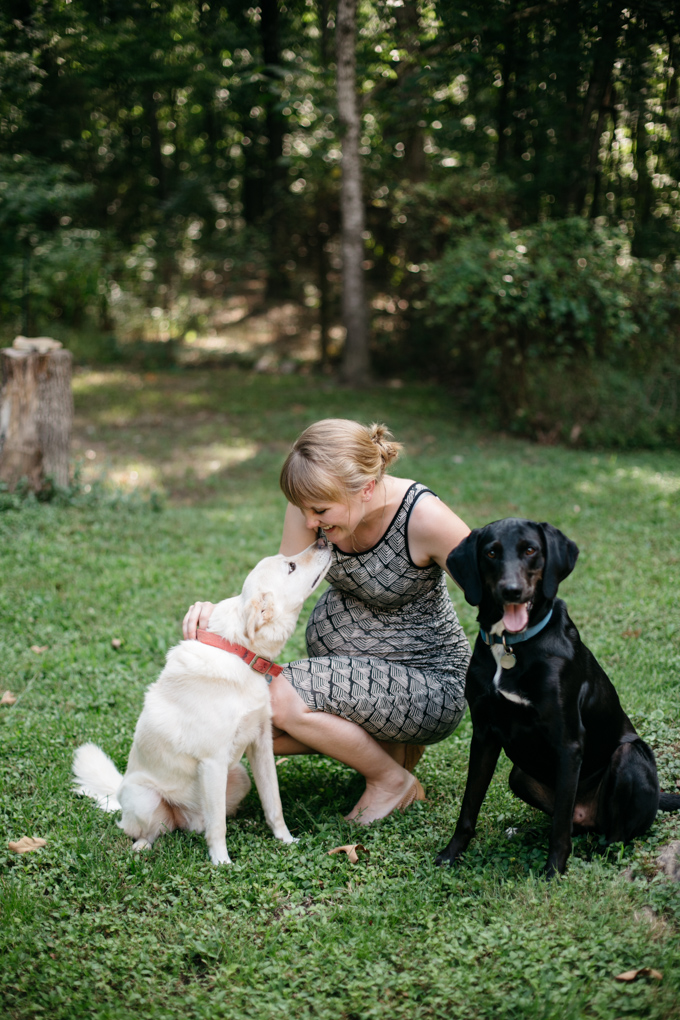
And I’ll leave you with a photo of a very-pregnant me with our pups.

Filed Under: Personal Tagged With: baby kroll, birth story, personal, pregnancy

Green Lentil Bowl with Sautéed Spinach and Avocado

March 17, 2017 by Asharae 1 Comment

If you’re anything like me, you could use some simple, fresh, EASY lunch ideas! Bonus points if said lunch ideas are healthy too.

This recipe was inspired by my new-found love for lentils. Weird? Yes. Good for you? Yes. Delicious with the right toppings? Most definitely. I topped this bowl of lentils with sautéed spinach and garlic, a fried egg, avocado, feta cheese, cilantro, and a super simple lime dressing. It’s fresh and easy and you can make a large batch of lentils at the beginning of the week to make lunch time a breeze.

Happy lunch-ing!

Green Lentil Bowl

Asharae Kroll
Print Recipe Pin Recipe
Servings 1 serving

Ingredients
  

  • 1 c cooked lentils prepared according to the package instructions (I like to cook a large batch and use it throughout the week)
  • Large handful of spinach
  • 1 clove garlic minced
  • 1 egg

For the Dressing

  • Juice of 1/2 a lime
  • 1-2 Tbs olive oil
  • Pinch of salt and pepper
  • Pinch of red pepper flakes

Garnishes

  • Avocado
  • Cilantro
  • Feta or queso fresco
  • Salt and pepper

Instructions
 

  • Cook lentils according to the package instructions, set aside. This can be done the day before.
  • In a small bowl, whisk together the dressing ingredients, set aside.
  • Heat 1 tsp olive oil over medium in a large pan. Saute the spinach until almost wilted. Add the garlic and cook for one more minute, or until the spinach is fully wilted.
  • To save on dishes use the same pan to cook the eggs. Add a little more olive oil, fry the egg to your preference.
  • Assemble your lentil bowl. Top lentils with fried egg, spinach and garlic, avocado, cilantro, feta or queso fresco, dressing, and add salt and pepper if needed.


Filed Under: Main Course Tagged With: easy lunch, easy recipe, lunch, lunch idea, simple recipe

DIY Handlettering: A Behind the Scenes Look

November 30, 2016 by Asharae 2 Comments

You guys. I wrote a book. Well, technically I co-authored a book alongside the fabulous Melissa Averinos. It’s totally surreal to see our names on the cover of a stack of books currently sitting in my office. Even weirder that I can recognize my handwriting all over the covers of said books.

diy-handlettering-3

Rewind. About two years ago I got an email from a lady at Adams Media, a publishing company based in Massachusetts. She asked if I’d be interested in co-authoring a handlettering book as an “artist author” who would create all the lettering styles for the book. Obviously I said yes.

I had a great time creating different lettering styles and the variations on each one to give our readers some inspiration to take each style and make it their own. I decided we needed a little something extra for the book, so I created several pages of doodles, flourishes, banners, and floral wreaths, and wrote the instructions to go along with the lettering styles and the doodles. My co-author Melissa is the “craft author” and she took the styles and doodles I created and made a ton of crafts with them – she’s a crafting genius.

diy-handlettering-4 diy-handlettering-5 diy-handlettering-7 diy-handlettering-9 diy-handlettering-15 diy-handlettering-11

The book turned out to be a great mix of craft projects and inspiration to take what you see and make it your own. My hope is that you see the handlettering styles I’ve created and put your own spin on them, experiment and add your own personality, and end up creating something entirely your own.

I would be absolutely delighted if you guys bought my book! Buy it for yourself, for your grandma, for your roommate, for your coffee table, or even for your dog. Christmas is just around the corner after all!

You can buy DIY Handlettering over here on Amazon!

(That’s an affiliate link ya’ll! That means if you click on it and make any purchase through Amazon, I make a small commission off your order, at no additional cost to you. Thanks for helping me keep food on the table here at This Wild Season!)

diy-handlettering-2

The entire process of seeing a book from idea to print was a lot of fun.  It’s funny to have a lot of the publishing process demystified in a way. The company that published our book does things quite a bit differently from other companies in that they seek out authors to write about topics that are popular in the moment. I confess I thought it was a scam when I first got the email! I’d never heard of a company that does things like Adams Media.

diy-handlettering-13 diy-handlettering-10

I truly learned a ton through the whole process. It was great to have the creative freedom to create additional lettering styles and fun embellishments for our readers to incorporate into their projects. And it was such a sweet surprise to see my doodles incorporated throughout the book as well! Toward the end of last year when we submitted our final draft, it just looked like a strangely formatted Word document. It was hard to imagine how it would turn out in the end. A couple months passed and we finally got to see what they’d done with all our hard work. Overall they designed it beautifully – and even the practice pages were a sweet surprise we weren’t expecting!

diy-handlettering-6 diy-handlettering-8 diy-handlettering-14

It’s so fun to look at it now and think back to all the hard work that went into it. Some of the nature doodles were inspired by our trip to Oregon last summer, scribbled in my notebook while we sat on the cliffs overlooking Cannon Beach. I remember sitting in the Seattle airport, typing away on my laptop to make one of our deadlines before our red-eye flight that night. Other styles I created while sitting on the floor in our family room, a football game or something else on in the background. A few lettering styles I created didn’t make it into the book, and others took their place instead. And the cover – oh the cover. We had some discussions about that one. But for now we’ll just file it away in the “you live and you learn” folder.

diy-handlettering-16

I loved working with my co-author Melissa. She’s written a couple books with Adams before, so even though we never met in person, I felt like she was guiding me along through the process, letting me know how everything works. We’d text each other late at night – ack! Have you met the latest deadline? How are the crafts going? What do you think of this lettering style? It’s so wild to create a book with someone even though hundreds of miles separate us. Oh technology.

diy-handlettering-12

The sweet part of all of this is that writing this book has opened up some incredible new opportunities for me. Since the book came out I’ve started teaching handlettering classes locally with SkillPop here in Charlotte. It’s an amazing start-up that is providing awesome in-person classes on a whole range of topics. If you’re local to Charlotte or Raleigh be sure to sign up for the newsletter and check out all the classes that are currently offered. Handlettering always sells out, so you’ve got to be quick to sign up if you’re interested in taking one of the classes!

And now, congratulations if you made it to the bottom of this post! Be sure to check out my Instagram page for an opportunity to win two signed copies of my book – one for you and one for a friend!

Filed Under: DIY, Personal Tagged With: author, book, DIY Handlettering, personal

Slow Cooker Maple Spiced Steel Cut Oats and Quinoa

November 21, 2016 by Asharae Leave a Comment

Happy Thanksgiving Week! Anyone traveling this week? Or welcoming family into your home? Anyone preparing to feed lots of friends and family? If you’re in need of a super simple homemade breakfast option for feeding lots of people this week, I’ve got the perfect recipe for you. And if you’re making this recipe for just one or two, I’ve got instructions for freezing any leftovers to have later!

This Maple Spiced Oats and Quinoa dish is healthy-ish, hearty, so delicious and can be customized to suit each person you’ll be hosting this Thanksgiving. When you’re worried about getting the turkey in the oven, all the pies made on time, and getting Grandma’s stuffing just right, you really don’t need to be thinking about anything complicated for breakfast! Just get up early and throw all these ingredients in your slow cooker (try doubling it and adding some time if you have more than 8 of guests.) You can set out lots of topping options so everyone can customize their own bowl, and this dish is hearty enough that it’ll give everyone energy to help out with all your Thanksgiving dinner prep!

This recipe is adapted from two I found online – this Pumpkin Overnight Oats recipe from Well Plated and this Slow Cooker Overnight Quinoa and Oats by Chelsea’s Messy Apron. Feel free to adapt and adjust to fit your preferences!

this-wild-season-maple-spiced-steel-cut-oats-and-quinoa-2 this-wild-season-maple-spiced-steel-cut-oats-and-quinoa-3 this-wild-season-maple-spiced-steel-cut-oats-and-quinoa-4 this-wild-season-maple-spiced-steel-cut-oats-and-quinoa-5

Slow Cooker Maple Spiced Steel Cut Oats and Quinoa

Print Recipe Pin Recipe
Prep Time 10 mins
Cook Time 3 hrs
Total Time 3 hrs 10 mins
Servings 8 servings

Ingredients
  

  • 1 1/2 c steel cut oats (do not use old fashioned or quick cook oats)
  • 1/2 c quinoa rinsed (or purchase pre-rinsed)
  • 3-4 c water depending on how thick you want your oatmeal to be
  • 2 c milk
  • 2 Tbs chia seeds
  • 2 Tbs ground flaxseed
  • 1/4 c brown sugar
  • 2 Tbs maple syrup
  • 1/2 tsp kosher salt
  • 1 1/2 tsp vanilla extract
  • 1 Tbs cinammon
  • 1 tsp ginger
  • 1/2 tsp nutmeg
  • 1/2 tsp allspice

Garnishes

  • Sliced almonds
  • Dried cranberries
  • Additional brown sugar
  • Chopped apples
  • Additional cinnamon nutmeg, or allspice

Instructions
 

  • Spray slow cooker with cooking spray.
  • Rinse quinoa well, using a fine mesh sieve. (Skip this step if you bought pre-rinsed quinoa)
  • Combine all ingredients except garnishes in slow cooker, stir well to combine.
  • Set on high for 2-3 hours, stirring after an hour and a half so you know how much longer to cook it. This will depend on how hot your slow cooker gets. (See note below.)
  • Oats are finished when they reach the consistency you desire - I like mine to still be slightly chewy, so I cooked mine for just over 2 hours.
  • Turn off heat and serve topped with dried cranberries, sliced almonds, extra brown sugar, or whatever you like!

Notes

The recipe I adapted this from said to cook it on low for 7 hours or high for 4, but mine would have been burnt to a crisp if I let it go that long. Use your best judgement depending on how quickly your particular slow cooker operates.
If you want to make this recipe to save for later, use a muffin tin to divide the remaining cooked oats and quinoa. Let cool completely on the counter, then place in the freezer for a few hours. Remove oats from muffin tin once frozen, store in a freezer safe ziplock bag, and keep in freezer until ready to eat. Reheat in microwave, top with garnishes, and enjoy!

slow-cooker-maple-spiced-steel-cut-oats-and-quinoa-by-this-wild-season

Filed Under: Breakfast/Brunch Tagged With: breakfast, breakfast recipe, brunch recipe, comfort food, crock pot, crockpot, crockpot recipe, crowd pleaser, fall recipe, simple recipe, slow cooker, slow cooker recipe, winter recipe

  • « Previous Page
  • 1
  • 2
  • 3
  • 4
  • 5
  • 6
  • …
  • 27
  • Next Page »

Hello there!

My name is Asharae. I’m a photographer by trade, wife to an amazing man, and mama to three little ones. I am passionate about creating good food, sharing meaningful conversation around the table, trying new things, and encouraging others to do the same.

Welcome to This Wild Season! This is a place for sharing what I’m learning in the kitchen and outside of it. Most of all, it is a challenge to myself and to you to slow down, be present in the moment, and re-learn how to savor food and conversation around the table.

About

Search

Connect

  • Facebook
  • Instagram
  • Pinterest
  • Twitter
  • Vimeo

Find my book on Amazon:

Recent Posts

  • Emmeline’s Birth Story, The Story of Her Name
  • Emmeline’s Birth Story, Birth Day Part 2
  • Emmeline’s Birth Story, Birth Day Part 1
  • Emmeline’s Birth Story, My Pregnancy
  • Emmeline’s Birth Story, An Introduction
Follow on Bloglovin
Visit This Wild Season's profile on Pinterest.

Copyright © 2025 · Foodie Child Theme by Shay Bocks · Built on the Genesis Framework · Powered by WordPress