This Wild Season

Sharing what I'm learning in the kitchen as well as outside of it.

Navigation
  • Home
  • Blog
  • Recipes
    • Appetizer
    • Breakfast/Brunch
    • Side Dish
    • Main Course
    • Dessert
    • Drinks
    • Personal
  • About

Snowball Cookies

December 23, 2014 by Asharae 2 Comments

Merry Christmas y’all! I thought this week called for sharing a classic Christmas recipe (and story). These cookies were an essential part of Christmas when we were growing up. Every year my parents re-tell the story of little me – probably four years old – stuffing one of these cookies into my face and then trying to talk. Instead of any actual words coming out, I got the giggles because, as everyone knows, you can’t talk with a snowball cookie in your mouth. Giggles devolved into four-year-old me drooling powdered sugar dust down my chin and onto my red Christmas dress. It’s one of those classic family get-together stories that gets retold around this time each year.

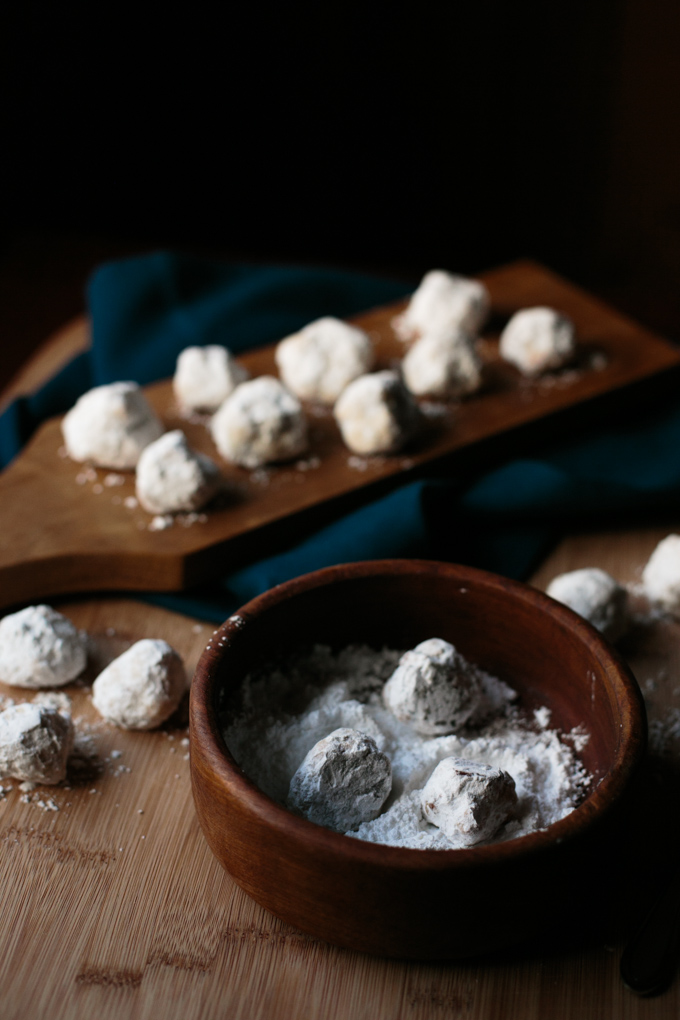
These cookies are perfect for making with kids – you can have them roll the cookie dough into balls and even roll them in the confectioner’s sugar once they’ve cooled. I always loved getting my hands dirty in the kitchen and helping my mom roll these cuties in powdered sugar – it always meant we got to “taste-test” a few extras while we made them.

Snowball Cookies - thiswildseason.com -2 Snowball Cookies - thiswildseason.com -3 Snowball Cookies - thiswildseason.com -4 Snowball Cookies - thiswildseason.com -5 Snowball Cookies - thiswildseason.com -6

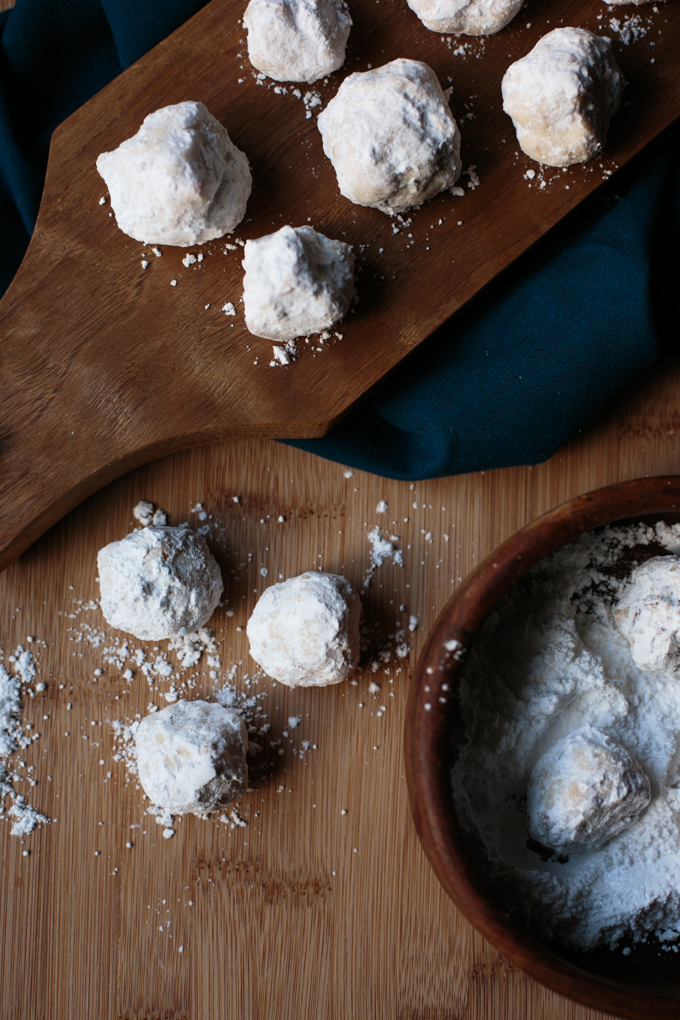
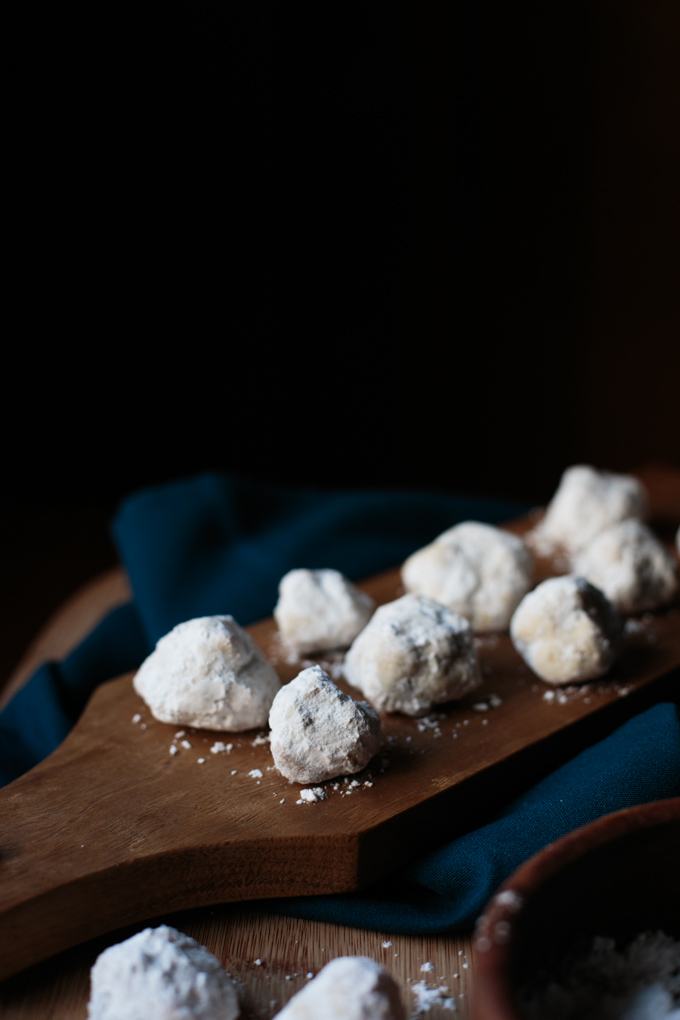
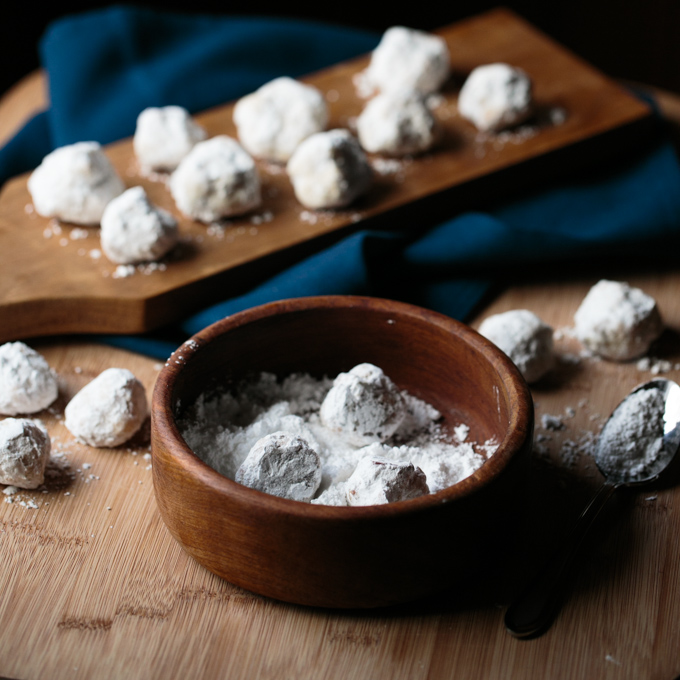
This recipe is for a very large batch of cookies – perfect for taking to a cookie exchange, church gathering, or school event. If you’re looking to just share with your family, the recipe can easily be halved. Cookies do not rise at all, so whatever shape you roll them into is the same shape they’ll be when they come out of the oven. I like snowballs that aren’t completely perfect. Be sure to watch them carefully especially at the end of their baking time. Cookies will just barely turn light brown when they’re finished – I always check the bottoms of the cookies to make sure they’re not burning. Roll in powdered sugar twice and they’re ready to enjoy!

Snowball Cookies

Adapted from Betty Crocker
Print Recipe Pin Recipe

Ingredients
  

  • 2 c of Butter softened (4 Sticks)
  • 1 c Confectioner's sugar
  • 2 tsp Vanilla
  • 4.5 cups flour
  • 1/2 tsp salt
  • 1.5 c roughly chopped pecans or walnuts optional

Instructions
 

  • Sift flour and salt together in a medium bowl. Set aside.
  • In a separate large bowl, using an electric hand mixer, thoroughly mix together butter, confectioner's sugar, and vanilla until smooth.
  • Stir in flour and salt mixture until dough forms. Add in nuts if desired.
  • Chill dough in the fridge for at least an hour.
  • Preheat oven to 400 degrees F.
  • Roll into 1 inch balls. Bake on an ungreased baking sheet for 10-12 minutes. Watch cookies carefully as they're quick to burn. Cookies are done when they're just slightly turning light brown - you'll think they need more time. Don't be fooled. Check the bottoms before you leave them in longer to be sure you're not burning them.
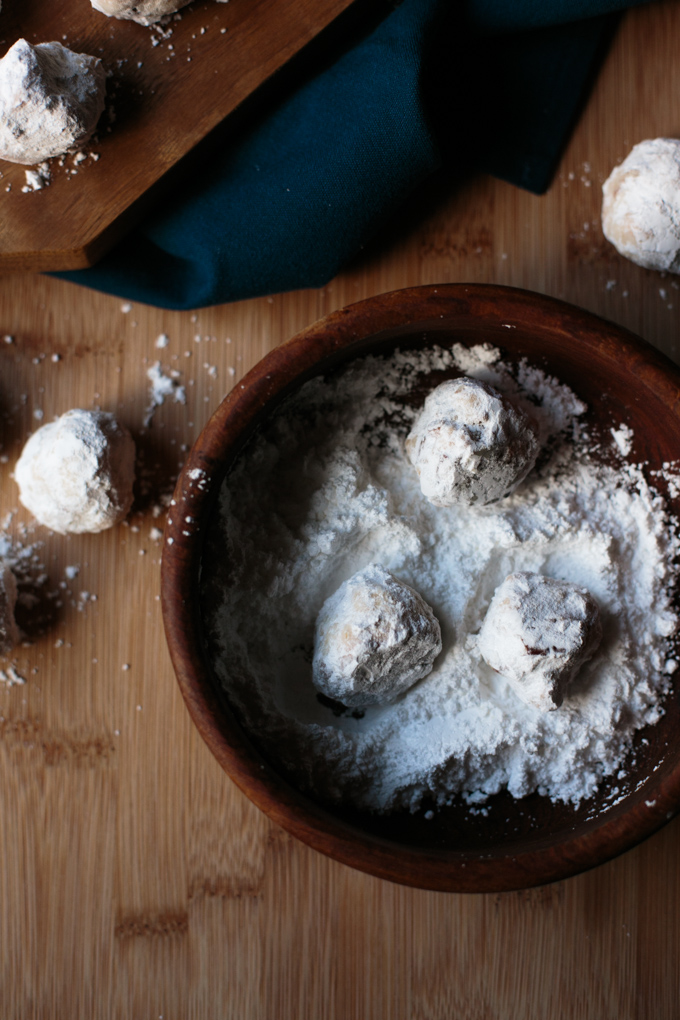
  • Remove from the oven, let cool until you can handle them comfortably, then roll in confectioner's sugar.
  • Let cool completely, then roll in sugar one more time.


Filed Under: Dessert Tagged With: cookies, crowd pleaser, easy recipe, holiday, holiday desserts, holiday ideas, simple recipe

Last Minute Gift Ideas

December 15, 2014 by Asharae Leave a Comment

If you’re anything like me, you’ve waited until the last minute to do your Christmas shopping. Perhaps it was out of good intentions to savor this season, to rest, and to scale back on the holiday crazy. But more than likely you just procrastinated, like me. I for one was sitting on my couch in a turkey-and-football daze while the early birds were scoring deals on Thanksgiving evening. (Let’s not even get into how crazy it is that “Black Friday” starts on Thanksgiving now – as in, during Thanksgiving dinner.) And then somehow Small-Business-Saturday and Cyber Monday passed me right by. And now, here we are, just over a week to go till Christmas, and panic is starting to set in.

So I figured, perhaps you too might be in need of a few helpful ideas when it comes to Christmas gifting this year. Below are some of my absolute favorite items I’ve been using lately (and a few that are on my wish list) – they’re all budget friendly ($35 or less) and would make great gifts or stocking stuffers for Christmas!

Last Minute Gift Ideas - thiswildseason.com -2

Books:

Bread and Wine: A Love Letter to Life Around the Table with Recipes by Shauna Niequist – This one is a given. This Wild Season is named after a quote from this book, and I believe anyone who loves food should read this book (that’s all of you.) Shauna is the most wonderful storyteller. She weaves recipes and cooking tips into stories from her own life in a way that keeps you hungry for more.

The Smitten Kitchen Cookbook by Deb Perelman – Smitten Kitchen is one of the very first food blogs I ever followed. Deb creates and tests and retests recipes till they’re just perfect. This cookbook is full of deliciousness – I’m still working my way through it, but so far everything we’ve tried has been amazing! It feels like more of a fall/winter cookbook to me, so it’s perfect for this time of year!

The Yellow Table: A Celebration of Everyday Gatherings by Anna Watson Carl – I’ve mentioned Anna’s story on the blog before. Just over a year ago she started a journey to create her own cookbook and has since road-tripped about the country, having dinner parties along the way, sharing her story over on her own blog, and now her book is published! I got my copy in the mail last week and have been reading it cover-to-cover. I can’t wait to try her recipes in our own kitchen!

Kitchen Gizmos and Gadgets:

Cuisinart Smart Stick 2-Speed Immersion Hand Blender – I raved about this immersion blender in my recipe for Butternut Squash Soup recently, but here’s a link for the actual one we use. I love this thing. We use it often to blend soup as it saves you the trouble of pouring hot soup into a blender, doing multiple batches, wondering where you’ll put the blended soup – back in the pot or do you dirty another bowl? All that is simplified by using an immersion blender. It’s also perfect for blending smoothies, salsas, sauces, and pretty much anything you’d use a regular blender for. I love that the bottom is detachable to make it easy to wash as well!

Last Minute Gift Ideas - thiswildseason.com -5

OXO Good Grips Smooth Edge Can Opener – This is a totally weird gift, but I love mine so I had to share! Perhaps it would make a funny stocking stuffer! This can opener leaves a smooth edge on both the can and lid so you don’t have to worry about slicing your fingers. It’s a little tricky to figure out when you first get it, but once you get the hang of it then it’s a breeze. The option available online now is a sleeker design than ours, but it works the same way.

Last Minute Gift Ideas - thiswildseason.com -4

Food Network’s Silicone Set – We got these for ourselves last year for Christmas and I hardly use any other utensils when I’m cooking. The spatula and spoonula (isn’t that a great name?) are the two we use the most, but I love having the full set. I’m a firm believer that if you have beautiful kitchen utensils you’re more likely to use them. These are silicone, so they’re comfortable in your hand and extraordinarily heat-resistant.

Last Minute Gift Ideas - thiswildseason.com -7

Paper Straws – These are just for fun. How can you not be happy when drinking out of a striped straw? We love having these around for parties, casual dinners, and really for any occasion.

Last Minute Gift Ideas - thiswildseason.com -6

Bonus Ideas:

Rifle Paper Co. Botanicals Notebook Collection or Midnight Garden Recipe File Box – You’ve certainly seen Anna Bond’s designs floating around the internets, and for good reason. Her work is simply beautiful. I love these little notebooks a friend gifted me – they’re the perfect size to carry around in my purse, and I use them to write down recipe ideas, business goals, and even gift ideas. The recipe file box is the spiffiest way to store those tiny recipe cards you’ve collected from your grandmother. Rifle includes their own adorable recipe cards so you can add your own recipes to your collection.

The Giving Keys – One of our brides for next year works for this company in LA and I just love the idea behind what they do. First of all, they employ people who are looking to transition out of homelessness. Each key they make has a word on it such as hope, dream, belong, or courage. The idea is that you wear your key until you encounter someone who needs the message you wear – at that point you give your key to that person. What a beautiful gift, and an incredible conversation starter!

Chelsea Market Cookbook – This is on my wishlist for Christmas. When Tim and I were in NYC for the first time back in September we stumbled upon the Chelsea Market – we literally knew nothing about it. (Had I heard of it, it would have been on our must-see list!) We were actually headed to see the High Line and walked right past the market on our way from the subway. It was so much sweeter that way as we felt like we had “discovered” this hidden gem in New York City. Anyone from NYC would probably laugh at us for not having heard of it – oh well. If you’re not from the city, the Chelsea Market is a collection of shops, restaurants, bakeries, and all around amazing food. This cookbook is a compilation of recipes from the various chefs and restauranteurs associated with the market.

Grain & Compass Fine Art Prints – Our print shop is open and we just updated it with photographs from our travels this year! We have prints from every corner of the US with a few from South America as well. Each print is mounted on a backboard so it can stand-alone or be put in a frame.

Give a gift that’s personal – Think about what your strengths are. Is there something you’re good at, something you enjoy doing or creating, something personal you could give of yourself? This adorable succulent and owl planter were given to me by my friend Deedie – she’s a floral designer, so it makes perfect sense coming from her! It was such a sweet surprise when she showed up to our coffee date a couple weeks ago with this darling little plant in hand! What thoughtful, personal gift could you give away this year?

Last Minute Gift Ideas - thiswildseason.com -8

This post contains affiliate links, but all opinions are my own.

Filed Under: Personal Tagged With: Christmas, Christmas gifts, cookbooks, gift ideas, holiday ideas, kitchen gadgets

Butternut Squash Soup with Bacon, Goat Cheese, and Pistachios

December 10, 2014 by Asharae 1 Comment

I’m so excited to share this post with you today! This recipe. You guys. I really thought I knocked it out of the park last week with the most ridiculously delicious pumpkin cheesecake. I gotta be honest though, I’m more of a savory/salty kinda gal than a sweets one. So this butternut squash soup with bacon AND goat cheese AND pistachios is really just the perfect thing.

I’d never worked with butternut squash until my mother-in-law bestowed one upon us after one of our holiday gatherings in Maryland a couple years ago. She ran out to the car as all the kids were packing things into our respective cars, and I caught a glimpse of her placing some sort of squash in our trunk. A couple days later, I got a perplexed text from my sister-in-law in Chicago, “Did you have a butternut squash in your trunk too?”

I’m not sure what she ended up making with hers, but I promptly scoured Pinterest for a recipe for butternut squash soup. Our first attempt a few years back was not nearly as glorious as the recipe before you now. But I do apologize for the unhealthiness accept your gratitude for the deliciousness of this recipe.

The initial inspiration for this recipe came from this one over on Half Baked Harvest – her food photos are simply amazing. I saw one photo of her soup on Pinterest and knew I wanted to try something similar. The flavors I aimed for were quite different, but I always love pointing back to my source of inspiration when I can!

Butternut Squash Soup - thiswildseason.com -2 Butternut Squash Soup - thiswildseason.com -3 Butternut Squash Soup - thiswildseason.com -4 Butternut Squash Soup - thiswildseason.com -5 Butternut Squash Soup - thiswildseason.com -6 Butternut Squash Soup - thiswildseason.com -7

Butternut Squash Soup with Bacon, Goat Cheese, and Pistachios

Asharae Kroll
Print Recipe Pin Recipe
Prep Time 15 mins
Cook Time 40 mins
Total Time 55 mins
Servings 4 -6 servings

Ingredients
  

  • 1 medium butternut squash peeled, seeds scooped out, and diced
  • 2 large carrots peeled and diced
  • 1 onion diced
  • 1 apple peeled, cored, and cubed
  • 2 cloves of garlic minced
  • 1 tsp fresh thyme
  • 1/4 tsp dried sage
  • 1/2 tsp salt
  • 1/4 tsp pepper
  • 1 bay leaf
  • 32 oz vegetable broth
  • 1 c heavy cream
  • 1 package of bacon
  • 4 oz package of goat cheese
  • Shelled pistachios

Instructions
 

  • Place bacon in a cold pan, heat to medium and cook till crispy. Set on paper towels to cool. Reserve bacon grease. Once bacon is cool, crumble into small pieces.
  • Add 3 Tbs bacon grease to a large stockpot and heat over medium. Add carrots, onion, and diced butternut squash and sauté for 5-7 minutes, or until veggies start to soften.
  • Add apple, thyme, sage, salt, and pepper, and sauté 3-4 more minutes. (Add another Tbs of bacon grease if necessary.)
  • Add garlic and sauté one more minute, then add vegetable broth, scraping the delicious bits off the bottom of the pan. Add bay leaf. Bring to a boil, then reduce heat and simmer 6-8 minutes, or until the veggies and apples are soft. Remove from heat and let cool slightly.
  • Remove bay leaf and use an immersion blender to blend the soup to a smooth consistency. Alternately, you can carefully blend the soup in batches in a blender. (Side note - if you don't have an immersion blender, it's a worthwhile investment - perfect for soups, smoothies, salsas, and other things - we use ours all the time!) Once the soup is smooth, stir in the heavy cream.
  • Serve topped with bacon, goat cheese, and pistachios. Drizzle with a little extra heavy cream to make it pretty. Enjoy!

Notes

To more easily peel your butternut squash, use a fork to poke holes all over. Heat for 1-2 minutes in the microwave. Let cool, cut each end off with a knife, then use a vegetable peeler to remove the skin. To dice, cut your butternut squash in half, separating the taller skinny half from the wide fat end. Place each half of the squash on your cutting board, cut side down, and cut each one in half. Scoop the seeds out and then lay each quarter on your cutting board, flat side down and slice into 1/4 in - 1/2 in slices. Dice up each slice into smaller pieces and you're ready to use it in your soup recipe!

We use this Cuisinart Immersion Hand Blender and absolutely love it!

(Full disclosure – That’s an affiliate link above, so I’ll receive a small percentage of your purchase if you click through the link. I appreciate your help in keeping This Wild Season up and running!)

Filed Under: Main Course Tagged With: comfort food, crowd pleaser, soup

Pumpkin Cheesecake with Pecan Caramel Sauce

December 5, 2014 by Asharae 3 Comments

I do not exaggerate when I say that this cheesecake is the best dessert I’ve ever made. Ever ever. Even better than these cookies. I can’t take credit for the recipe though – the original was posted here on Food & Wine – feel free to hop over there for further instructions!

I know that I’m a little behind the times – hopping on the pumpkin bandwagon when it’s already December. But quite frankly, I don’t care. Because this pumpkin cheesecake is worth it. I’ve made this for two Friendsgivings in a row the past two years, and I have a feeling it’ll become a tradition. It’s just that good. It tastes like fall in the best way possible. I’m not sure what else to tell you to convince you to make this for your next holiday party…perhaps the photos will convince you?

Pumpkin Cheesecake with Pecan Caramel Sauce - thiswildseason.com -3 Pumpkin Cheesecake with Pecan Caramel Sauce - thiswildseason.com -2 Pumpkin Cheesecake with Pecan Caramel Sauce - thiswildseason.com -4 Pumpkin Cheesecake with Pecan Caramel Sauce - thiswildseason.com -5 Pumpkin Cheesecake with Pecan Caramel Sauce - thiswildseason.com -6

Okay and if the photos didn’t convince you, the long list of instructions certainly won’t. Don’t be discouraged though! This cheesecake has lots of steps but none of them are difficult. According to the original recipe’s author, the most important step is that you have all your ingredients at room temperature. Make this the day before your party, refrigerate it overnight, and serve drizzled with warm pecan caramel sauce. You can thank me later.

A lot of cheesecake recipes call for placing the springform pan in a bath of water, and baking it that way. I’ve read complaints of leaky springform pans, convoluted methods of sealing your pan with tinfoil, etc. It all sounds very tedious. And I don’t do tedious very well. But I do like cheesecake. So this recipe is the perfect compromise. No water baths. No aluminum foil. Just patience. Lots of patience. Trust me, it’s worth it.

In other news, I have a feeling my cheesecake shouldn’t have cracked while baking – there’s gotta be a scientific explanation for it and probably a way to correct for it, but I’m just going to let you know that it’s just as delicious with the cracks in the middle.

Enjoy this recipe. Take it to a party and I promise you’ll make new friends.

Pumpkin Cheesecake with Pecan Caramel Sauce

Katherine Beto
Print Recipe Pin Recipe

Ingredients
  

For the Cheesecake

  • One 15-ounce can pumpkin puree
  • 8 whole graham crackers
  • 1/2 cup pecans
  • 1 tablespoon light brown sugar
  • 5 tablespoons unsalted butter melted, plus more for greasing the pan
  • 1 1/2 cups cream cheese 14 ounces, at room temperature
  • 1 1/2 cups granulated sugar
  • 1 teaspoon salt
  • 1 teaspoon cinnamon
  • 1/4 teaspoon freshly ground nutmeg
  • 1/4 teaspoon ground cloves
  • 1/4 teaspoon ground allspice
  • 5 large eggs at room temperature
  • 1 cup heavy cream at room temperature
  • 1 tablespoon fresh lemon juice
  • 2 teaspoons pure vanilla extract

For the Pecan Caramel Sauce

  • 1 1/2 sticks unsalted butter
  • 3/4 cup dark brown sugar
  • 1/2 cup heavy cream
  • 1/4 teaspoon salt
  • 2 cups pecans

Instructions
 

For the Cheesecake

  • Take your "cold" ingredients out of the fridge and let them come to room temperature while you prep the pumpkin puree and bake the crust.
  • Line a large strainer (what you use to drain pasta) with two paper towels. Use a spatula to spread the pumpkin puree onto the paper towels. Let drain for 2 hours - the pumpkin puree should be fairly dry.
  • Preheat the oven to 500 degrees F and butter the bottom and sides of a 9 inch springform pan.
  • Use a blender or food processor to grind the graham crackers till they are a consistent texture - you're going for the texture of course sand. Add pecans and brown sugar and blend until finely ground. Add melted butter, pulse until combined, pour mixture into your springform pan, and press into the bottom of the pan. Bake the crust 3-5 minutes, until lightly browned. (The original recipe called to bake the crust for 8 minutes, but the edges of mine always start to burn around 4 minutes, so I take it out then.) Let the crust cool completely.
  • In a small bowl, stir together the sugar, salt, cinnamon, nutmeg, cloves and allspice. Set aside.
  • Use a standing electric mixer with the paddle attachment to beat the cream cheese until smooth. With the machine running, add the spiced sugar mixture and combine until smooth, scraping down the sides of the bowl as you go. Add the drained pumpkin puree and combine until smooth again. Add the eggs, one at a time. Scrape down the sides of your bowl between each egg. (I like to break the eggs in a separate bowl, one at a time, and then pour each egg into the mixing bowl - this ensures no pesky eggshells make their way into my cheesecake!) Beat well before adding each additional egg. Add heavy cream, lemon juice, and vanilla, and beat until smooth.
  • Pour cheesecake mixture over cooled crust. Bake for 12 minutes at 500 degrees F, then lower the oven temperature to 225 degrees F. Bake the cheesecake for 3 more hours, until an instant read thermometer measures 150 degrees. The center will still be slightly jiggly, but it shouldn't be liquidy.
  • Let the cheesecake cool, then cover with plastic wrap and refrigerate overnight or at least 8 hours.
  • The easiest way I've read (and tried) to remove the cheesecake from the pan is to run hot water over a knife (a butter knife works just great for this), dry it off, and immediately slide it between the edge of your cheesecake and the side of the springform pan. If the knife cools off, run it under hot water again, dry it off, and continue until you've loosened it from the pan. At that point you can remove the springform ring and cut and serve your cheesecake with the pecan caramel sauce. A hot knife works great for cutting the cheesecake as well! I've also heard of using floss to cut cheesecake, but I've never tried it - let me know if it works for you!

For the Pecan Caramel Sauce

  • While your cheesecake is cooling (or beforehand, while draining your pumpkin puree) set the oven to 350 degrees F. On a rimmed baking sheet spread the pecans in a single layer. Toast until lightly browned and fragrant, about 8 minutes. I like to stir them about 4 minutes in to be sure they don't burn. Check them toward the end of the 8 minutes in case your oven runs a little hot. Set aside to cool.
  • Combine butter and brown sugar in a saucepan over medium heat. Stir until smooth. Add heavy cream and salt, stir and bring to a boil. Lower heat and simmer until slightly thickened, around three minutes. Let cool.
  • Coarsely chop the pecans. Once caramel has cooled a bit, add the nuts and stir to combine.
  • Store in an airtight container and use the extra (if you manage to have any extra) to top your waffles and pancakes!
  • When ready to serve, heat caramel sauce slightly and pour over each individual slice of cheesecake. Take this to your next small group, family gathering, or church potluck and be prepared to make friends.

Notes

Apparently in the world of cheesecake-making it's very important that all your ingredients are at room temperature. I'm sure there's a perfectly good scientific reason for this which I am not prepared to give you. Just know that it's an important step!


Filed Under: Dessert Tagged With: crowd pleaser, dessert, holiday, holiday meal, shared meals

Simple Vegetable Soup

November 11, 2014 by Asharae 1 Comment

In an effort to save space, I titled this post “Simple Vegetable Soup.” What I actually scribbled down on the scrap of paper as I made the soup was – “Use-What-You-Have-In-Your-Pantry-Veggie-Soup.” I personally like that name a lot better. It’s a much better description of the story of this recipe.

Tim and I have been traveling a lot lately – between our three week road trip to three different weddings, several other short weekend trips away for weddings here in NC, and a roommate reunion with my college friends, we’ve put a lot of miles on the road lately. This means that our eating has been less than stellar. And the state of our fridge is abysmal at times. For being a go-with-the-flow kinda gal, I really love to have my meals planned out. I like shopping the menu to save money and save space in our fridge too. I’m the kind of person that wakes up thinking about dinner, and I love being able to look forward to something I know will be delicious. I think the last time we had that sort of routine was back in the summer. Or maybe late spring. It’s been a busy one.

All that being said, the other night Tim and I were wrapping up our editing for the day and looking towards dinner. It was one of those stare-at-the-fridge-hoping-something-will-appear nights. I scrounged around a bit and found we had enough ingredients in the fridge and few staples in the pantry to whip up a batch of soup. (Sidenote – I highly recommend keeping cans of beans and veggies, and a couple cartons of vegetable or chicken broth in your pantry for just such an occasion.)

Nights are getting chillier here in NC and the sun is setting unreasonably early, so a bowl of warm soup is the perfect antidote to the dark and cold outside. And I rejoiced at how this seemingly thrown-together soup turned out – it’s hearty and delicious with just the right amount of spice. We served ours with grilled cheese on the side – so good.

Simple Vegetable Soup - thiswildseason.com -2 Simple Vegetable Soup - thiswildseason.com -3 Simple Vegetable Soup - thiswildseason.com -4

This soup has a little kick to it – you’re more than welcome to leave out the jalapeños and can of green chilies if you don’t like spicy food. I recommend adapting this recipe to whatever you have on hand. I’m sure it would be great with a can of corn, some potatoes, perhaps some celery. Feel free to add more vegetable or chicken broth (or water) if you like your soup to have more broth than veggies, just adjust your salt and pepper accordingly.

Simple Vegetable Soup

Asharae Kroll
Print Recipe Pin Recipe
Prep Time 10 mins
Cook Time 40 mins
Total Time 50 mins
Servings 4

Ingredients
  

  • 1 Tbs butter
  • 1 Tbs olive oil
  • 1 yellow onion diced
  • 4 medium carrots sliced
  • 2 jalapeños diced and seeds removed
  • 1/2 bell pepper diced (use a yellow one if you're looking to make this soup pretty)
  • 3 cloves garlic minced
  • 1 7 oz can green chilies
  • 1 15 oz can diced tomatoes with juice
  • 1 32 oz carton of chicken or vegetable broth
  • 1/2 lb pasta we used elbow pasta
  • 1/4 tsp oregano
  • Salt and pepper to taste
  • Optional: Garnish with parsley

Instructions
 

  • Cook pasta according to package directions, rinse in cold water to stop the cooking. Add 1 Tbs olive oil, stir, and set aside.
  • While the pasta is cooking, heat oil and butter in a large stock pot over medium heat. Add carrots and peppers, cook about 3 minutes. Add onion, green chilies, and jalapeños, and cook about 5 more minutes or until tender. Add garlic, cook for one minute.
  • Add broth and tomatoes and bring to a boil. Reduce heat and simmer 20-30 minutes. Add oregano, and salt and pepper to taste.
  • Place noodles in bowls, ladle soup over the top, and serve. Garnish with parsley if you wish (or if you have leftovers in your fridge like me!)
  • I store leftover soup and noodles separately so the noodles don't get too soggy in the fridge.

Flour sack towel from The High Fiber – check out more of her gorgeous work at her Etsy shop!

Simple Vegetable Soup - thiswildseason.com -5

Filed Under: Main Course Tagged With: comfort food, easy recipe, simple recipe, soup, vegetarian

  • « Previous Page
  • 1
  • …
  • 11
  • 12
  • 13
  • 14
  • 15
  • …
  • 21
  • Next Page »

Hello there!

My name is Asharae. I’m a photographer by trade, wife to an amazing man, and mama to three little ones. I am passionate about creating good food, sharing meaningful conversation around the table, trying new things, and encouraging others to do the same.

Welcome to This Wild Season! This is a place for sharing what I’m learning in the kitchen and outside of it. Most of all, it is a challenge to myself and to you to slow down, be present in the moment, and re-learn how to savor food and conversation around the table.

About

Search

Connect

  • Facebook
  • Instagram
  • Pinterest
  • Twitter
  • Vimeo

Find my book on Amazon:

Recent Posts

  • Emmeline’s Birth Story, The Story of Her Name
  • Emmeline’s Birth Story, Birth Day Part 2
  • Emmeline’s Birth Story, Birth Day Part 1
  • Emmeline’s Birth Story, My Pregnancy
  • Emmeline’s Birth Story, An Introduction
Follow on Bloglovin
Visit This Wild Season's profile on Pinterest.

Copyright © 2025 · Foodie Child Theme by Shay Bocks · Built on the Genesis Framework · Powered by WordPress