This Wild Season

Sharing what I'm learning in the kitchen as well as outside of it.

Navigation
  • Home
  • Blog
  • Recipes
    • Appetizer
    • Breakfast/Brunch
    • Side Dish
    • Main Course
    • Dessert
    • Drinks
    • Personal
  • About

Blueberry Syrup

July 29, 2014 by Asharae 2 Comments

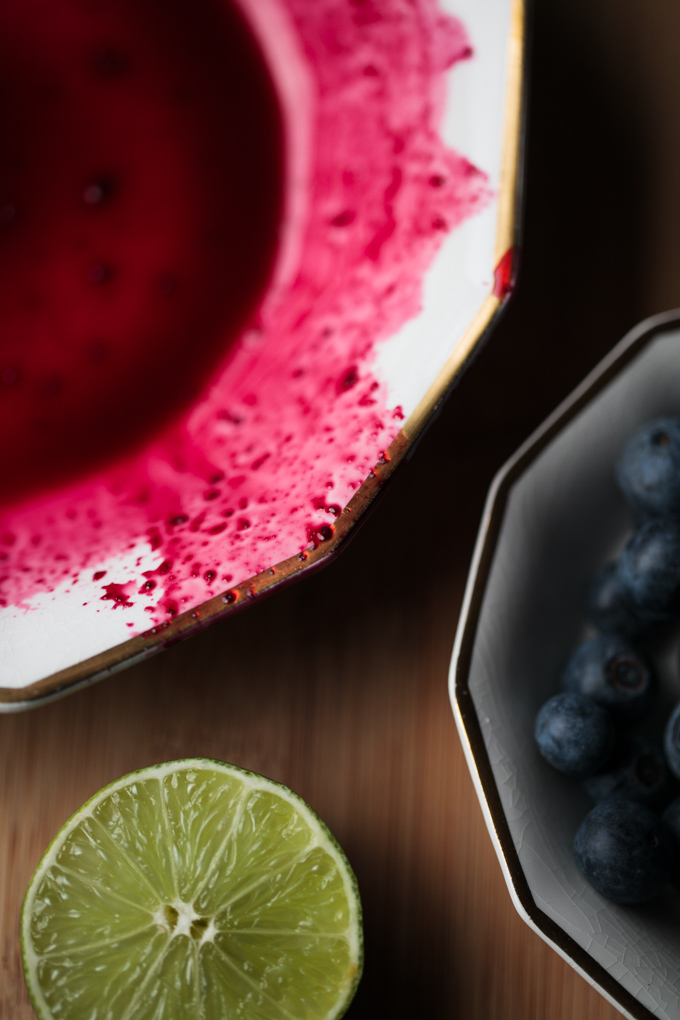
Blueberry-picking season has come and gone where we live in North Carolina, but if you live a little further north you’ve still got time to find a local blueberry patch and pick your own! A couple weekends ago we heard about a blueberry farm just a few minutes from our house, so we got up on Saturday morning and came home $11 lighter and nearly 4 pounds of blueberries richer!

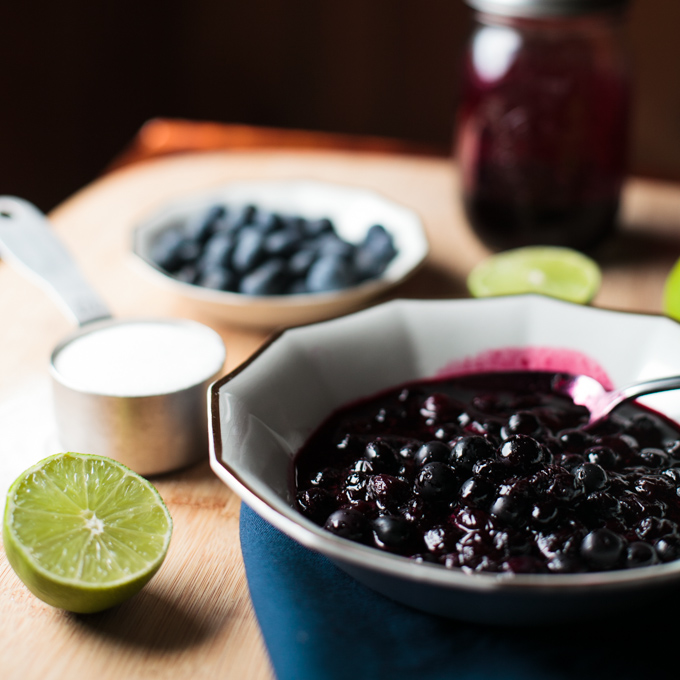
Our first order of business was to make crepes and blueberry syrup to go with. Tim is the crepe-master, and the only one of us with enough patience to make a whole batch of crepes and not get discouraged when the first two don’t turn out right. While he mixed up some batter, I looked up recipes for blueberry syrup and landed on this one. It seemed simple enough and didn’t call for any ingredients like corn syrup or corn starch, which I rarely have around. You only need three ingredients plus some water for this recipe – it really couldn’t be much simpler.

If you end up with extra blueberries like we did, you should enjoy them in pancakes or muffins, on top of yogurt, blended into homemade lemonade (SO good), or just eat them right out of the bowl.

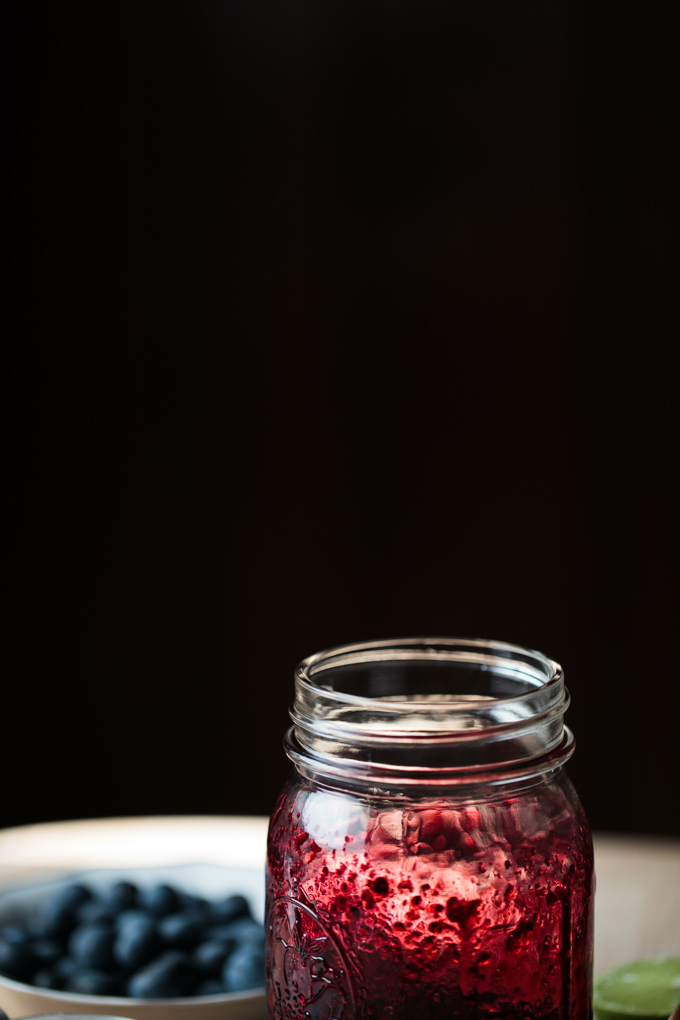
As for the blueberry syrup, it’s just as good on some vanilla ice cream for dessert as it is on pancakes, waffles, or crepes for breakfast!

Homemade-Blueberry-Syrup_This-Wild-Season-2 Homemade-Blueberry-Syrup_This-Wild-Season-3 Homemade-Blueberry-Syrup_This-Wild-Season-4 Homemade-Blueberry-Syrup_This-Wild-Season-5 Homemade-Blueberry-Syrup_This-Wild-Season-6 Homemade-Blueberry-Syrup_This-Wild-Season-7 Homemade-Blueberry-Syrup_This-Wild-Season-8

Blueberry Syrup

Recipe from Balancing Beauty and Bedlam
Print Recipe Pin Recipe

Ingredients
  

  • 2 cups of fresh or frozen blueberries
  • 1/2 cup water
  • 1/3 cup of sugar
  • 2 teaspoons lime or lemon juice

Instructions
 

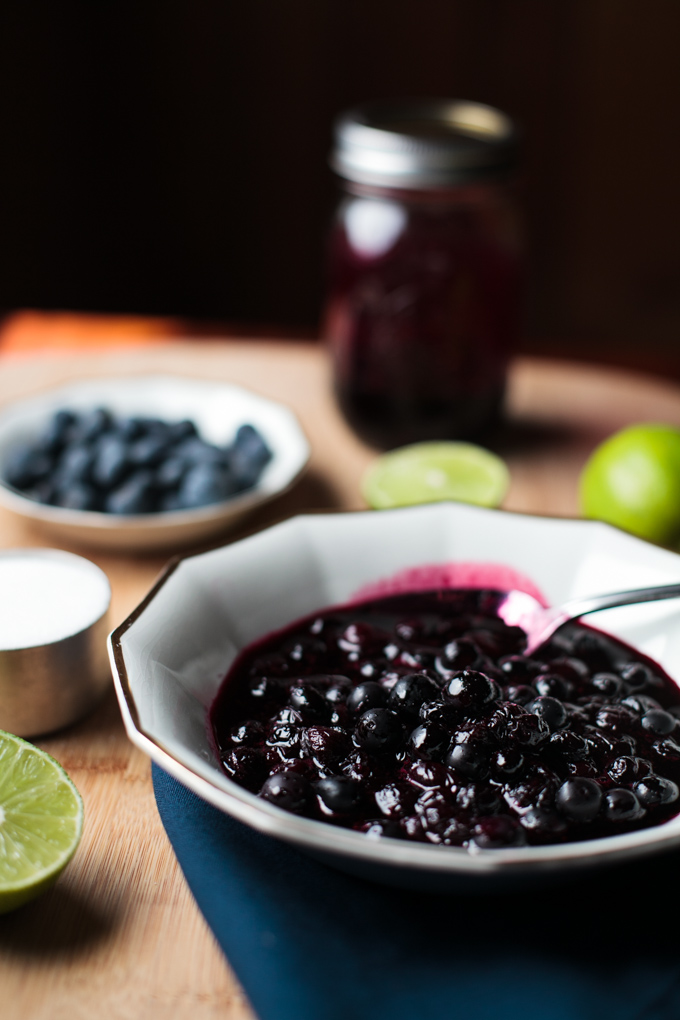
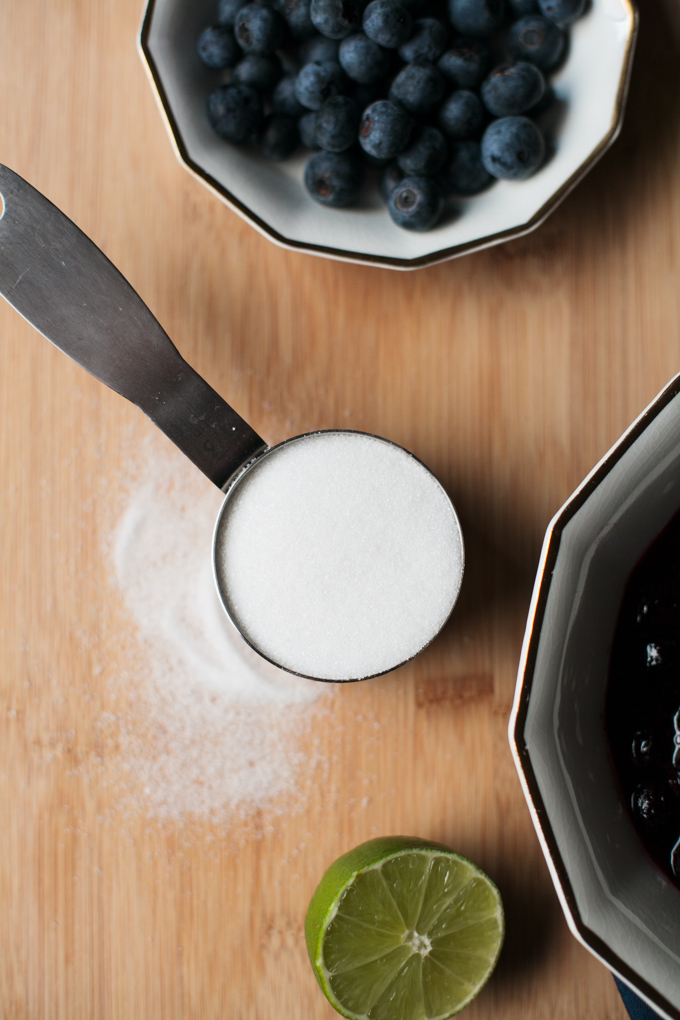
  • Combine one cup of blueberries, sugar, water, and lemon or lime juice in a small saucepan.
  • Cook and stir on medium heat for 2-3 minutes until the sugar dissolves.
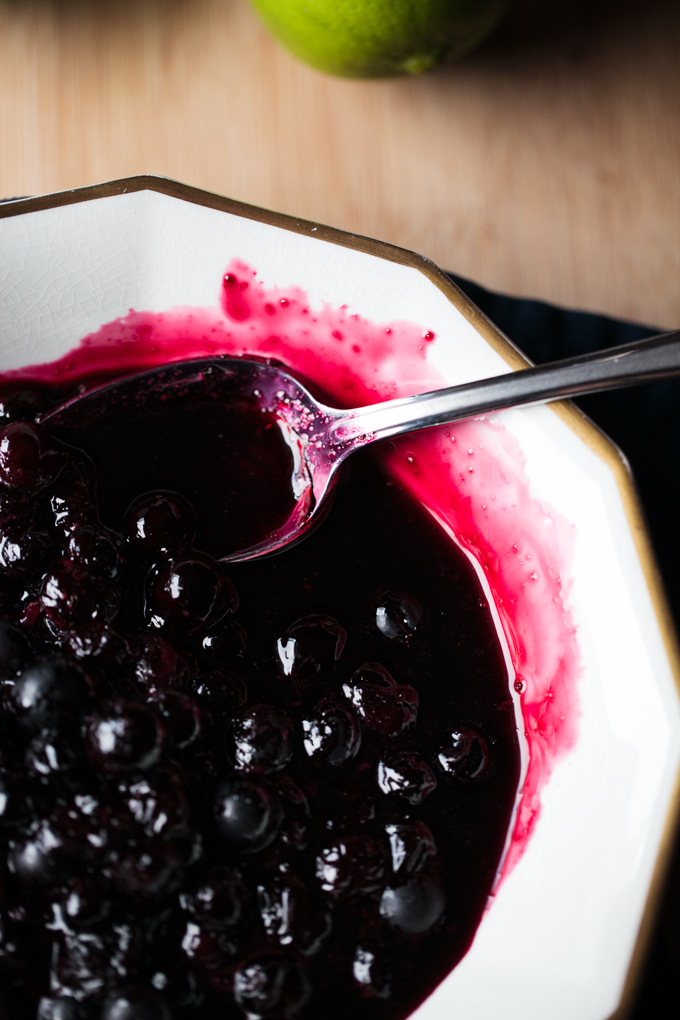
  • Bring to a boil, then reduce heat to low and simmer, uncovered for 15-20 minutes or until it begins to thicken. Stir occasionally. Blueberries may split while heating - that is okay!
  • Stir in remaining cup of blueberries and cook for 2-3 more minutes until blueberries become soft.
  • Serve warm with pancakes, waffles, crepes, ice cream, you name it!


Filed Under: Breakfast/Brunch Tagged With: blueberries, breakfast recipe, brunch recipe, syrup

Roasted Corn Salsa, Two Ways

July 25, 2014 by Asharae 2 Comments

This summer I was determined to find the perfect roasted corn salsa recipe. And, my friends, I thought I’d done it. I photographed this fabulous salsa recipe, was all excited to share it with you, and then a few weeks later – I tried another corn salsa recipe. And it was better. Way better in my opinion. So much better, in fact, that I figured I’d skip photographing it altogether and just share both recipes with you now! You can decide for yourself which one you like better – I determined that I prefer roasted bell peppers in my corn salsa instead of tomatoes. But if you’re a huge fan of tomatoes, you should probably test out both recipes. Just sayin’.

There are two different methods I’ll share for roasting corn, and they’re interchangeable depending on how much time you have, how much effort you’re willing to spend, and whether or not you have a grill. I prefer the slightly smoky flavor the grill gives the corn, but if you’re short on energy and/or a grill, feel free to roast those bad boys in the oven.

Roasted-Corn-Salsa_This-Wild-Season-2 Roasted-Corn-Salsa_This-Wild-Season-3 Roasted-Corn-Salsa_This-Wild-Season-4 Roasted-Corn-Salsa_This-Wild-Season-5 Roasted-Corn-Salsa_This-Wild-Season-6 Roasted-Corn-Salsa_This-Wild-Season-7

Roasted Corn Salsa, With Tomatoes

Adapted from Minimalist Baker
Print Recipe Pin Recipe
Prep Time 20 mins
Cook Time 20 mins
Total Time 40 mins
Servings 3 -4

Ingredients
  

  • 4 ears of corn shucked and silks removed
  • Olive oil
  • 1/4 of a red onion finely diced
  • 2 medium tomatoes seeded and diced
  • 1 jalapeño seeded and diced (I leave a few seeds to give the salsa a little heat)
  • Handful of cilantro finely chopped
  • Juice of 1-2 limes
  • Salt and Pepper to taste

Instructions
 

  • Place corn on a rimmed baking sheet that is lined with tin foil (for easier cleanup). Drizzle with olive oil and salt and pepper. Broil in the oven 15-20 minutes, or until corn kernels begin to char. Check every few minutes and use a set of tongs to turn the ears of corn as needed. Remove from the oven and let cool. Use a knife to carefully cut the kernels away from the cob. I like to stand each ear up on its end in a large bowl, I hold onto the top of the ear of corn, and use a knife to slice the kernels away - that way my fingers are safe and the kernels fall into the bowl, rather than fly all over the counter.
  • Combine the rest of the ingredients and let rest for 30 minutes or so in the fridge for the flavors to combine.

Roasted Corn Salsa, With Roasted Bell Peppers

Adapted from Simply Scratch
Print Recipe Pin Recipe

Ingredients
  

  • 4 Ears of corn shucked and silks removed
  • Olive oil
  • 1/2 orange bell pepper seeds removed
  • 1/2 red bell pepper seeds removed
  • 1/4 cup red onion finely diced
  • 1/4 cup fresh cilantro chopped
  • 1 Tbs pickled or fresh jalapeño diced (optional)
  • Juice of 1 lime
  • 1/2 tsp Kosher salt plus more to taste

Instructions
 

  • Brush each ear of corn and bell pepper half with olive oil and heat on the grill, turning occasionally until the kernels are charred to your liking and the bell pepper skins are charred as well. Remove from the grill and let cool. Carefully cut the kernels away from each ear of corn (see note on previous recipe for a helpful way to do that).
  • Use your fingers to peel the charred skin off each bell pepper (it doesn't have to be perfect - I leave some blackened bits for color). Dice the roasted bell peppers and combine with the rest of the ingredients.
  • Let the salsa rest in the fridge for 30 min or so for the flavors to get happy.


Filed Under: Appetizer, Side Dish Tagged With: roasted vegetables, salsa, tacos

Guest Post by Lily Dunn – Zucchini Lasagna

July 23, 2014 by Asharae Leave a Comment

Today I’m excited to have my dear friend Lily Dunn guest posting here on This Wild Season. Lily is a fabulous writer, so you should check out her blog Such Small Hands, as well as the travel blog she shares with her husband – Two Sore Thumbs.

I made this recipe to share with my family over the weekend and I can assure you that it is absolutely delicious! It got glowing reviews all around, including one from my dad who admitted it was the best lasagna he’d ever eaten. I confess I was a little hesitant to swap out noodles for zucchini instead, but I honestly enjoyed this recipe way more than regular lasagna! I have a distinct feeling this is the only way I’ll make lasagna from here on out.

And with that introduction, I’ll hand it off to Lily!

Eleven months ago my husband and I moved to South Korea to teach English. Living in a foreign country can feel exciting and adventurous, but there are still times when it’s hard not to be overcome by homesickness and longing for the comfortable and familiar. One of the best ways for me to feel connected to home is through food. I love to cook, especially for friends and family. Here in Korea, I don’t have access to the same ingredients or cooking methods I did at home (no ovens!) so I’ve had to make some creative adjustments and adaptations.

This lasagna is one of those recipes born from “creative adaptation.” It is special to me, not only because it’s so delicious, but because I have come to associate it with community. A few months ago I made this for a group of girls who were meeting for the first time, hoping to start a Bible study. My Wednesday nights with them have now become the best part of my week. When my parents visited at the beginning of May we went to lots of great restaurants and enjoyed some great meals, but one night we stayed home and I made this lasagna for them and we ate together sitting half on the couch and half at the table because we only have 2 chairs. After they left my mom sent me an email that said, “I asked Dad what his favorite food was that we tried while we were there. He mentioned a few restaurant meals we’d had, but then he said, ‘I think my favorite thing was Lily’s zucchini lasagna.’” Winning. 🙂

The zucchini actually replaces the pasta in this dish, so it’s a great option for those who eat gluten-free or low-carb as well as being a great somewhat lighter version of a well-loved comfort food. Since most of the flavor comes from the sauce and the cheese, and the zucchini itself doesn’t have a strong flavor, you really don’t miss the pasta. In fact, my husband, who is a lasagna aficionado but not a big vegetable eater, LOVES this dish. There’s a bit of prep time involved, but you can make it ahead of time and just pop it in the oven when you are ready to eat it. As they say in Korea, “잘먹겠습니다!” (jal meog-es-seub-ni-da – the Korean version of “Bon Apetit!”)

Zucchini-Lasagna_Lily-Dunn_This-Wild-Season-2 Zucchini-Lasagna_Lily-Dunn_This-Wild-Season-3 Zucchini-Lasagna_Lily-Dunn_This-Wild-Season-4 Zucchini-Lasagna_Lily-Dunn_This-Wild-Season-5 Zucchini-Lasagna_Lily-Dunn_This-Wild-Season-6 Zucchini-Lasagna_Lily-Dunn_This-Wild-Season-7 Zucchini-Lasagna_Lily-Dunn_This-Wild-Season-8

Cooking Notes:

The sweating process for the zucchini is very important. If you don’t do this you will end up with watery soupy gloop.

The original recipe calls for an egg added to the cheese mixture. I prefer it without the egg because I think it makes the cheese creamier. If you like the cheese part to be stiffer you can add one egg.

I add mushrooms to my sauce, but these are entirely optional.

I make this in a convection toaster oven since Korean kitchens don’t have ovens. Because of that I have to use a smaller pan (maybe 11’x7’?) I use the same amount of sauce and cheese mixture, but only 1 – 1 1/2 zucchinis.

This recipe calls for mozzarella, but I have trouble getting that here so I have been using a three-cheese blend and it’s delicious. I think you could really use any cheese, it will just change the flavor slightly.

Zucchini Lasagna

Lily Dunn / Adapted from Sandra M at Key Ingredient
Print Recipe Pin Recipe

Ingredients
  

  • 1 lb lean ground beef
  • 1/2 yellow onion diced
  • 3 cloves garlic minced
  • 1 cup white mushrooms chopped
  • 1 tsp olive oil
  • 1 jar of your favorite marinara sauce I use Classico’s Italian sausage and pepper for this and it is AMAZING
  • 2 large or 3 medium zucchinis
  • 15 oz part-skim ricotta cheese
  • 16 oz shredded part-skim mozzarella or other cheese + 1/2 cup to sprinkle on top
  • 1/4 cup grated parmesan

Instructions
 

  • In a large saucepan, brown the ground beef. Drain, rinse, and set aside.
  • In the pan you used to brown the meat, heat the olive oil. Add the garlic, onions, and mushrooms and sauté until the onions are soft. (2-3 minutes)
  • Add the ground beef and marinara sauce. Bring to a boil, then turn down to low and simmer for 45 – 50 minutes. The sauce is meant to thicken quite a bit. Do not add any water.
  • Meanwhile, slice the zucchini lengthwise into long lasagna-noodle shaped strips (about 1/8 inch thick). I use a vegetable peeler for this. Lay the zucchini slices out on paper towels and sprinkle with salt. Allow the zucchini to “sweat” for 20 minutes. Then pat dry to remove excess moisture.
  • In a large bowl, combine ricotta, parmesan, and shredded mozzarella.
  • Spread a thin layer of sauce in the bottom of an 8’x12’ casserole dish –just enough to coat the bottom. Top with a layer of zucchini. (If some of your zucchini pieces are very thin, you can double them up). Finish with a layer of cheese mixture. Continue to layer in this order until your ingredients are used up, finishing with a layer of sauce and the remaining 1/2 cup of mozzarella cheese. (I usually get two complete layers)
  • Cover with foil and bake at 375 for 45 minutes or until the center is hot. Uncover and bake for an additional 15 minutes. Let stand 5-10 minutes before serving.

Lily Dunn is mastering the art of toaster oven cooking in Daegu South Korea where she and her (devastatingly handsome) husband Jonathan teach elementary school English. Lily writes about life, faith, and searching for grace at Such Small Hands. She and Jonathan also share a blog about expat life in Korea at Two Sore Thumbs. You can follow her on Twitter at @LilyEllyn.

Filed Under: Main Course Tagged With: comfort food, crowd pleaser, Guest Post, Italian, lasagna

Cucumber and Tomato Salad

July 21, 2014 by Asharae 1 Comment

Last week when I shared a recipe for tzatziki, I promised it would soon be followed with this cucumber and tomato salad recipe. One of my favorite meals includes naan, tzatziki, one of a few variations of spicy chicken (like this recipe), and this tomato and cucumber salad.

I prefer tearing off a piece of naan and scooping up all the flavors into one big bite. Somehow it’s more satisfying than using a fork. It almost feels like finger painting – you remember the one day in kindergarten when you were allowed to make a mess, it was okay to have your hands completely covered in paint, the colors oozing between your fingers as you balled up your little fist, trying to make that squelchy noise we all took so much joy in.

That’s what this meal is to me. It’s getting familiar with your food, being okay with the tomato and cucumber bits that fall off the naan, back onto your plate. Or sometimes they miss your plate and tumble onto the floor where the dog happily cleans up your mess. You may end up with tomato juice running through your fingers and down your arm, but it won’t matter. What matters is that you’re enjoying good food with the people you love. And the people you love don’t care if you make a mess and have red wine vinegar dribbling down your chin.

Let’s all get out the finger paint and make a mess, shall we?

Cucumber-and-Tomato-Salad_This-Wild-Season-2 Cucumber-and-Tomato-Salad_This-Wild-Season-3 Cucumber-and-Tomato-Salad_This-Wild-Season-4 Cucumber-and-Tomato-Salad_This-Wild-Season-5 Cucumber-and-Tomato-Salad_This-Wild-Season-6

Cucumber and Tomato Salad

Print Recipe Pin Recipe

Ingredients
  

  • 1 cucumber peeled, seeded, and diced
  • 3-4 medium tomatoes diced (I prefer to remove the seeds as well)
  • 1/4 c red onion finely chopped
  • 1.5 Tbs red wine vinegar
  • 1 Tbs lemon juice
  • 1 Tbs olive oil
  • 1 tsp honey
  • 1/4 tsp salt
  • 1/8 tsp pepper
  • Feta mint, and kalamata olives for serving (optional)

Instructions
 

  • Whisk together red wine vinegar, lemon juice, olive oil, honey, salt and pepper.
  • Combine with the rest of the ingredients and place in fridge till ready to serve.
  • (Optional) Top with feta, mint, and kalamata olives right before serving.


Filed Under: Appetizer, Side Dish Tagged With: cucumber, easy recipe, easy side dish, shared meals, simple recipe, tomato, vegetarian

Tzatziki. And the benefit of personality tests.

July 18, 2014 by Asharae 2 Comments

Tim and I are always intrigued by (ahem, obsessed with) our Myers-Briggs test results. We were RAs in college together when we first took the test to understand ourselves better and learn how our individual personalities would best thrive in leading a floor of college students. Since then we’ve seen our results only shift slightly, depending on our circumstances, jobs or lack thereof, and general season of life we happen to be in at the time. Tim and I come back to our results over and over because they help us better understand the way we each think and operate. Our results provide a framework for us to talk about our marriage, our business, our families, and how we interact with and understand each of these things. I’m INFP and Tim is ESFJ, if you really want to know.

Last year a good friend of ours recommended the Strengths Finder test – he even bought two books for us so Tim and I could each take the test! I gave mine away to my brother as he was in the midst of job searching and applying to grad schools at the time, so I didn’t end up taking the test until last week. The results were fascinating to me, and comparing my strengths to Tim’s was even more interesting.

The test is a simple one – 177 questions where you choose from one of two phrases or sentences that resonates with you the most. It only takes about a half-hour, and at the end they provide you with 5 strengths – the things you’re gifted at, the areas you excel in. If you purchase the book which includes descriptions of all the strengths, you get one voucher to take the test online. If you’d rather just see your own 5 strengths, you can take the test online for around ten dollars. I promise Strengths Finder isn’t paying me to tell you this! Hah! We’ve just found it so valuable that I think everyone should take it! I believe it’s valuable for your friendships, your marriage, your workplace, and the ways that these relate to one another and how you relate to each of them.

One of the most valuable take-aways for me after doing the test was seeing that Tim and I both have the strengths that this test labels “Empathy” and “Developer.” Out of 34 different strengths this test names, we share those two. I began to think about how Empathy (the ability to sense the emotions of those around you) and Developer (the ability to see the potential in others and take great joy in seeing others grow) relate to owning our own photography and videography business, the ways that we work with our couples, and how we can maximize our strengths to better serve others and dream bigger. I don’t have a conclusion yet – I feel like we’re just getting started. But as we begin to unpack all of these thoughts and brainstorm what all of it could mean, I’m excited to see where it leads us.

Have I convinced you yet? Will you take the Myers Briggs and Strengths Finder tests? I’m certain we could all stand to learn a little more about ourselves and how we interact with and understand the world and the people around us.

Tzatziki_This-Wild-Season-2
The other night we invited my parents over for dinner. We sat around the table eating good food and chatting about many things – our “strengths” included. I especially love looking at the two of them, seeing the areas they excel in and the things they’re gifted at. I’m endlessly fascinated by the traits I inherited from each of them (that sounds horrendously narcissistic, I know, I know.) Really it just fascinates me how the human brain is a little sponge that soaks up and adapts and reacts to its environment.

Somehow in all my years growing up I inherited some of my dad’s love of dreaming about the future, his compassion and love of animals, his desire to carefully craft each and every thing he sets his mind to creating or building, and even some of his fondness for making up silly lyrics to well-known songs. And somewhere along the way I also got my mom’s penchant for crafting all the things, a fraction of her determination and dedication to projects and causes she believes in, and her deep love of those around her and her desire to see each of them grow. I love that I’m finally starting to be able to put words to these traits, understand a little about where they came from, and begin to wonder how they’ll be used in the long run.

I made this recipe the other night when we had my parents over, and it’s one I make often – tzatziki might be one of my favorite foods. And I’m okay with that. If we ever have leftover tzatziki, you can find me hovered over the sink, using tortilla chips to scoop out every last morsel of this garlicy-minty-goodness the next day. And GARLICY it will be. Stay away from friends, family, pets, you name it, if you’re eating this on the second day. The garlic “flowers” overnight and becomes much stronger. But I’m okay with that too. Gotta keep those vampires away somehow right?

Tzatziki_This-Wild-Season-3 Tzatziki_This-Wild-Season-4 Tzatziki_This-Wild-Season-5 Tzatziki_This-Wild-Season-6

Be sure to check out the links below the recipe to see what else I served with tzatziki this past Wednesday night!

Tzatziki

Asharae Kroll
Print Recipe Pin Recipe

Ingredients
  

  • 1 c plain Greek yogurt
  • 1 large cucumber peeled, seeded, and finely chopped (you can grate the cucumber but I'm too lazy for that)
  • 1/2 tsp kosher salt
  • 1 clove garlic minced
  • 1/8 tsp pepper
  • Juice from 1/2 lemon
  • 1/4 c mint finely chopped

Instructions
 

  • (Optional step) Place finely diced (or grated) cucumber in a sieve over a bowl and sprinkle with 1.5 tsp salt. Stir and let sit for 20 minutes or so. Press the water out of the cucumber with the back of a spoon and shake the sieve to release the water. If you do this step, you'll likely not need to add salt later on.
  • Combine cucumber with the rest of the ingredients and place in the fridge till ready to serve.
  • Note: the garlic will "flower" over time and the flavor will be much stronger the next day. I recommend serving to guests the day it's made, and staying away from friends if eating it the next day 😉

Make it a meal! We served tzatziki with the following:

Grilled chicken with tikka masala spices – Recipe from The Perfect Pantry

Cilantro Mint Chutney – Recipe from Spice Roots

Cucumber Tomato Salad – My own recipe! You can find it here!

Naan – Store-bought this time. I’m working on perfecting my naan-making skills 😉 Let me know if you have a good recipe!

Filed Under: Side Dish Tagged With: easy recipe, easy side dish, personality tests, simple recipe, vegetarian

  • « Previous Page
  • 1
  • …
  • 14
  • 15
  • 16
  • 17
  • 18
  • …
  • 21
  • Next Page »

Hello there!

My name is Asharae. I’m a photographer by trade, wife to an amazing man, and mama to three little ones. I am passionate about creating good food, sharing meaningful conversation around the table, trying new things, and encouraging others to do the same.

Welcome to This Wild Season! This is a place for sharing what I’m learning in the kitchen and outside of it. Most of all, it is a challenge to myself and to you to slow down, be present in the moment, and re-learn how to savor food and conversation around the table.

About

Search

Connect

  • Facebook
  • Instagram
  • Pinterest
  • Twitter
  • Vimeo

Find my book on Amazon:

Recent Posts

  • Emmeline’s Birth Story, The Story of Her Name
  • Emmeline’s Birth Story, Birth Day Part 2
  • Emmeline’s Birth Story, Birth Day Part 1
  • Emmeline’s Birth Story, My Pregnancy
  • Emmeline’s Birth Story, An Introduction
Follow on Bloglovin
Visit This Wild Season's profile on Pinterest.

Copyright © 2025 · Foodie Child Theme by Shay Bocks · Built on the Genesis Framework · Powered by WordPress