This Wild Season

Sharing what I'm learning in the kitchen as well as outside of it.

Navigation
  • Home
  • Blog
  • Recipes
    • Appetizer
    • Breakfast/Brunch
    • Side Dish
    • Main Course
    • Dessert
    • Drinks
    • Personal
  • About

Honey Wheat Bread for the Bread Machine

April 21, 2016 by Asharae 3 Comments

Today I’m sharing a recipe that has become the go-to bread in our kitchen. Several years ago I “borrowed” my mom’s bread machine and somehow just haven’t given it back yet. The bread machine is one of those weird kitchen appliances that takes up entirely too much room, and is really only good for one purpose, but I really do think it’s worth its weight in gold.

Homemade bread is approximately 1273 times more delicious than store-bought bread, and the bread machine makes it so much more attainable. If I was kneading bread by hand or even watching it in my KitchenAid Mixer, I would rarely make it. With the bread machine I make bread almost every week. It’s so easy to throw all the ingredients in, push a few buttons, and forget about it for an hour and a half. I do prefer to use my machine to knead the dough and do the first rising, but then I bake it in the oven in a regular 5×9 loaf pan.

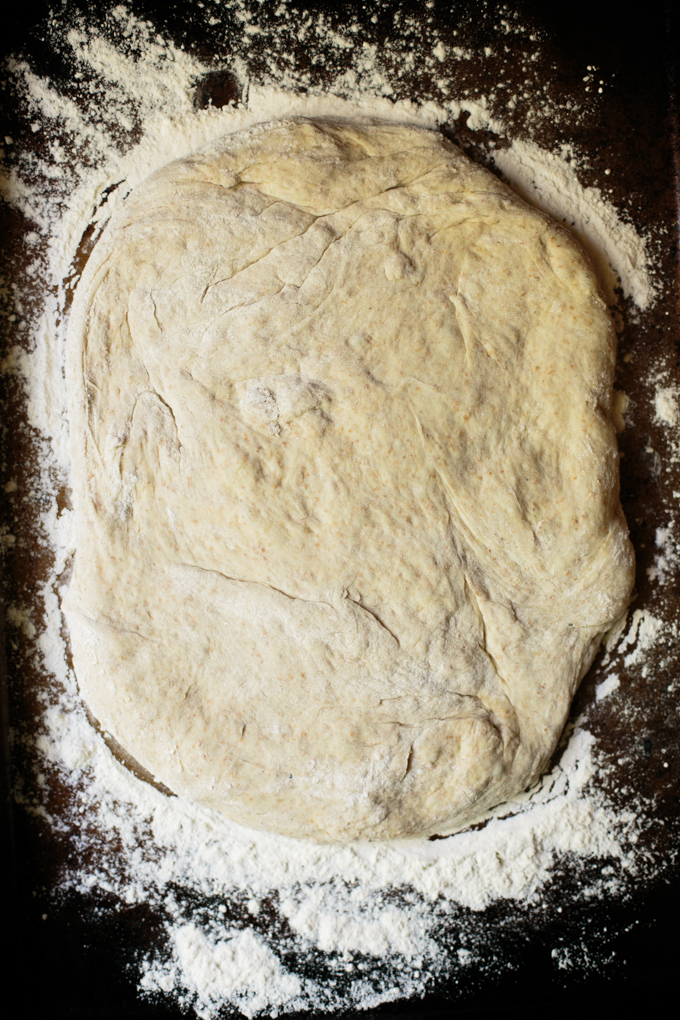
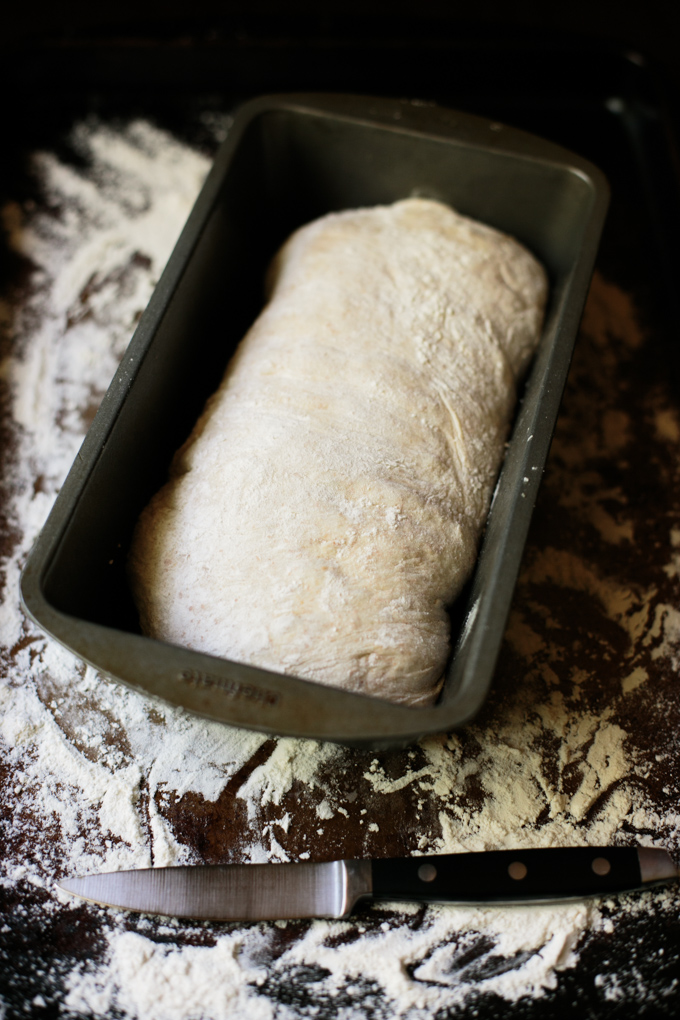
After the dough has completed its cycle, you just remove it from the bread machine pan and pat it out on a floured surface (I like to flour a rimmed baking sheet because it makes for easy clean-up!) You want your dough to be roughly rectangular, and about the length of your well-greased 5×9 loaf pan. Don’t think too much about this though – it doesn’t have to be perfect!

Honey Wheat Bread Recipe for the Bread Machine by This Wild Season -2

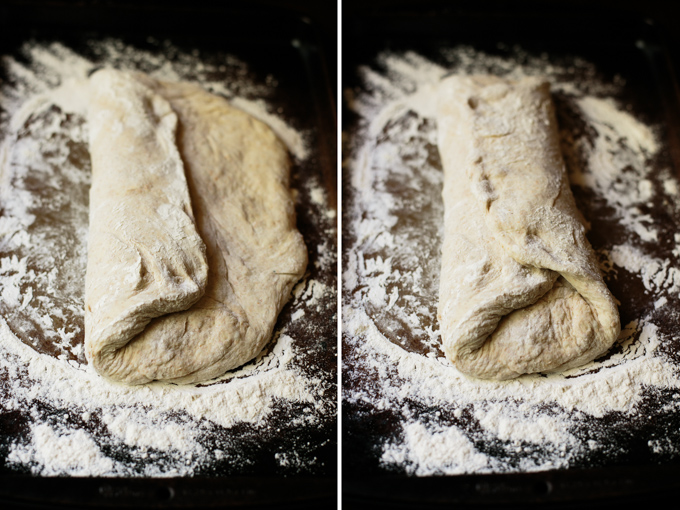
Once you’ve patted the dough out, fold it into thirds. Look! It’s a little bread burrito!

Honey Wheat Bread Recipe for the Bread Machine by This Wild Season -3 Honey Wheat Bread Recipe for the Bread Machine by This Wild Season -4

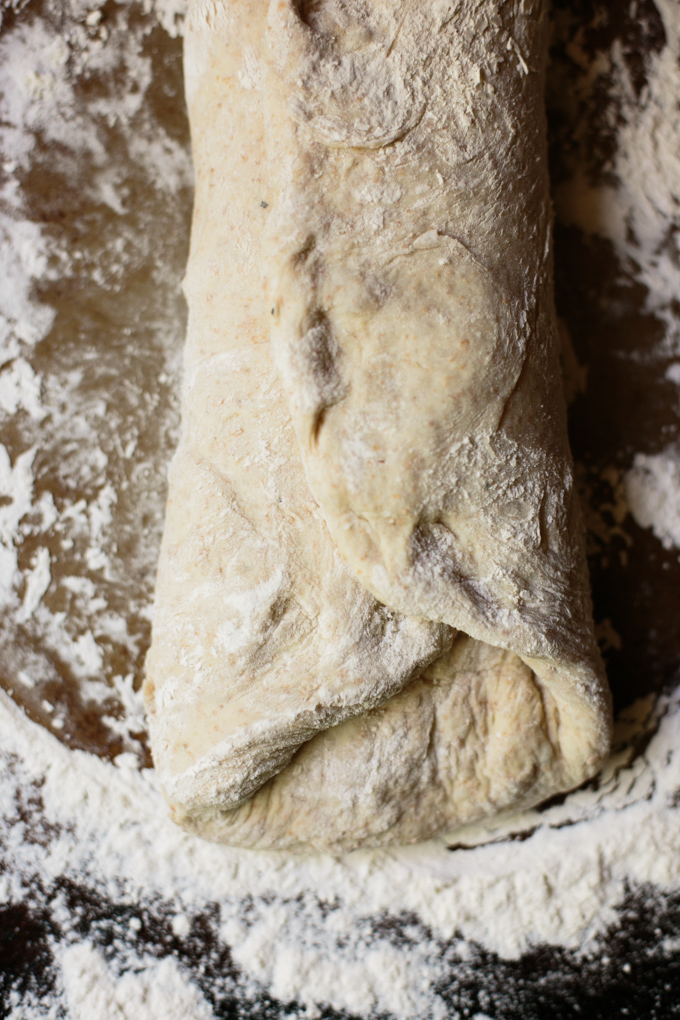
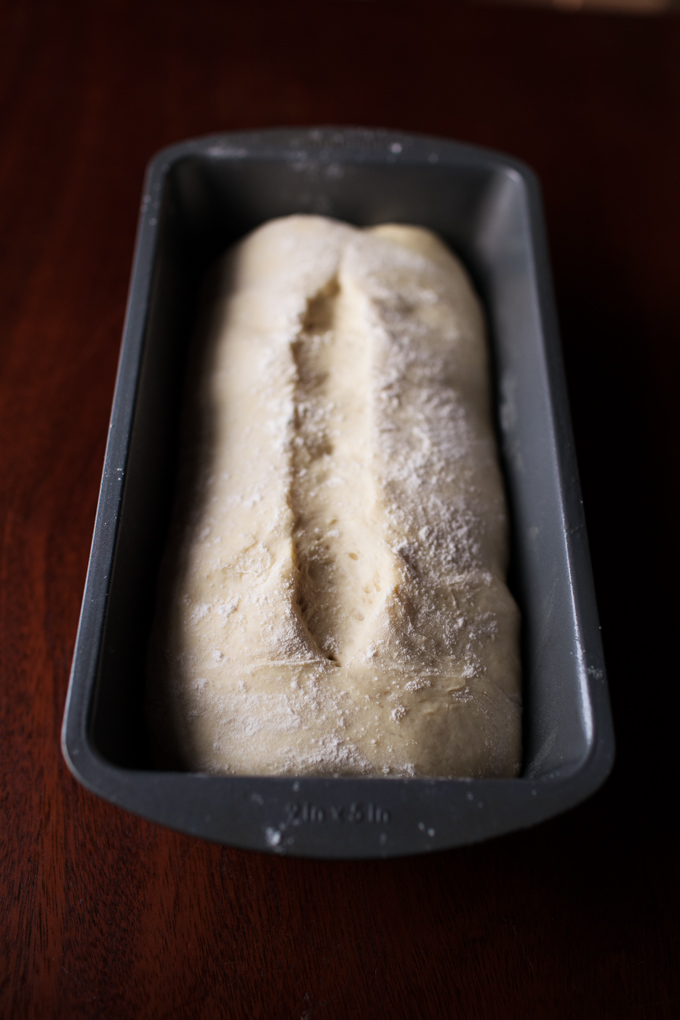
Once your dough is folded, gently lift it and flip it into your greased bread pan so that the seam or fold is on the bottom.

Honey Wheat Bread Recipe for the Bread Machine by This Wild Season -5

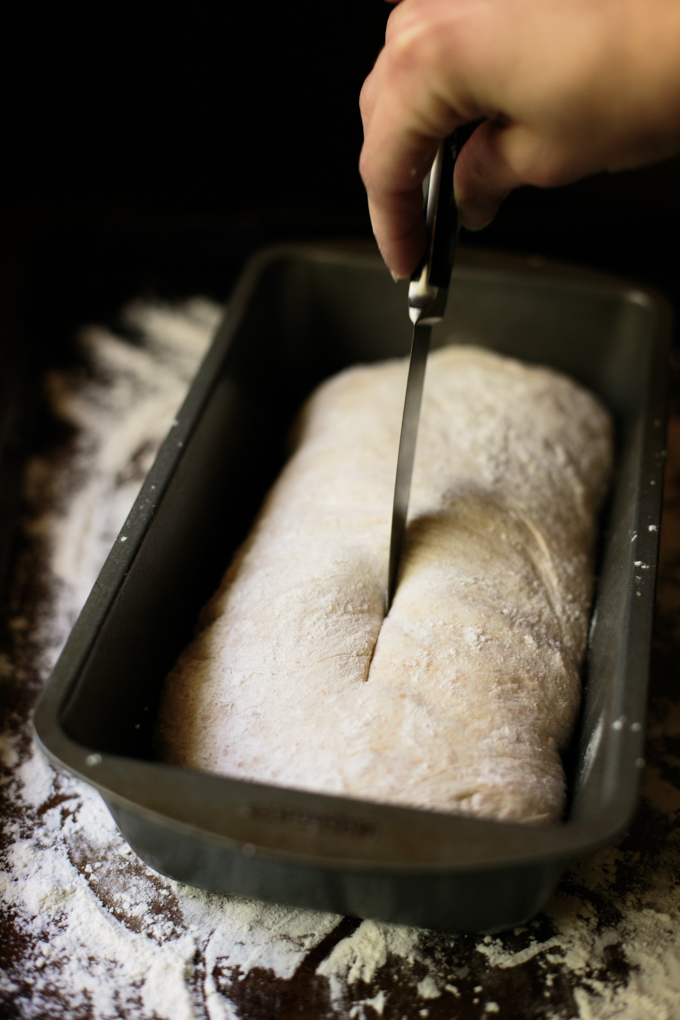
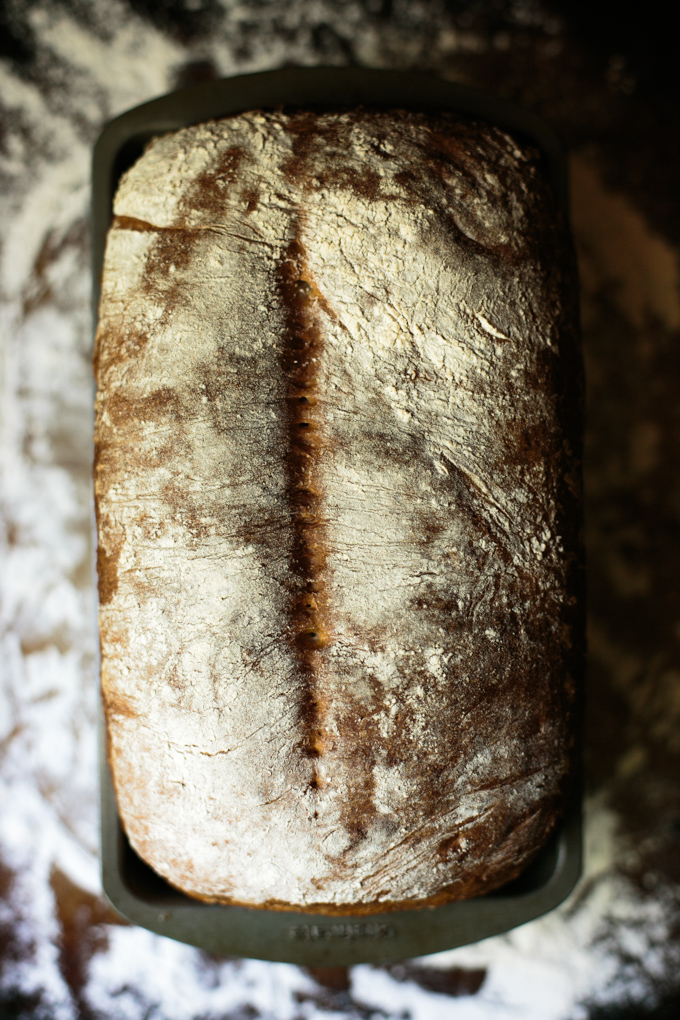
Use a knife to make a shallow (about 1/4 inch deep) cut in the top of your bread. This will allow space for it to expand while it rises a second time.

Honey Wheat Bread Recipe for the Bread Machine by This Wild Season -6

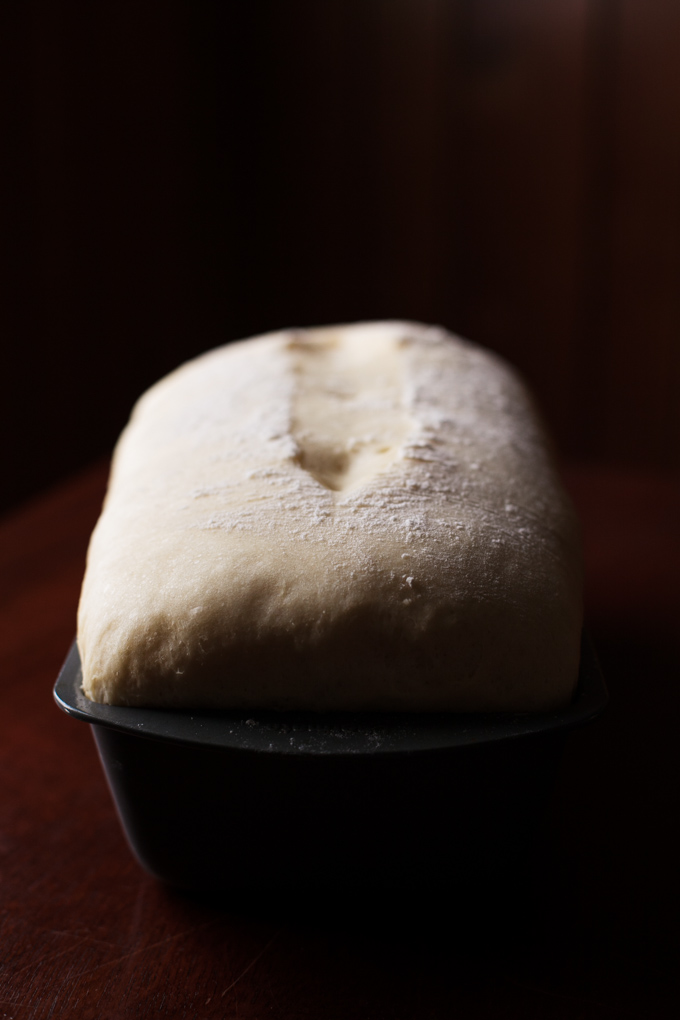
At this point we wait again. Time to let the dough rise. Set it aside in a warm place till it looks about the size you want it to be once baked. My method for this is to heat my oven up slightly and then shut it off. I put the dough in for about 25 minutes before removing it. This speeds up the rising process quite a bit, especially if your house tends to be cold.

Honey Wheat Bread Recipe for the Bread Machine by This Wild Season -7

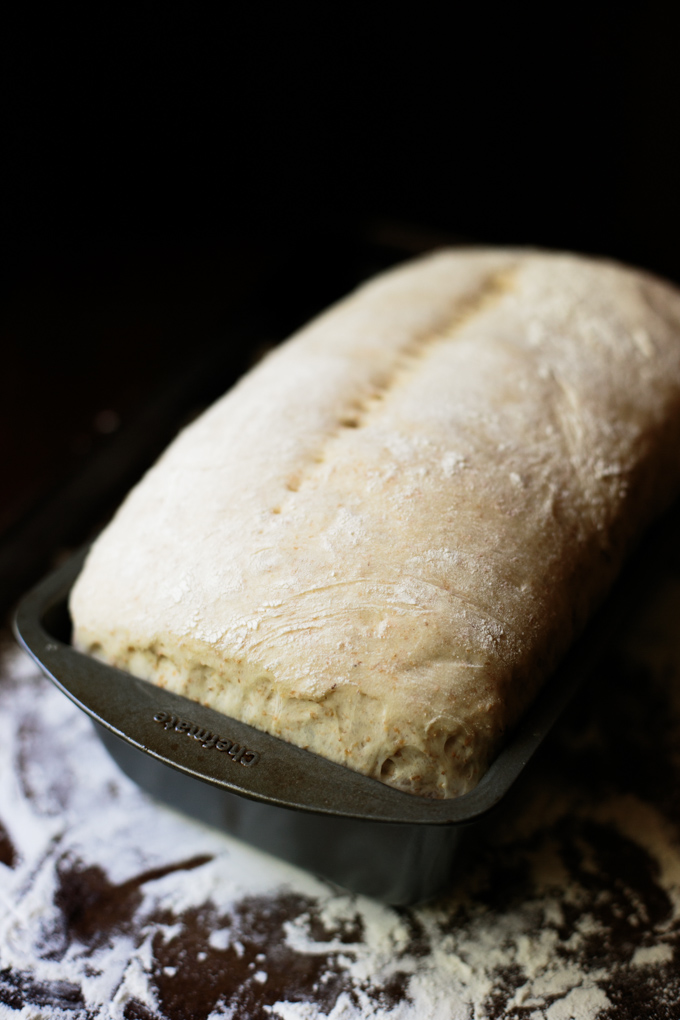
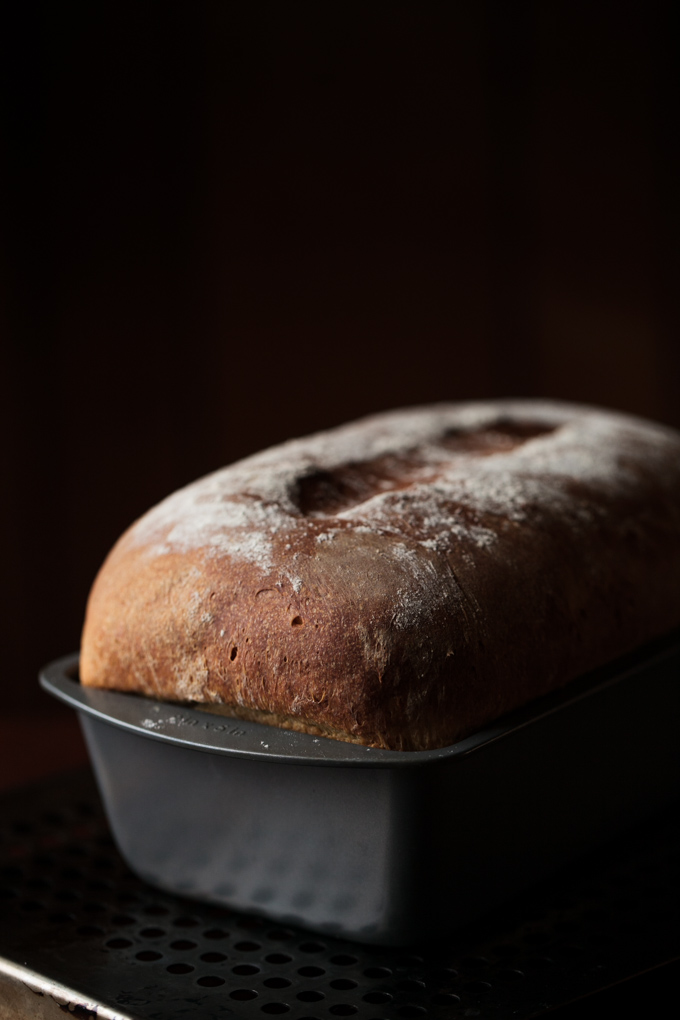
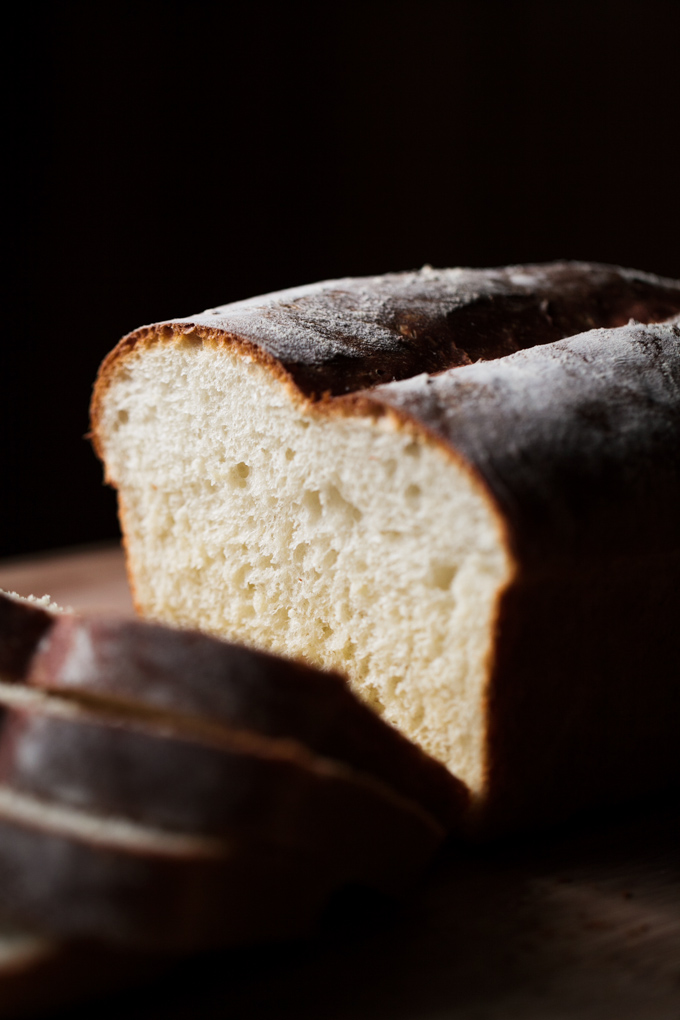
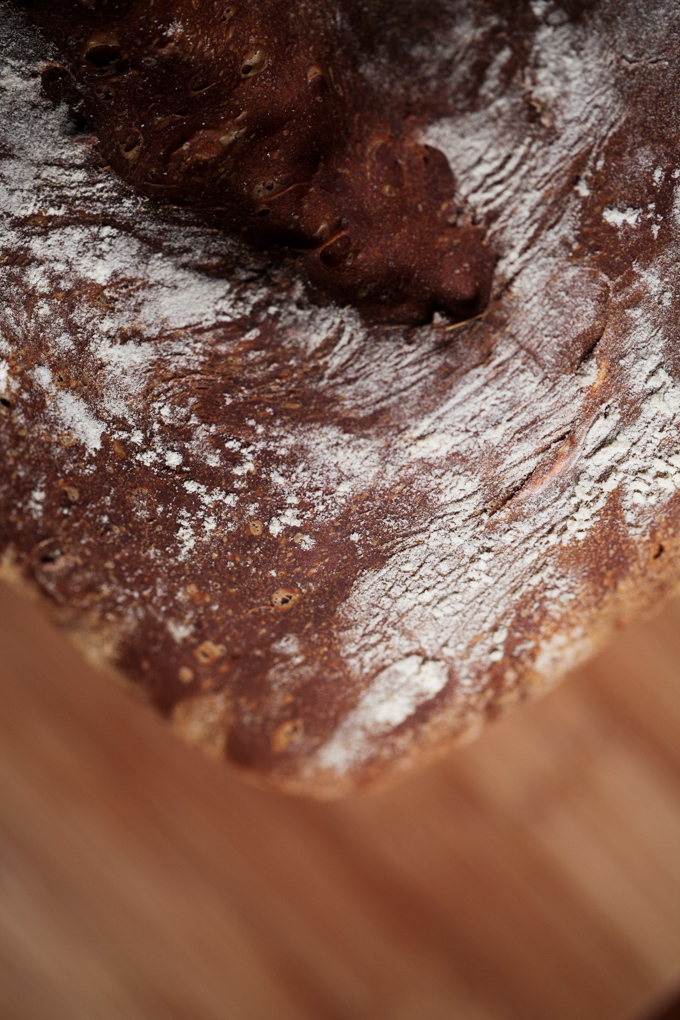
Once the dough is almost the size you want it to be when finished, remove it from the oven so you can preheat it to 375 F. Once the oven is good to go, put your dough in for 25 minutes. It’s finished when browned on top and hollow-sounding when tapped with your finger.

Honey Wheat Bread Recipe for the Bread Machine by This Wild Season -8 Honey Wheat Bread Recipe for the Bread Machine by This Wild Season -9

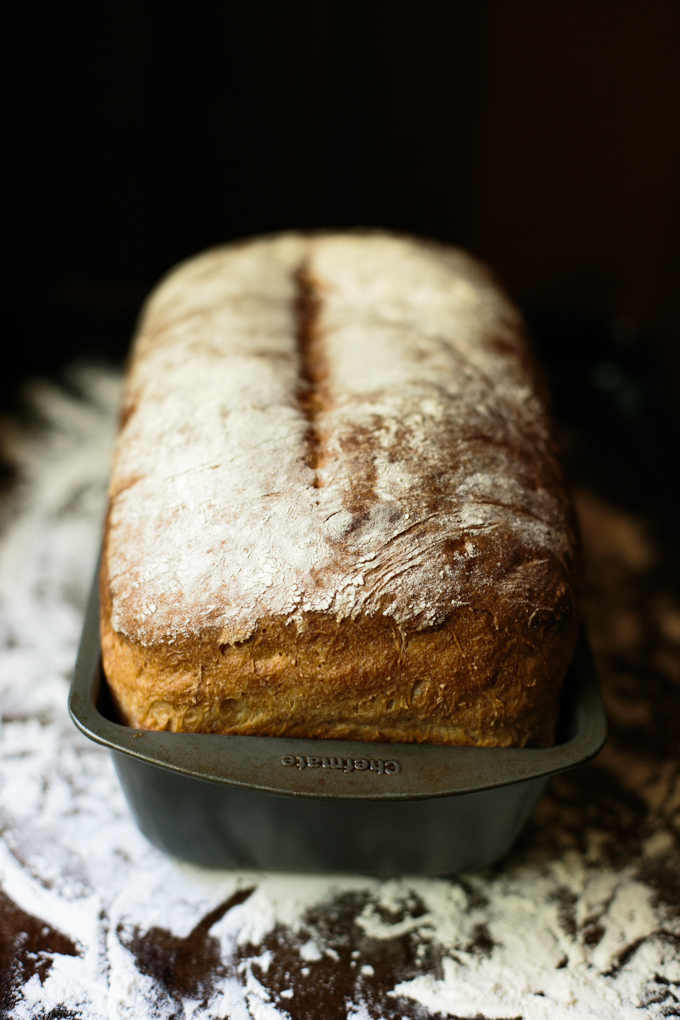
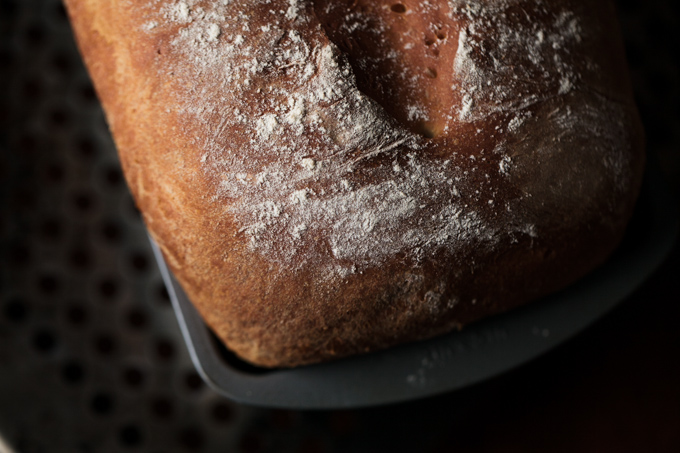
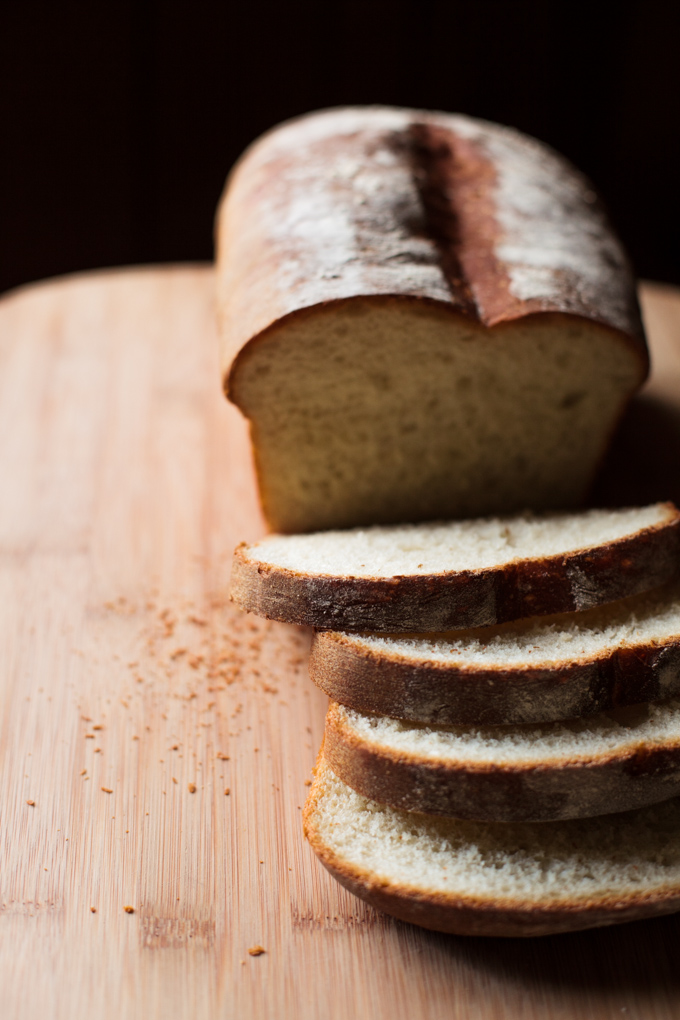
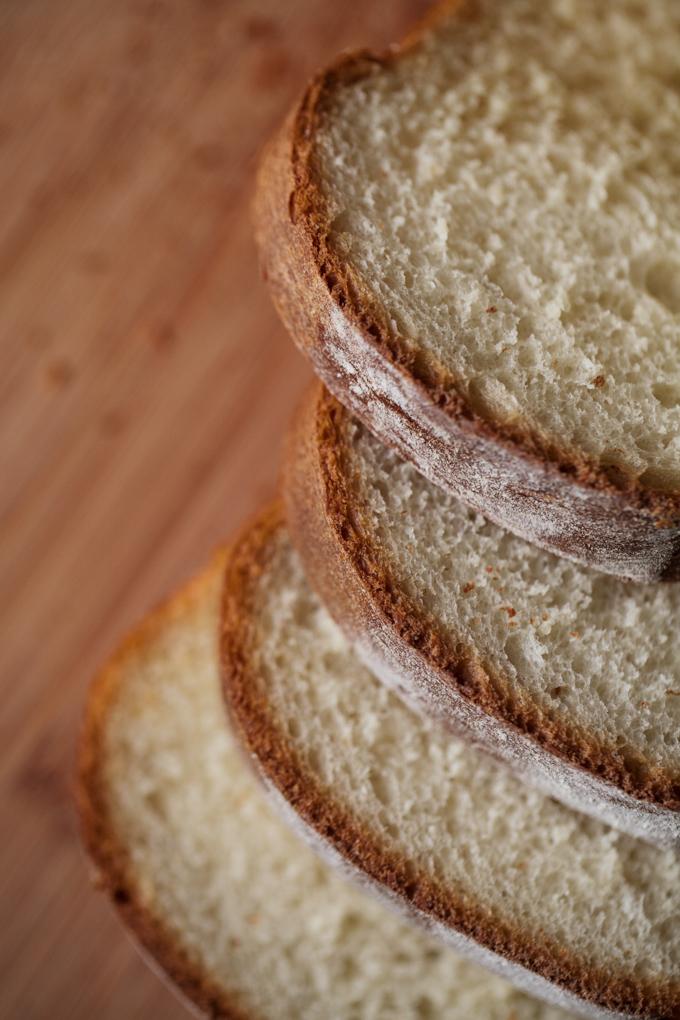
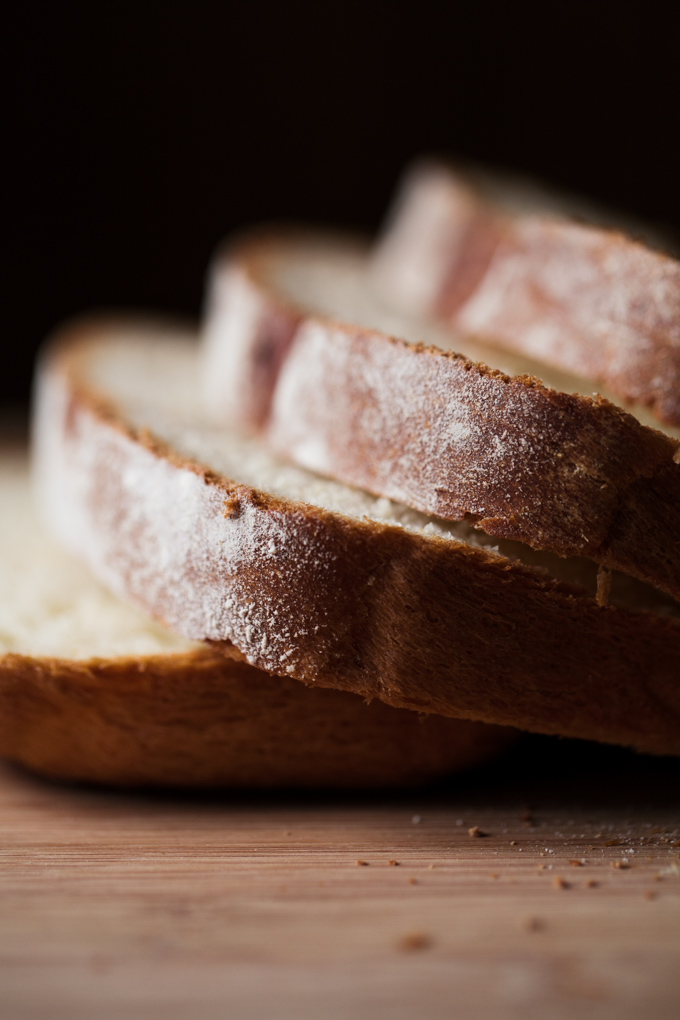
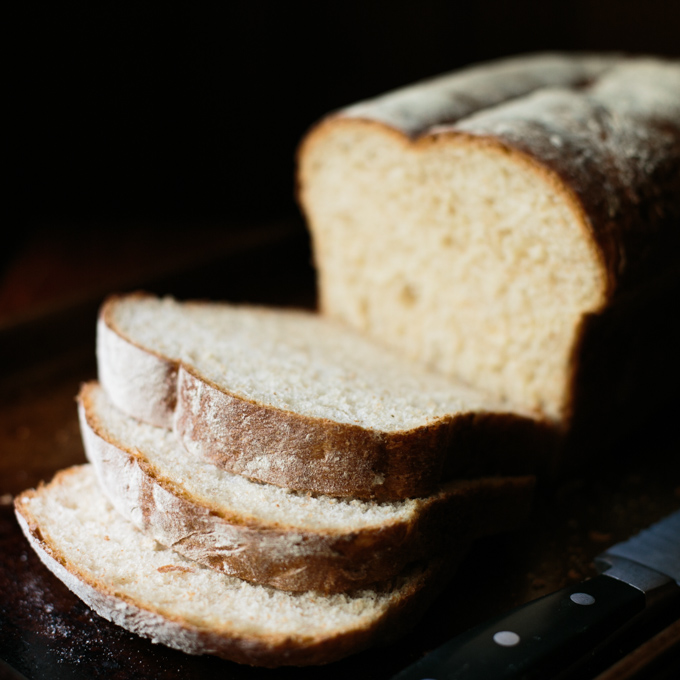
Carefully remove the bread from the pan and let it cool completely before cutting it. If you have a cooling rack, that’s perfect for this. If you place your bread flat on a plate, it can get soggy on the bottom as the steam from the bread will condense on the plate as it cools. And no one likes soggy bread.

Honey Wheat Bread Recipe for the Bread Machine by This Wild Season -10 Honey Wheat Bread Recipe for the Bread Machine by This Wild Season -11

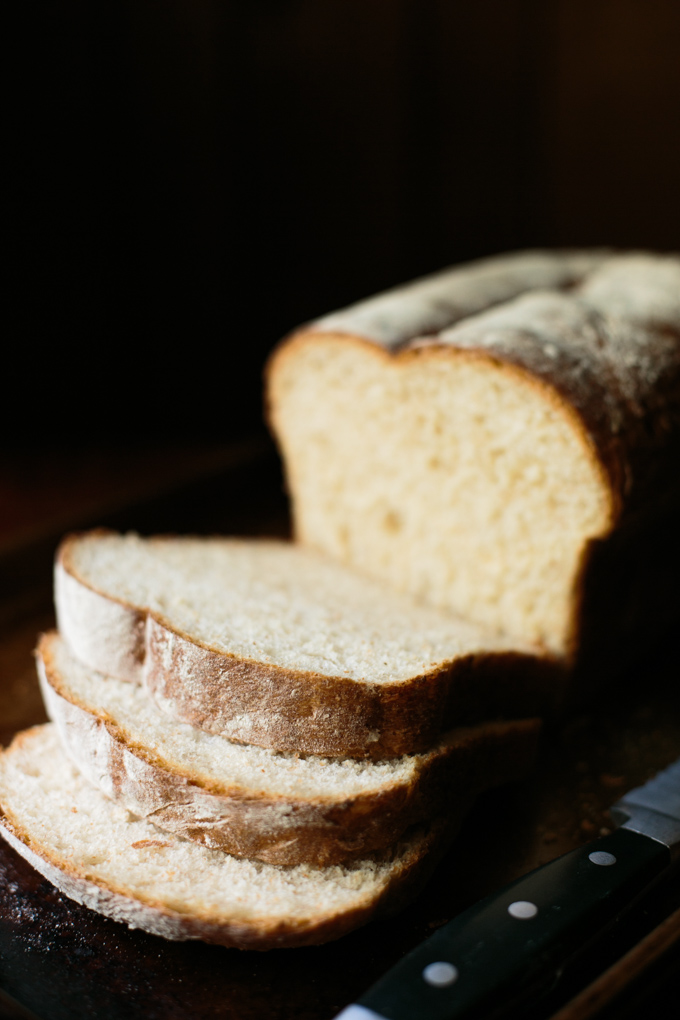
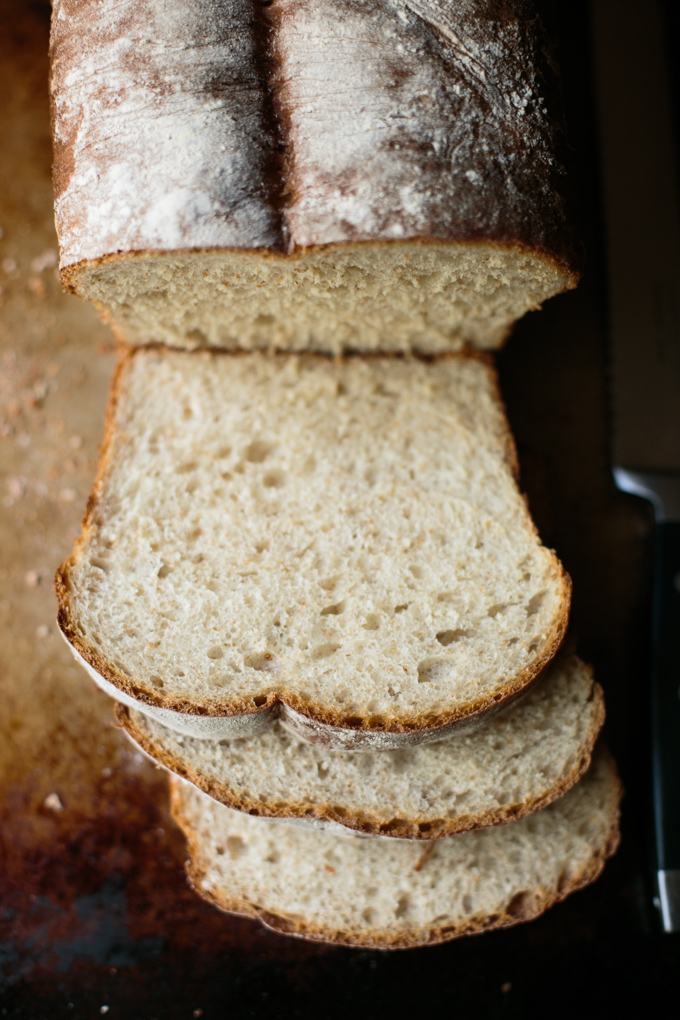
Mmmm. Fresh-baked bread perfection. That wasn’t so difficult was it?

If you’ve got a bread machine, use it! If your mom or grandma has a bread machine, borrow it! You can thank me later. This bread is perfect for sandwiches, grilled cheese, french toast, and even just dipping in olive oil and spices.

And one last note – if you don’t have whole wheat flour or prefer not to use it, you can follow my original bread recipe instead.

Honey Wheat Bread for the Bread Machine

Asharae Kroll
Print Recipe Pin Recipe

Ingredients
  

  • 1 c warm water
  • 2 Tbs butter softened
  • 1 tsp salt
  • 2 Tbs honey
  • 2 c bread flour
  • 1/2 c whole wheat flour
  • 1 packet yeast 2 1/4 tsp

Instructions
 

  • Place ingredients into bread machine in the order recommended by the manufacturer.
  • Mine recommends to put the water, salt, butter, and honey in first.
  • Add the flours on top of that.
  • Make a small well in the flour and add the yeast.
  • Adjust your bread machine to the Dough setting, 1.5lb loaf and let it run. I like to check on it about 5 minutes in to make sure it's not too wet or too dry. If it looks too wet and sticky, add a tablespoon or two of flour. If too dry and flaky-looking, add a tablespoon or two of water. Let the machine run through its whole cycle and try not to peek at it too much! (Bread machines heat up slightly which helps the rising process, each time you open it you let some of the heat out which can cause it to rise slower.)
  • Once the dough cycle is finished, turn dough out onto a floured surface. Gently press into a rectangle about 9-10 inches long (you can measure it along the side of your 9x5 pan). Fold one of the long sides in toward the center and fold the other long side on top of that - you're essentially folding it in thirds. Gently place the dough, seam side down, in your well-greased 9x5 pan. Use a knife to cut a small slit (about 1/4 inch deep) down the middle of the dough - this will allow it to expand.
  • Let the dough rise for 30 minutes or so until it looks good. If your house is colder, this could take up to an hour or more. I like to heat my oven for a few minutes, turn it off, and place the dough in for about 30 min to speed up the process. Whatever it looks like now is approximately the size it'll be when it's done baking. Toward the end of this final rising, preheat your oven to 375 degrees. (Take the bread out at this time if you used the oven to let it rise.)
  • Once dough is finished rising, bake for 25 minutes at 375.
  • Bread is finished when you tap it with your finger and it sounds hollow.


Filed Under: Side Dish Tagged With: baking, bread, bread machine, comfort food, easy recipe, simple recipe

Basic Bread Recipe for Bread Machine

March 12, 2014 by Asharae 9 Comments

Hunger is the most basic of needs. We all feel hungry at some point. Some more often than others. Some with more intensity than others. We hunger for food, for relationship, for stability, for safety, and for peace in our lives. I lived in Costa Rica for a summer, and my host mom there would always pray before meals “Danos hambre y sed para tí Dios” – Give us hunger and thirst for you Lord. She’d pray, not just thanking Him that our everyday need of hunger was satisfied and our thirst satiated, but asking Him for more feelings of hunger and thirst. This has stuck with me for years. A need, not just for food, but a need for the Lord. That’s exactly what it should be and what it becomes if you let it – a hunger and thirst for the Lord – the most basic of needs. He is our most basic of needs. He is present with us, and we need Him every day.

This blog is an outpouring of many things – my heart mostly, my desire to bring friends and family together with food, my love for deep conversation shared over drinks and dessert, and my longing to cultivate a home that is warm and welcoming, where people feel comfortable to simply be themselves. One of the chief goals I have in creating this blog though, is not just to be an excuse to make and eat good food, but also to use it as a way to provide for others who hunger. I am so privileged to have food in my pantry and filling up my fridge, but not all are quite so blessed. It’s only fitting that what is shared here – the stories and the recipes surrounding community and joining around the table – benefit not just my little community in my own home, but the community beyond my four walls.

I know that blogs can take a while to get going, to get followers, advertising, and sponsors to the point where they turn any kind of profit, but my goal is that once we’re to that point, we’ll donate a portion of what we make to provide for people who hunger – those who hunger for food, for shelter, for security, for the Lord. My thought right now is that each quarter we’ll choose a different non-profit to donate to, and we’ll highlight them here on our blog so you’ll be able to donate directly if you wish! So go ahead, share this blog with your friends! Follow us on Pinterest, Facebook, Twitter, and Instagram! Every bit helps!

Let me know if you’re familiar with any wonderful organizations that provide for those who hunger! I would love to compile a list of non-profits and such that we could potentially give to!

Since we’re talking about our most basic needs, I thought it was appropriate to share a recipe for the most basic of foods – bread! If the thought of making bread terrifies you, fear not! This is the EASIEST bread I have ever ventured to make. My goal is to learn how to make one of those round crusty artisan loaves that crunches when you break it open. Mmmmm. One day. For now we’ll settle for this bread, which is pretty darn delicious straight out of the oven. If you have a bread machine (or can borrow one from a friend – I’ve been “borrowing” my mom’s since Christmas) then you’re in luck! This recipe specifically calls to use the Dough setting on your bread machine, and then you can bake it in a well-greased 9×5 pan in the oven to get a beautiful loaf of bread! I’ve been making this at least twice a week for the past month or so and it always disappears quickly! It’s great for sandwiches, french toast, dipping in olive oil and spices (bonus if you add in the vinaigrette we made yesterday!) I’m sure this bread would be delicious with parmesan and garlic mixed into the dough – I’ll let you know how it turns out when I try it!

Fun fact: This bread made its internet debut in a styled shoot we did last month! Check out the featured post on The Lovely Find and the full story on our photography site!

Basic-Bread_This-Wild-Season-2 Basic-Bread_This-Wild-Season-4 Basic-Bread_This-Wild-Season-6 Basic-Bread_This-Wild-Season-7 Basic-Bread_This-Wild-Season-8 Basic-Bread_This-Wild-Season-9 Basic-Bread_This-Wild-Season-10 Basic-Bread_This-Wild-Season-12 Basic-Bread_This-Wild-Season-13 Basic-Bread_This-Wild-Season-11 Basic-Bread_This-Wild-Season-14

Basic Bread Recipe for Bread Machine

Asharae Kroll
A super simple bread recipe for the bread machine.
Print Recipe Pin Recipe
Prep Time 2 hrs
Cook Time 25 mins
Total Time 2 hrs 25 mins
Course Bread

Ingredients
  

  • 1 cup warm water
  • 2 Tbs butter softened (or shortening for crispier bread)
  • 1 tsp salt
  • 2 Tbs honey or sugar
  • 2.5 cups bread flour
  • 1 packet yeast 2 1/4 tsp

Instructions
 

  • Place ingredients into bread machine in the order recommended by the manufacturer.
  • Mine recommends to put the water, salt, butter, and honey in first.
  • Add the flour on top of that.
  • Make a small well in the flour and add the yeast.
  • Adjust your bread machine to the Dough setting, 1.5lb loaf and let it run. I like to check on it about 5 minutes in to make sure it's not too wet or too dry. If it looks too wet and sticky, add a tablespoon or two of flour. If too dry and flaky-looking, add a tablespoon or two of water. Let the machine run through its whole cycle and try not to peek at it too much! (Bread machines heat up slightly which helps the rising process, each time you open it you let some of the heat out which can cause it to rise slower.)
  • Once the dough cycle is finished, turn dough out onto a floured surface. Gently press into a rectangle about 9-10 inches long (you can measure it along the side of your 9x5 pan). Fold one of the long sides in toward the center and fold the other long side on top of that - you're essentially folding it in thirds. Gently place the dough, seam side down, in your well-greased 9x5 pan. Use a knife to cut a small slit (about 1/4 inch deep) down the middle of the dough - this will allow it to expand.
  • Let the dough rise for 30 minutes or so until it looks good. If your house is colder, this could take up to an hour or more. I like to heat my oven for a few minutes, turn it off, and place the dough in for about 30 min to speed up the process. Whatever it looks like now is approximately the size it'll be when it's done baking. Toward the end of this final rising, preheat your oven to 375 degrees. (Take the bread out at this time if you used the oven to let it rise.)
  • Once dough is finished rising, bake for 25 minutes at 375.
  • Bread is finished when you tap it with your finger and it sounds hollow.


Filed Under: Appetizer, Side Dish Tagged With: bread, bread machine, simple recipe

Hello there!

My name is Asharae. I’m a photographer by trade, wife to an amazing man, and mama to three little ones. I am passionate about creating good food, sharing meaningful conversation around the table, trying new things, and encouraging others to do the same.

Welcome to This Wild Season! This is a place for sharing what I’m learning in the kitchen and outside of it. Most of all, it is a challenge to myself and to you to slow down, be present in the moment, and re-learn how to savor food and conversation around the table.

About

Search

Connect

  • Facebook
  • Instagram
  • Pinterest
  • Twitter
  • Vimeo

Find my book on Amazon:

Recent Posts

  • Emmeline’s Birth Story, The Story of Her Name
  • Emmeline’s Birth Story, Birth Day Part 2
  • Emmeline’s Birth Story, Birth Day Part 1
  • Emmeline’s Birth Story, My Pregnancy
  • Emmeline’s Birth Story, An Introduction
Follow on Bloglovin
Visit This Wild Season's profile on Pinterest.

Copyright © 2025 · Foodie Child Theme by Shay Bocks · Built on the Genesis Framework · Powered by WordPress