This Wild Season

Sharing what I'm learning in the kitchen as well as outside of it.

Navigation
  • Home
  • Blog
  • Recipes
    • Appetizer
    • Breakfast/Brunch
    • Side Dish
    • Main Course
    • Dessert
    • Drinks
    • Personal
  • About

Thai Nachos

October 1, 2014 by Asharae 3 Comments

This recipe was inspired by my brother. He worked with a summer program through UNCC this past July and they took their group of high school kids down to Wilmington for a week of fossil hunting and rock finding. One night my brother Christian texted me from the fabled Flaming Amy’s Burrito Barn – a restaurant known for…. you guessed it – burritos! Somehow in all our trips to Wilmington, I’ve never been – someone tell me – is it worth all the hype?

Christian sent me a photo of the dinner he had ordered – any guesses? Don’t get too far ahead of yourself – it wasn’t a burrito. I know, I know. That’s probably sacrilegious or something. But he’s always one to think outside the box when it comes to food. Instead of a burrito he ordered Thai Nachos. THAI NACHOS. Cue heavenly music. My response was pretty much – WHAT. Tell me everything! Tim and I hadn’t eaten dinner yet, so when he texted back with a list of all the toppings, we obviously dropped everything and made our own version of these nachos for our dinner.

I was tempted to keep this recipe to myself – perhaps to break out at our next Superbowl party or something. But no. That would be cruel. Cruel to serve you so many veggies at a Superbowl party and also cruel to keep this recipe to myself. You really must try these nachos for yourself.

Thai Nachos - thiswildseason.com -2 Thai Nachos - thiswildseason.com -3 Thai Nachos - thiswildseason.com -4 Thai Nachos - thiswildseason.com -5 Thai Nachos - thiswildseason.com -6

Thai Nachos

Print Recipe Pin Recipe
Prep Time 15 mins
Cook Time 10 mins
Total Time 25 mins
Servings 2 -3

Ingredients
  

Dressing

  • 1 clove garlic minced
  • 1.5 tsp fresh ginger minced
  • 2 Tbs tahini can substitute peanut butter - heat for a few seconds in the microwave to soften
  • 1.5 tsp soy sauce
  • 1.5 tsp fish sauce find this in the Asian food section of your grocery store
  • 1.5 Tbs sweet chili sauce
  • Zest and juice of 1 lime

Nachos

  • Tortilla Chips
  • Cheese shredded
  • 1 Bell Pepper cut into bite-size slices
  • 1/4 of a Red Onion cut into thin slices
  • Edamame find in the frozen veggies section - purchase the pre-shelled edamame
  • 2 Carrots peeled and grated

Garnish

  • Cilantro
  • Green onions

Instructions
 

  • Whisk dressing ingredients together, set aside.
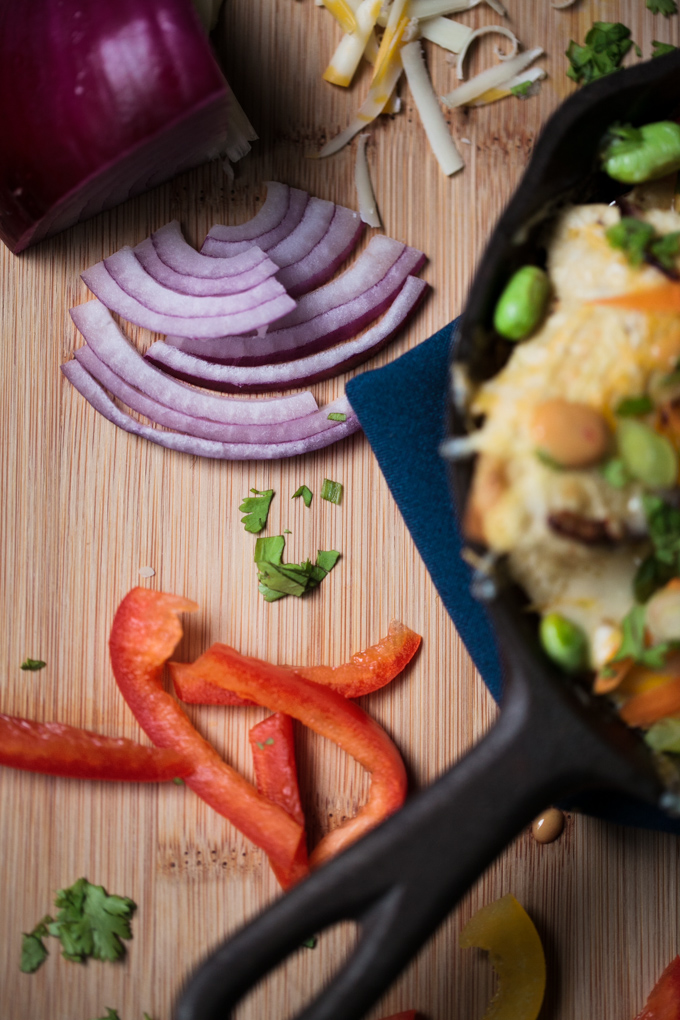
  • Heat a large pan with a drizzle of olive oil. Add red onions and bell peppers and sauté till slightly tender, about 4-5 min. Set aside when finished.
  • While sautéing the veggies, heat a pot of water and cook the edamame according to the package directions (usually 4-5 minutes, or until tender). When finished, drain and run under cold water for a few seconds to stop the cooking.
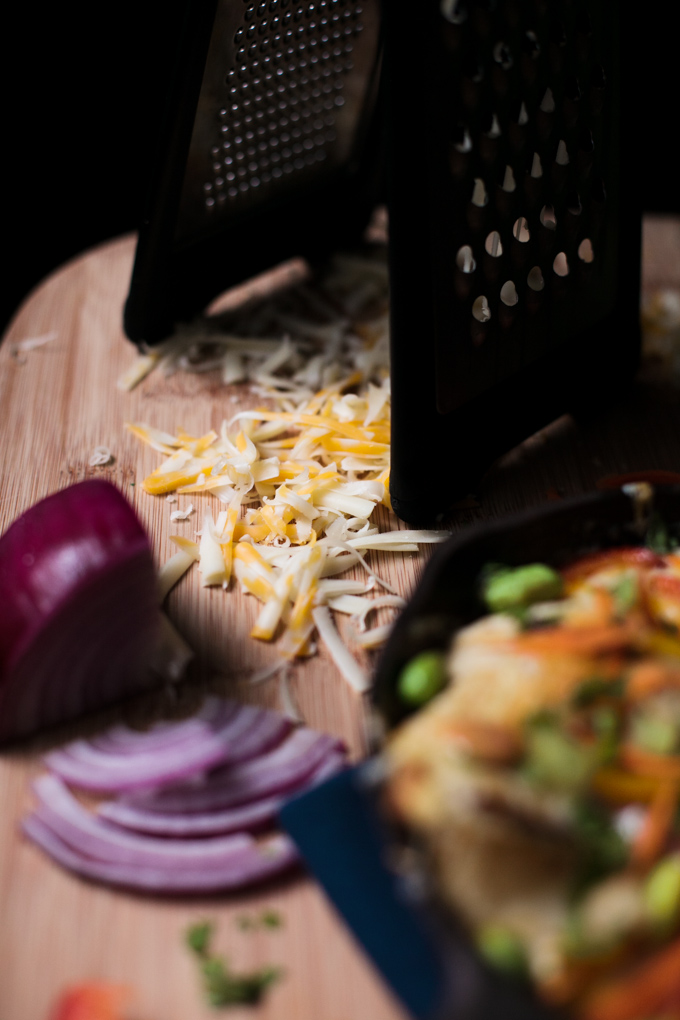
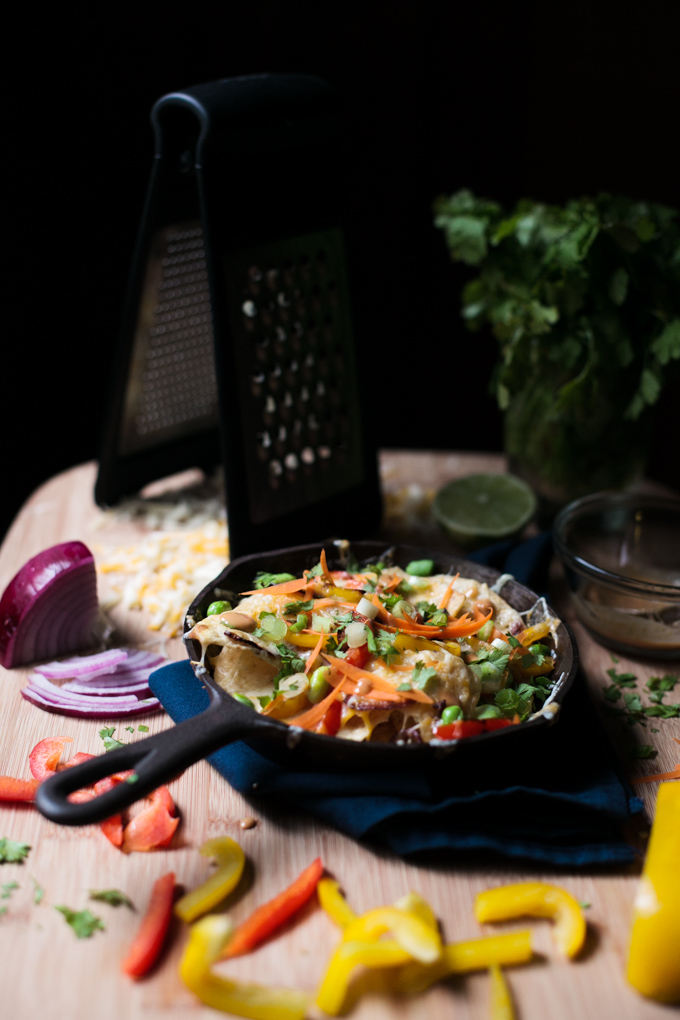
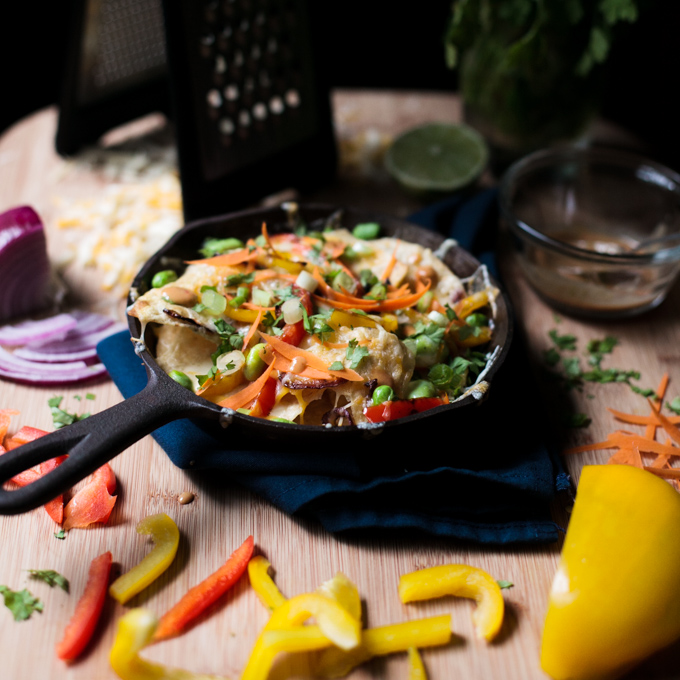
  • Assemble nachos on a large rimmed baking sheet (not pictured). Cover the pan with chips, sprinkle half the cheese on top, add bell pepper, red onion, grated carrots, and edamame. Add the rest of the cheese and bake at 400 for about two minutes, or until cheese begins to melt. Turn the broiler on and broil for about one minute, till cheese is melted and begins to bubble.
  • Garnish with cilantro, green onions, and drizzle the dressing on top. Enjoy immediately.

Notes

Feel free to add other veggies to this dish or even add cooked shredded chicken for a little more protein.


Filed Under: Main Course Tagged With: crowd pleaser, Thai, thai food, thai recipe, vegetarian

Caprese Salad with Honey Balsamic Reduction and some Mid-Week Inspiration

September 10, 2014 by Asharae 1 Comment

This week I want to share a few of the things that I’ve been inspired by lately.  I hope a few of these words speak to you and perhaps encourage you to read these books or visit these blogs. Enjoy!

Tsh Oxenreider and her family’s year-long round-the-world trip.

I’m completely in awe of this trip Tsh and her husband are about to set out on with their three kids. I haven’t even gotten a chance to read her book Notes From A Blue Bike which I bought back in the spring, but it’s next on the list. I love reading stories of families who are thinking outside the box – the ones who are willing to make certain sacrifices in order to pursue what’s most important to them.

The Oxenreiders are doing something which seems so radical to some, but as Tsh explains it – “Traveling is in our blood.”

I love this quote from her blog. I think it applies to so many things, particularly when it comes to taking a big “next step,” in anything from vocation to marriage to family to going on a year-long trip around the world.

“I think sometimes we feel like there needs to be this extrinsic, sign-from-God sort of reason to do something this big. But really, what if God simply delights in us following our desires? What if we’re partly fulfilling our vocation (in the literal sense of the word) by acting on our deepest passions?”

Yes. This.

These photos of the Ingalls homestead from Joy Prouty. 

Go look at them. And read her words. Altogether they make me want to melt in a puddle of happiness. I loved the Laura Ingalls Wilder books when I was a kid – and these photos reminded me of how much they ignited my imagination – perhaps my secret longing to build my own house, grow my own food, and raise chickens and goats has something to do with those books. I even remember a short-lived phase where I insisted on calling my parents Ma and Pa.

I think Little House on the Prairie is moving up on my list of books to re-read. But right now I’m trying to convince Tim we should read The Voyages of Dr. Doolittle aloud – it’s another of my childhood favorites. We started reading it on Sunday, and he was sweet enough to read a few chapters to me before I started snoring on the couch. Sunday afternoons man. They’ll getcha.

Anna Watson Carl and her blog The Yellow Table

I’m a relatively new reader of Anna’s blog, but I’ve been loving everything she writes. She’s a chef and a writer based in NYC and she’s publishing a cookbook this fall. It’s been a lot of fun to follow her journey via Instagram and her blog. She writes with refreshing honesty about combatting the doubts and discouragement and realizing her need for rest, refreshment, and new perspective.

I came across this post of hers recently and it really resonated with me. I too have trouble slowing down and truly resting. Working from home and running my own business is a blessing and a curse in that regard. I’m home all the time, so it seems it would be easy to relax and simply enjoy being home. The flip side of that is that I’m also always at work – there’s always more to be done – more emails to send, more blog posts to write, more photos to edit. And it really never ends. I’ve taken to (almost) never checking my email on the weekends because I simply need a break from it all. I’m slowly letting go of the guilt I can sometimes feel when I let an email go a couple days before I answer it. My heart and my brain simply need to rest sometimes.


Caprese Salad with Honey Balsamic Reduction - thiswildseason.com-2 Caprese Salad with Honey Balsamic Reduction - thiswildseason.com-3 Caprese Salad with Honey Balsamic Reduction - thiswildseason.com-4 Caprese Salad with Honey Balsamic Reduction - thiswildseason.com-5 Caprese Salad with Honey Balsamic Reduction - thiswildseason.com-6 Caprese Salad with Honey Balsamic Reduction - thiswildseason.com-7 Caprese Salad with Honey Balsamic Reduction - thiswildseason.com-8

This recipe is inspired partly by the plethora of tomatoes we have exploding from our garden right now and partly by our honeymoon over four years ago (no, we didn’t go to Italy, but we did eat at an amazing Italian restaurant in Georgia of all places.) We ordered caprese salad as an appetizer and it maybe changed our lives. Mine at least. The waiter explained that they had created a balsamic vinegar reduction to drizzle over the tomatoes, mozzarella, and basil. All I remember is that that dish forever changed my dislike for tomatoes. The sweet, salt and peppery, tart combination left me yearning to figure out how to recreate that dish. Until now I’d never actually tried. I came across this recipe for a honey balsamic reduction and adapted it into my usual caprese salad ensemble. The result – delicious.


Caprese Salad with Honey Balsamic Reduction

Print Recipe Pin Recipe

Ingredients
  

For the Honey Balsamic Reduction

  • 1/2 c balsamic vinegar
  • 2 Tbs honey

For the salad

  • 3 Medium tomatoes any variety - we used Black Krim, Lemon Boy, and Better Boy tomatoes
  • Mozzarella buying the pre-sliced rounds makes this easy - I even slice those in half since they're so thick
  • Salt and pepper to taste
  • Fresh basil chopped

Instructions
 

For the Honey Balsamic Reduction

  • Combine the balsamic vinegar and honey in a small saucepan and bring to a boil. Reduce heat to medium-low and simmer until syrupy and reduced to 1/3 c, about 10-12 minutes. Let cool to room temperature. Store leftovers in a sealed container in the fridge.

Assemble the salad

  • Layer the salad in this order - tomato, salt and pepper, mozzarella, honey balsamic reduction, fresh basil.
  • Enjoy!

Notes

If you're short on time or feeling lazy, you can always skip the honey balsamic reduction and drizzle a few teaspoons of balsamic vinegar over your tomatoes instead.


Filed Under: Appetizer, Side Dish Tagged With: crowd pleaser, easy appetizer, easy recipe, easy side dish, Italian, mid-week inspiration, vegetarian

Roasted Tomato Salsa

September 4, 2014 by Asharae Leave a Comment

Our garden is currently exploding with tomatoes – anyone want some? A couple weeks ago we had an abundance of cucumbers, but this week it’s tomatoes. Obviously that means I should share another salsa recipe with you. I mean, pico de gallo is great for any occasion, but if you want to put a little extra something special into your salsa, roasting your tomatoes is a great option!

Tomatillos are also coming into season, so if you’re really wanting to think outside the box, grab a few of those and add them to this recipe. And a side note – tomatillos are super easy to grow – at least in our hot southern climate. Last year we grew two tomatillo plants (you have to grow at least two so they can cross-pollinate – oh the things you learn when growing your own food!) They’re fun plants to have in your garden because the fruits grow in pretty little paper husks – once they fill the husk and start to break out of it, you know they’re ready! We still have a freezer full of tomatillos from last year, so we decided not to grow any this time around.

Speaking of an abundance of veggies – one of the things I’ve always loved about living in the country is how many people have backyard gardens, and how willing they are to share their produce. “Eating local” and “growing organic” isn’t a newfound fad around here, it’s a way of life. I remember when I was a kid we always had people from the church my dad pastors dropping off bags of tomatoes, peppers, cucumbers, and peaches on our front doorstep. Sometimes we’d look in the bag and wonder “what exactly is that vegetable?” Inevitably the mystery veggie would make its way into some soup or casserole. Another story for another day.

Recently a sweet lady in our church offered up an open invitation to my mom to stop by her house and pick pears whenever she wanted.  My mom stopped by Dixie’s house to take a few pears off her hands and called me as she was leaving, “I ended up with more fruits and veggies than I know what to do with! I’m bringing some by your house!” When she arrived she brought in a bag of pears and a bag of tomatoes and exclaimed “I’m not done yet – come help me get stuff out of the car!” Two bell peppers, three banana peppers, seven jalapeños, two honeydew, one huge watermelon, five eggplant, twenty or thirty something pears, and two ginormous bags full of tomatoes later, we’d split her bounty down the middle. All that being said – many thanks to Dixie for the gorgeous yellow tomatoes below! We used them for everything from bruschetta to pasta sauce to this delicious salsa.

Roasted Tomato Salsa - thiswildseason.com -3 Roasted Tomato Salsa - thiswildseason.com -2 Roasted Tomato Salsa - thiswildseason.com -4 Roasted Tomato Salsa - thiswildseason.com -5 Roasted Tomato Salsa - thiswildseason.com -6

Roasted Tomato Salsa

Asharae Kroll
Print Recipe Pin Recipe
Prep Time 10 mins
Cook Time 30 mins
Total Time 40 mins

Ingredients
  

  • 2-3 c of cherry tomatoes halved
  • Optional 3-4 large tomatillos, halved (6-7 if using small tomatillos like I did)
  • 2 or more jalapeños halved lengthwise and the seeds removed if you want a milder salsa
  • Juice from 1-2 large limes
  • 1/2 - 1 c loosely packed cilantro leaves
  • Salt and pepper to taste
  • 1 clove garlic minced
  • 1/4 tsp cumin
  • 3/4 medium tomatoes
  • 1/4 c white onion finely diced

Instructions
 

  • Preheat the oven to 400 degrees
  • Grease a baking sheet lined with aluminum foil and place tomatoes, tomatillos (if using), and jalapeños, cut side down on the pan. (I didn't do that for the photos, but your veggies will stick to the pan later if you do it the other way!)
  • Roast in a 400 degree oven for 15 minutes. Remove pan from oven, carefully flip all the veggies so they're now cut side up, and roast for about 15 more minutes, or until roasted and delicious looking. Keep an eye on them during the last half of roasting to be sure they don't burn - char is good, burn is bad. Let cool slightly before adding to the rest of the ingredients.
  • While the veggies are roasting, you can begin to assemble the rest of your ingredients.
  • Place roasted veggies, lime, cilantro, salt and pepper, garlic, cumin, and fresh tomatoes in a food processor or blender and blend to desired consistency. If your salsa is too thick, you can always add another tomato or two to add more juice back in. Adjust to taste.
  • For a little more texture in my salsa, I stir the onion in at the very end. If you want a smoother salsa, you're welcome to blend that in as well.

Notes

For roasting, I used a combination of Sweet 100 cherry tomatoes and yellow tomatoes from a sweet lady in our church (not sure of the variety). To add some juice back into the salsa when blending, I used a combination of Black Krim, Better Boy, and Roma tomatoes. Obviously you're welcome to use whatever variety you have on hand - the flavor and color of your salsa will vary depending on what you use.


Filed Under: Side Dish Tagged With: crowd pleaser, easy recipe, salsa, simple recipe, tomatillo

Homemade Stovetop Popcorn

August 20, 2014 by Asharae 1 Comment

A couple months ago I had a fun family session down at Holden Beach, south of Wilmington, NC.  A sweet friend of mine from college hired me to do photos with her whole family – all four generations. It was so special to spend the whole day with them, capturing the ebbs and flows of the day, kicking our toes around in the sand, sharing stories, and soaking up the last golden rays of light as the sun dipped beneath the clouds. It was a long enough drive that they invited me to spend the night, and we sat around chatting and playing games till late into the night, all the while munching on copious amounts of homemade popcorn.

My friend Lauren explained to me that homemade popcorn was her dad’s tradition – a little oil, some popcorn kernels, and a little salt makes for a deliciously simple midnight snack. Apparently he keeps huge 50 lb bags of popcorn kernels at home for just such an occasion. I love families that have food stories like this – popcorn is his thing. The whole family knows that when they get together, dad will be making popcorn. It’s tradition. I love that.

As we sat around the dining room table at the beach house, I was in awe at the bowl after giant bowl of popcorn he kept bringing out from the kitchen. I’d always thought that stovetop popcorn was some magical method of popcorn-making that I’d never be able to perfect. Isn’t there a certain way you have to shake the pan? Will I burn the popcorn? Or have too many kernels left over? I never tried it because I was afraid I’d fail. But after sitting around the table with Lauren’s family, laughing and chatting long after the kiddos had gone to bed, eating popcorn until I could eat no more – I decided I needed to learn how to make my own stovetop popcorn.

And you guys – here’s a secret – it’s really really easy to make!

I snooped around the internet for a while until I found a method that was simple enough and provided a good popcorn to oil ratio. I found this recipe over on the Pastry Affair and haven’t looked back since. She recommends using coconut oil, which I agree with. I tried olive oil and canola oil as well, but I like the subtle flavor the coconut oil gives to the popcorn (it doesn’t taste like coconut, I promise). Use whatever neutral oil you have around the house and have fun making your own homemade popcorn! It’s very rewarding and only takes a couple minutes longer than the microwaved stuff. It’s well worth it to know you’ve made a healthier snack with ingredients you can pronounce!

This-Wild-Season_Homemade-Stovetop-Popcorn-2 This-Wild-Season_Homemade-Stovetop-Popcorn-3 This-Wild-Season_Homemade-Stovetop-Popcorn-4 This-Wild-Season_Homemade-Stovetop-Popcorn-5 This-Wild-Season_Homemade-Stovetop-Popcorn-6 This-Wild-Season_Homemade-Stovetop-Popcorn-7

The instructions below might look a little overwhelming, but you really don’t have to take it this seriously. I’ve found that setting a timer for myself helps keep my mind on the task at hand – I’m easily distracted and fear I’d burn the popcorn otherwise!

Homemade Stovetop Popcorn

Adapted from Pastry Affair
Print Recipe Pin Recipe
Prep Time 1 min
Cook Time 6 mins
Total Time 7 mins
Servings 2 -3

Ingredients
  

  • 3 Tbs coconut oil or other neutral oil
  • 1/3 c popcorn kernels
  • Optional 1 Tbs melted butter
  • 1/4 tsp kosher salt or popcorn salt if you have it!

Instructions
 

  • Heat oil over medium high in a large heavy bottomed pot with a lid. Place 4-5 popcorn kernels in the pot and cover.
  • Once kernels begin to pop, pour the rest of the popcorn into the pot, cover the pot, and use potholders to shake the pot a couple times to distribute the kernels evenly. Remove from the heat for 30 seconds - this allows the kernels to reach the same temperature so they pop around the same time. At this point I like to start a timer for 4 minutes - once the countdown reaches 3:30, place the pot back on the heat.
  • When the kernels begin popping vigorously (around 2:30 on my stovetop), tilt the lid so it is slightly askew on the pot - this allows the steam to escape so your popcorn doesn't get soggy. At this point, I watch the clock and shake the pot every 10 seconds until the popping slows down. The popping itself should last 2-3 minutes - I've found on my stovetop that it finishes just as my 4 minute timer runs out.
  • Once the popping slows significantly, remove the pot from the heat and let rest for a moment to ensure no kernels pop out when you uncover it. Pour the popcorn into a large bowl, drizzle with the melted butter (optional), and sprinkle with salt and your toppings of choice.


Filed Under: Side Dish Tagged With: comfort food, crowd pleaser, easy recipe, simple recipe, snack

  • « Previous Page
  • 1
  • 2
  • 3
  • 4
  • 5
  • Next Page »

Hello there!

My name is Asharae. I’m a photographer by trade, wife to an amazing man, and mama to three little ones. I am passionate about creating good food, sharing meaningful conversation around the table, trying new things, and encouraging others to do the same.

Welcome to This Wild Season! This is a place for sharing what I’m learning in the kitchen and outside of it. Most of all, it is a challenge to myself and to you to slow down, be present in the moment, and re-learn how to savor food and conversation around the table.

About

Search

Connect

  • Facebook
  • Instagram
  • Pinterest
  • Twitter
  • Vimeo

Find my book on Amazon:

Recent Posts

  • Emmeline’s Birth Story, The Story of Her Name
  • Emmeline’s Birth Story, Birth Day Part 2
  • Emmeline’s Birth Story, Birth Day Part 1
  • Emmeline’s Birth Story, My Pregnancy
  • Emmeline’s Birth Story, An Introduction
Follow on Bloglovin
Visit This Wild Season's profile on Pinterest.

Copyright © 2025 · Foodie Child Theme by Shay Bocks · Built on the Genesis Framework · Powered by WordPress