This Wild Season

Sharing what I'm learning in the kitchen as well as outside of it.

Navigation
  • Home
  • Blog
  • Recipes
    • Appetizer
    • Breakfast/Brunch
    • Side Dish
    • Main Course
    • Dessert
    • Drinks
    • Personal
  • About

Raspberry Mango Popsicles

June 16, 2016 by Asharae 6 Comments

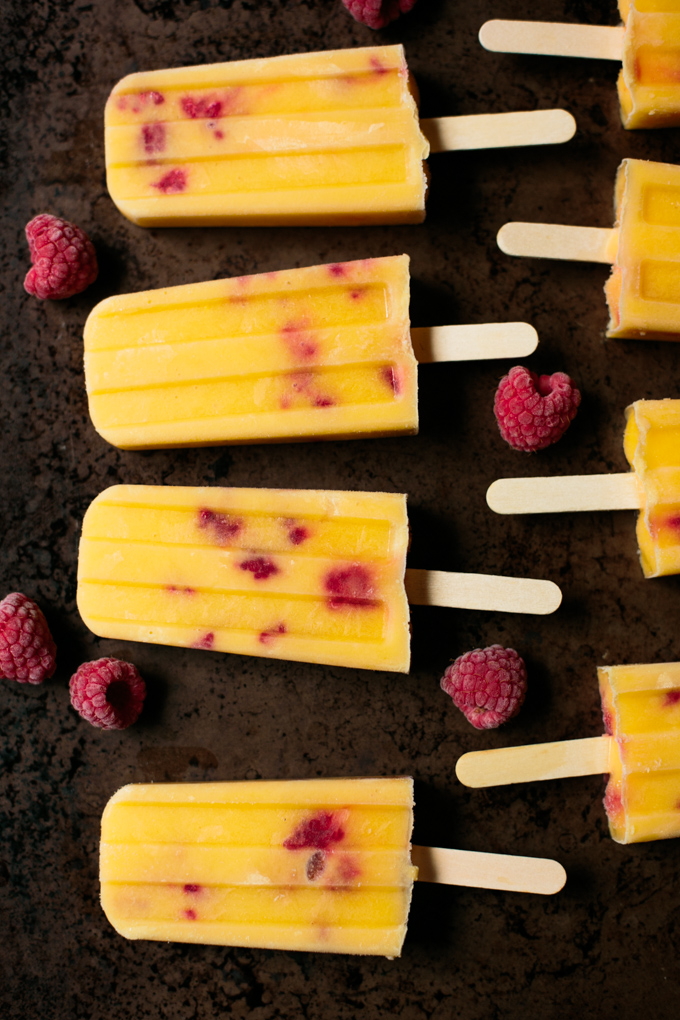
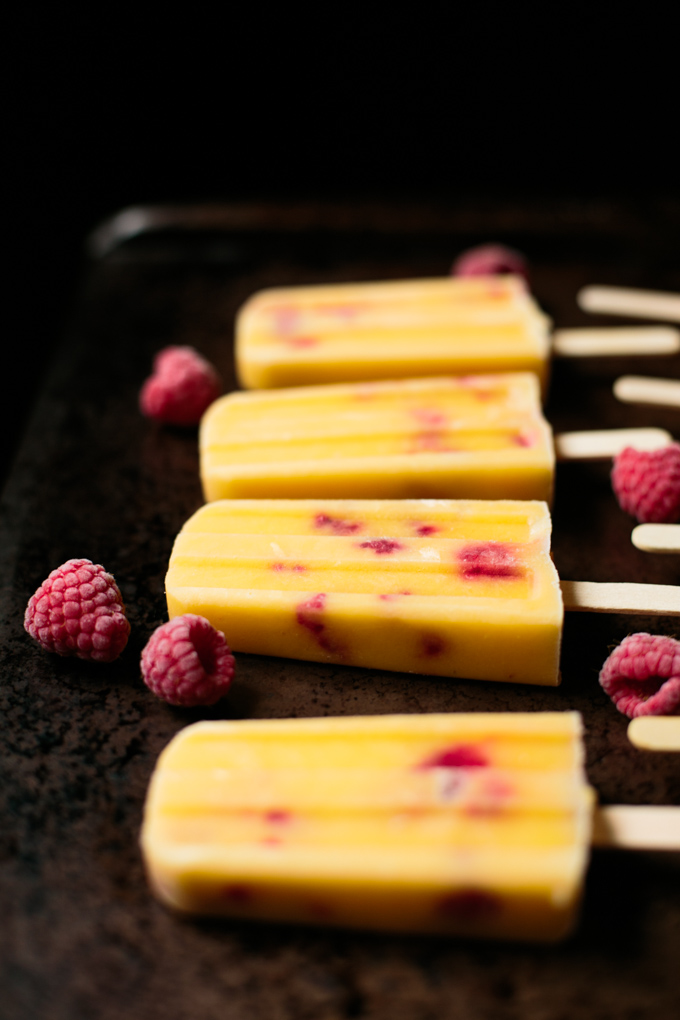
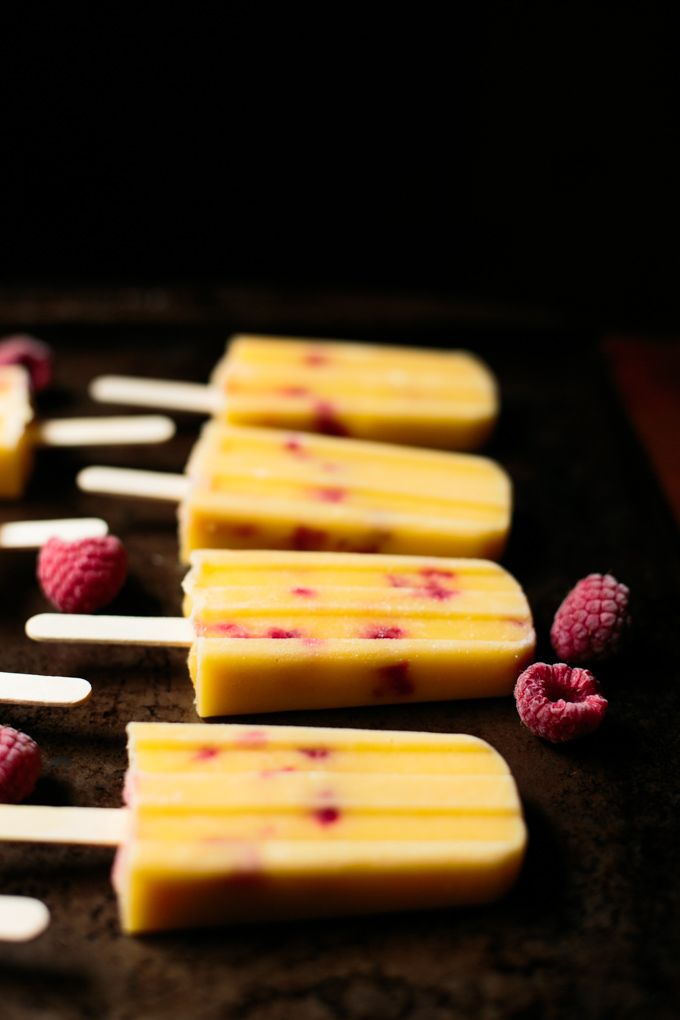
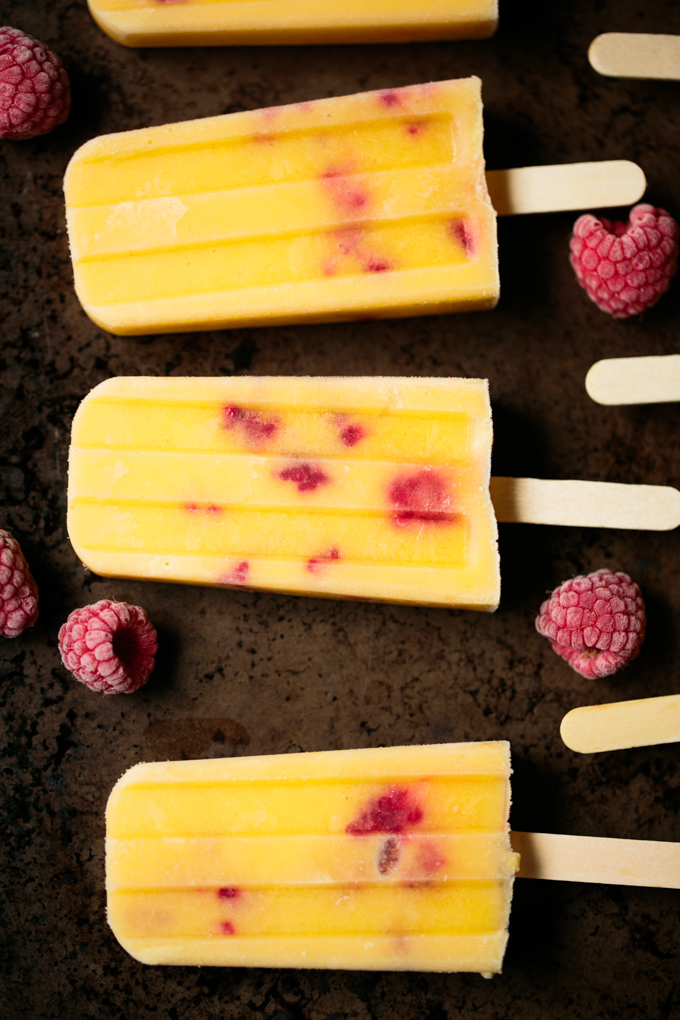
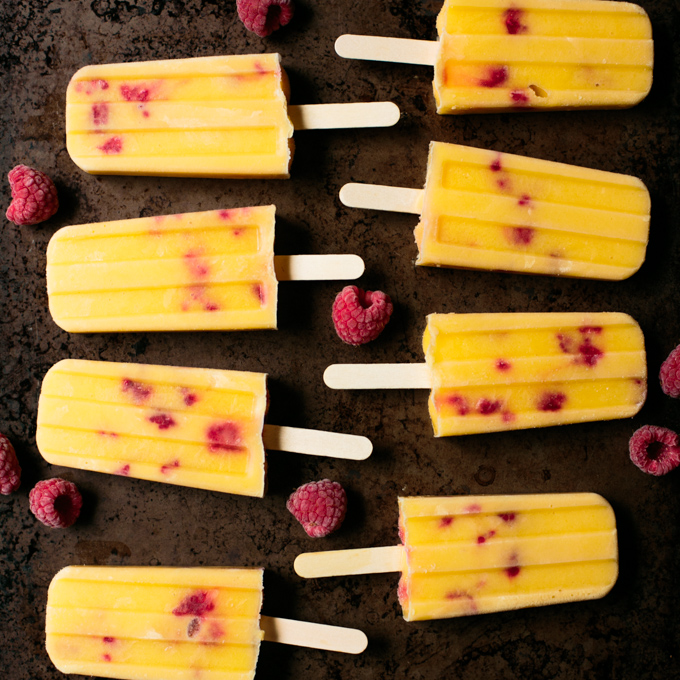
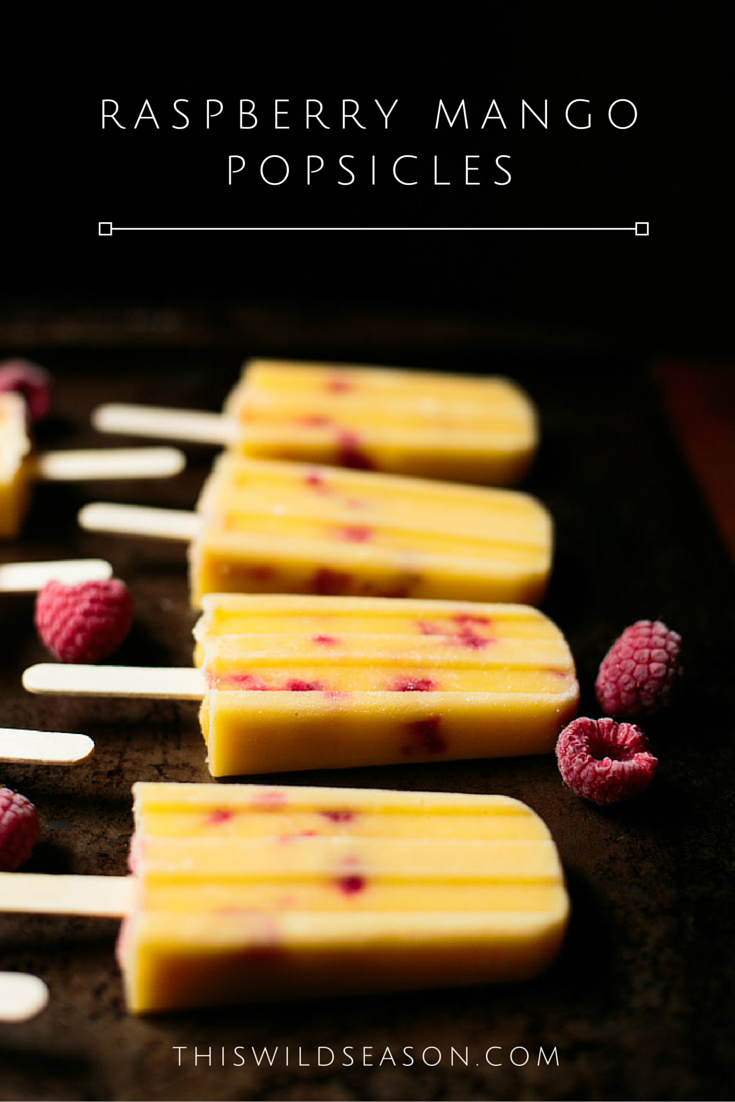
Summer has arrived in full-force here in North Carolina and we’re in desperate need of a little something to cool off with! Enter these raspberry mango popsicles. I finally got my hands on a popsicle mold at World Market recently and can’t stop making all. the. popsicles. It’s really not a bad problem to have. I actually recommend it.

I’ve got hopes of trying peach green tea popsicles, yogurt and granola ones, balsamic and fresh strawberry, mojito popsicles, and on and on! I’m currently working on perfecting a butterfinger popsicle recipe to share with you soon, but for now enjoy this one with its fresh summer fruit and gorgeous colors!

I’d love to hear if you have a favorite summer time popsicle recipe you love to make! Links are welcome in the comments below!

Raspberry Mango Popsicles by thiswildseason.com -2 Raspberry Mango Popsicles by thiswildseason.com -3 Raspberry Mango Popsicles by thiswildseason.com -4 Raspberry Mango Popsicles by thiswildseason.com -5 Raspberry Mango Popsicles by thiswildseason.com -6

Raspberry Mango Popsicles

Asharae Kroll
Print Recipe Pin Recipe

Ingredients
  

  • 2 c frozen mango chunks slightly thawed
  • 3/4 c light coconut milk
  • Honey to taste
  • 1/4 tsp vanilla
  • 3/4 c raspberries

Instructions
 

  • Use an immersion blender (or traditional blender) to blend mango, coconut milk, honey, and vanilla.
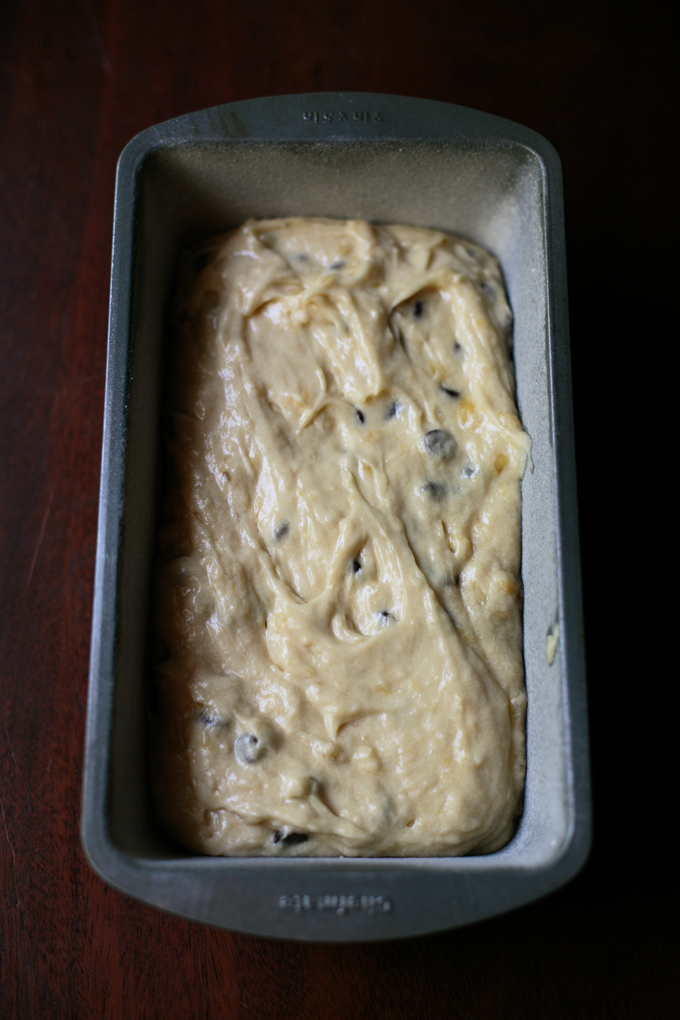
  • Pour mixture into approximately 8 popsicle molds, filling 3/4 of the way full. Save some of the mixture so you'll be able to top them off.
  • Add raspberries and use a chopstick or skewer to press them down into the mold and swirl them around a bit.
  • Finish filling the popsicle molds, add popsicle sticks, freeze for several hours till set.

Raspberry Mango Popsicles by thiswildseason.com

Filed Under: Dessert Tagged With: dessert, easy dessert, healthy dessert, popsicles, simple dessert, summer, summer recipe, summertime

Salted Brown Butter Heath Chip Cookies

March 10, 2016 by Asharae 5 Comments

Over the past couple years I have decided that cooking and baking for other people is one of my love languages. There’s something so rewarding about seeing the people you love enjoy something you created for them. It’s worth it just knowing that I can bring a little dose of joy to someone else’s day through what I make in the kitchen.

Our small group friends are some of my favorites to cook and bake for. We’re a random assortment of seven very different couples that have somehow found ourselves gathering once a week to share life, open up about our struggles, and walk with one another through the good and the hard parts of our stories. Some of us have been together as a group for nearly three years, and a few of us go all the way back to our freshman year of college. It’s been pretty extraordinary to see one another through so many seasons of life, and I feel like we’re really just getting started.

One of my favorite recipes to make for our small group is one for chocolate chip cookies that I shared a couple years ago. Everyone loves a good chocolate chip cookie. Tim and I were recently at the grocery store though when he came across these Hershey’s Heath Baking Bits 
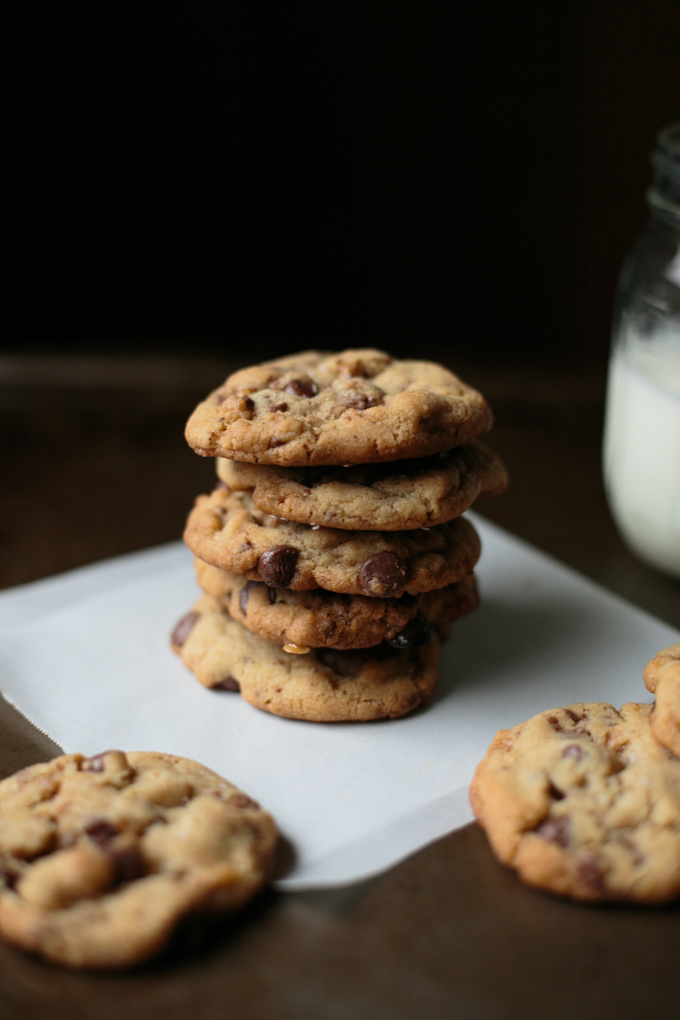
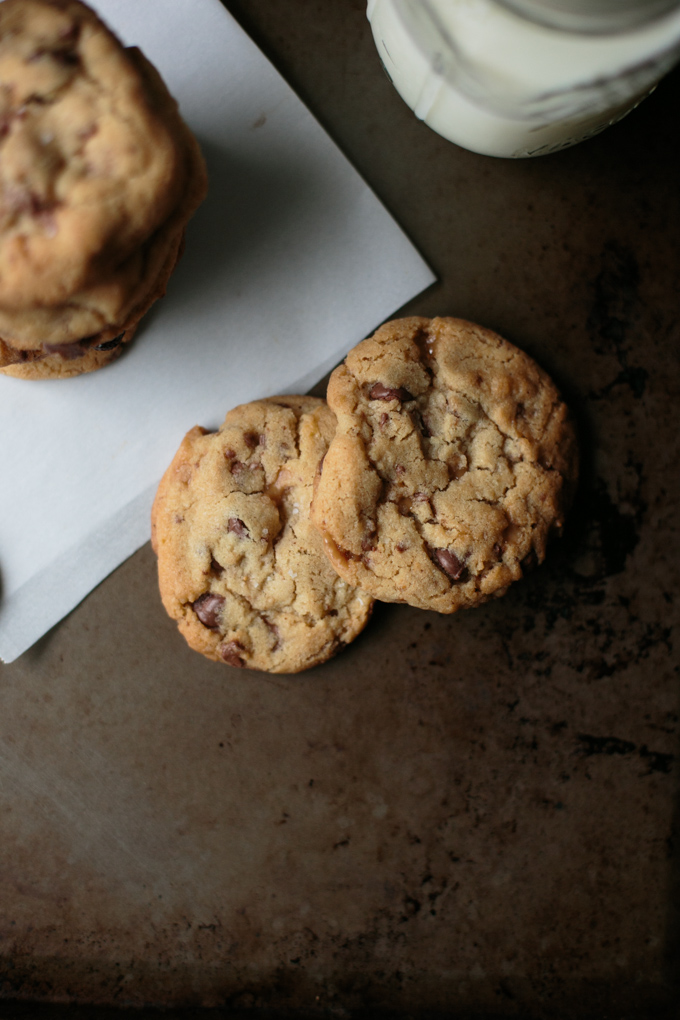
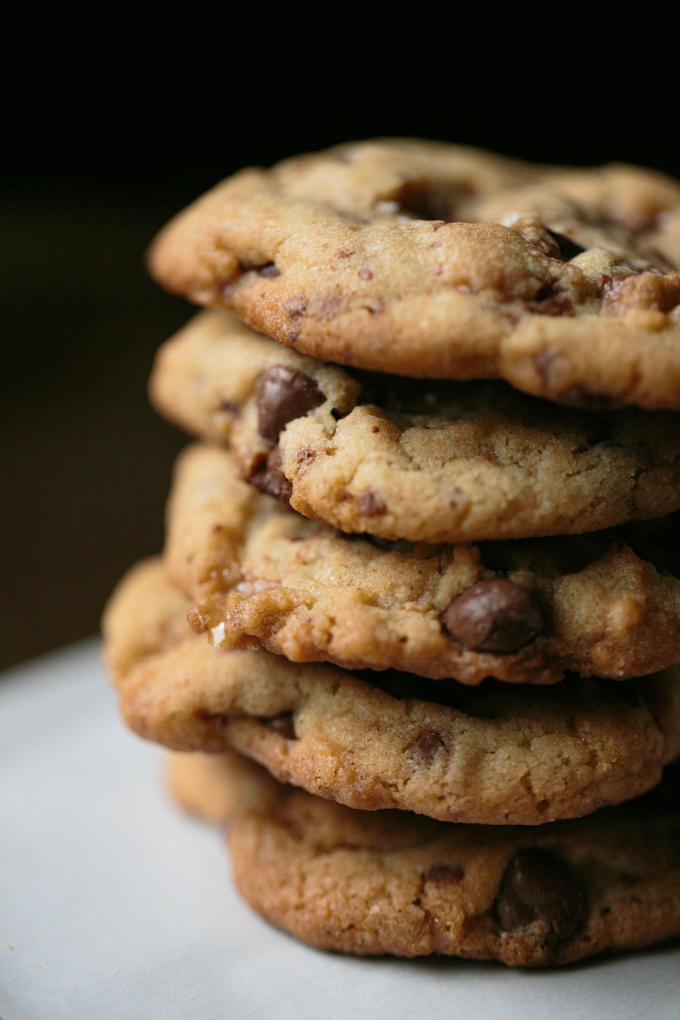
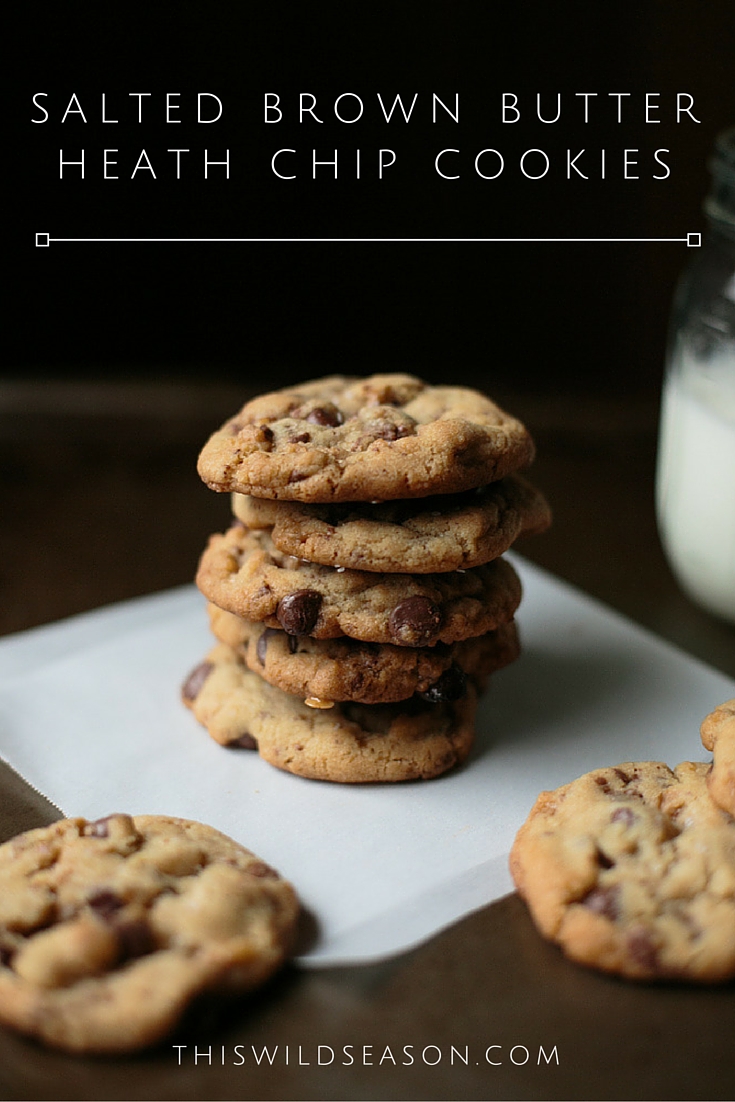
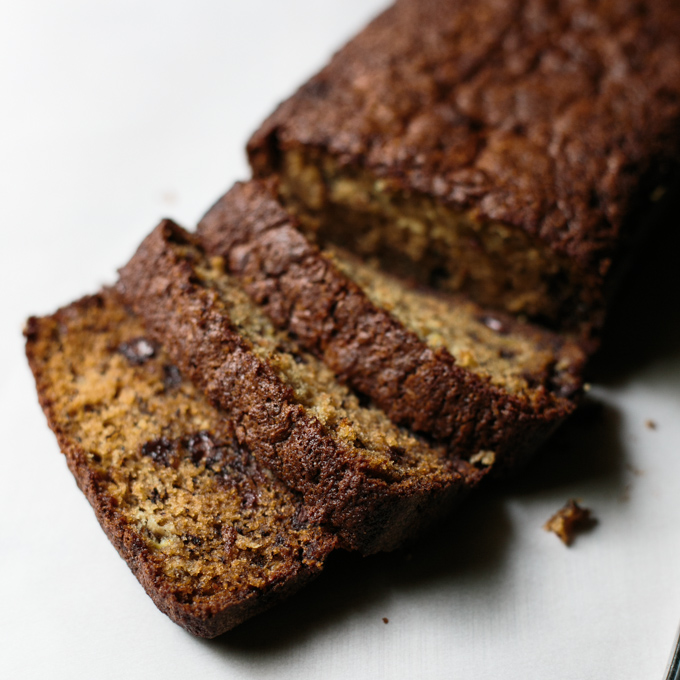
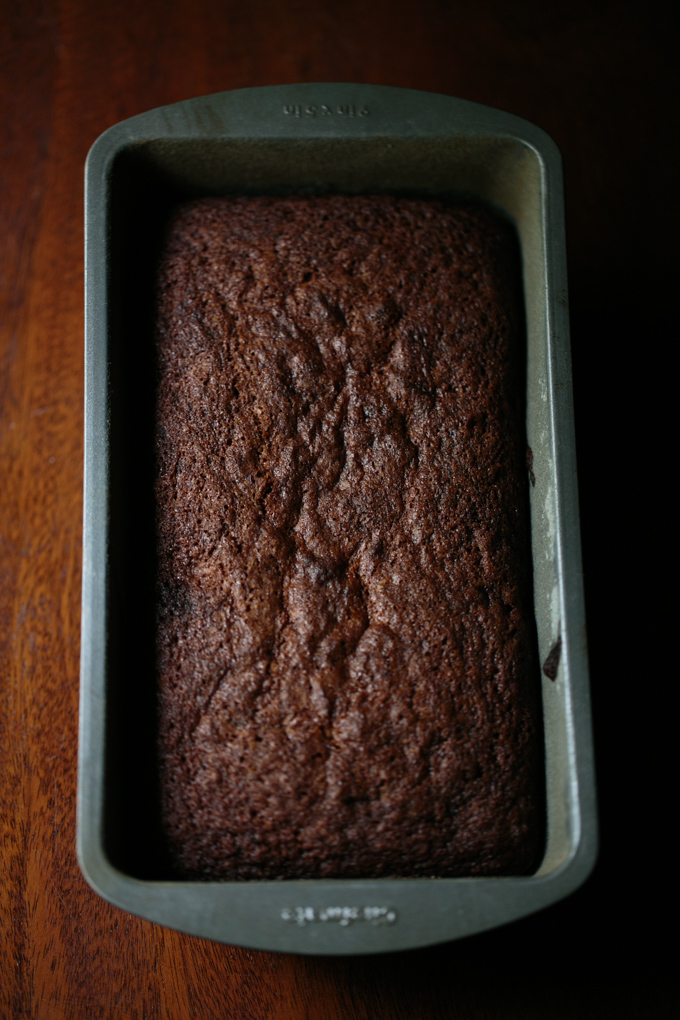
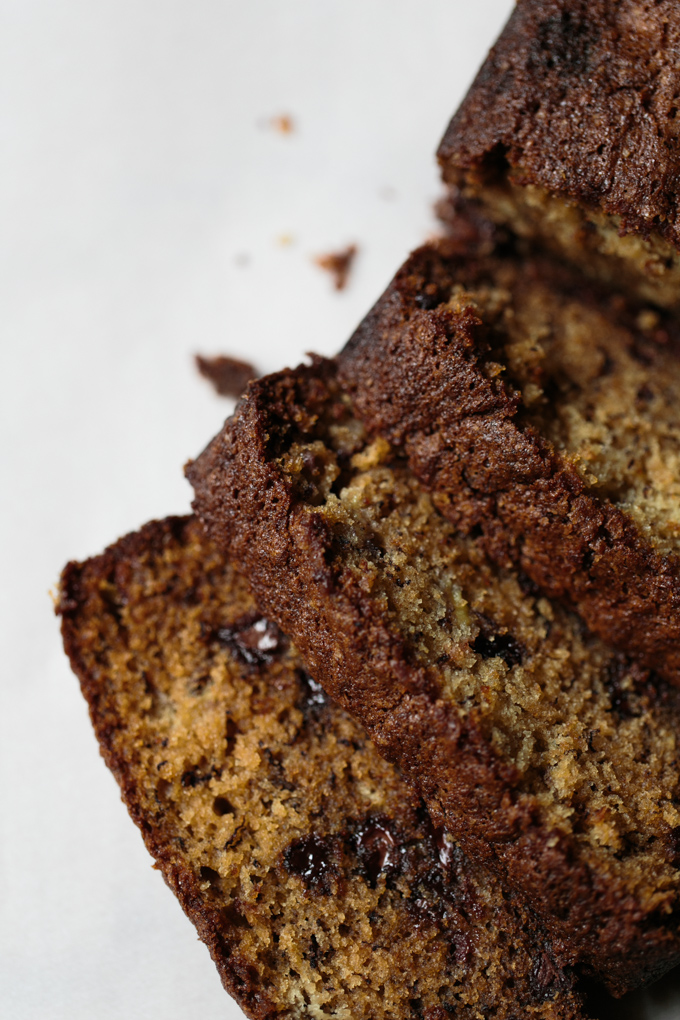
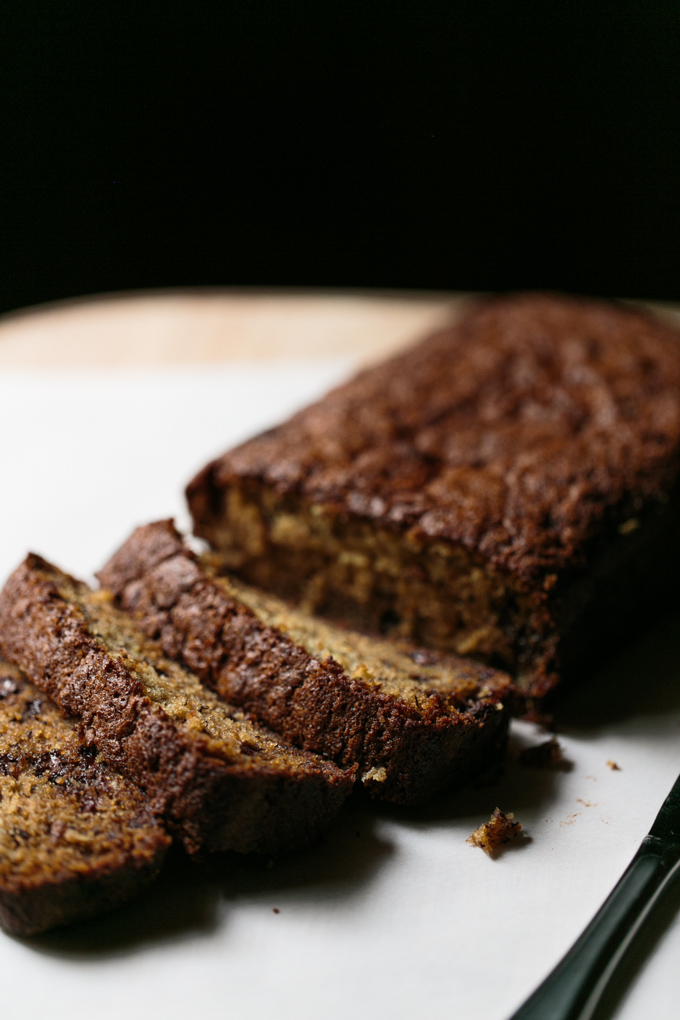
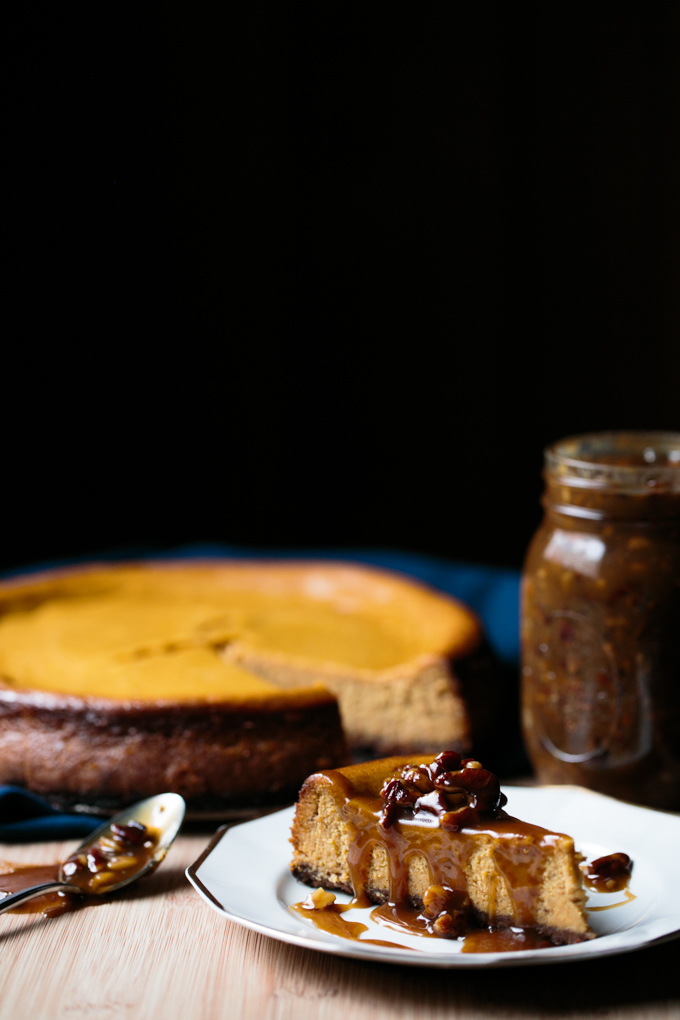
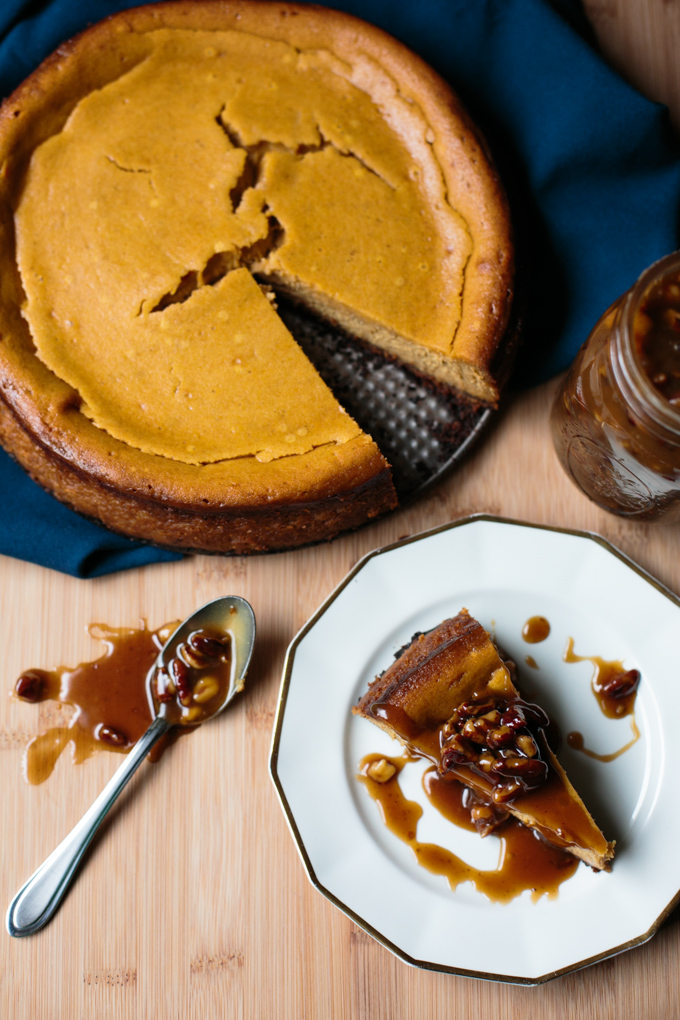
in the baking aisle. One thing was certain – something needed to be done with them. That’s where this recipe comes into play. This is a slight (and debatably more delicious) variation on my go-to recipe for salted brown butter chocolate chip cookies. Both recipes are worth a try! You won’t regret it.

Salted Brown Butter Heath Chip Cookies by thiswildseason.com -2 Salted Brown Butter Heath Chip Cookies by thiswildseason.com -3 Salted Brown Butter Heath Chip Cookies by thiswildseason.com -4 Salted Brown Butter Heath Chip Cookies by thiswildseason.com -5

Salted Brown Butter Heath Chip Cookies

Print Recipe Pin Recipe

Ingredients
  

  • 1 ¾ cups all-purpose flour
  • ½ teaspoon baking soda
  • 14 tablespoons unsalted butter 1 ¾ sticks
  • ½ cup granulated sugar
  • ¾ cups packed brown sugar
  • 1 teaspoon kosher salt
  • 2 teaspoons vanilla extract
  • 1 large egg
  • 1 large egg yolk
  • 3/4 cup semi-sweet chocolate chips
  • 3/4 cup Heath chips
  • Kosher salt for garnish

Instructions
 

  • Melt butter in a medium sauce pan over medium-high heat. Continue to heat as butter starts to bubble - the bubbling sounds will get louder as the butter heats up. Stir constantly, scraping the bottom and sides of the pan with a spatula as you go. Keep a close eye on it as it will change color quickly. Once the butter turns a nice dark golden brown and has a nutty aroma, remove it from the heat. Transfer butter to a heat-proof bowl and let cool. You may place it in the fridge for 15-20 minutes to speed up the process.
  • Preheat the oven to 375 degrees F.
  • Combine flour and baking soda in a medium bowl and set aside.
  • Once butter is cooled, but not hardened, place in the bowl of a stand mixer, along with both sugars, salt, and vanilla. Using the paddle attachment, mix until light and fluffy, about 3-5 minutes.
  • Add egg and egg yolk and mix until combined.
  • Mix in flour mixture until just combined.
  • Stir in chocolate chips and Heath chips with a spoon or spatula.
  • Scoop 2 Tbs of dough at a time onto a baking sheet lined with parchment paper. You'll need to do at least two separate batches in the oven. Should make about 24 cookies.
  • Bake for 9-12 minutes, till the edges just start to brown. Remove from oven, sprinkle with additional salt, and let cool a few minutes before removing from the pan.

This post is not sponsored in any way, but does include affiliate links. That means I make a small commission off any purchase you make through that link, at no additional cost to you. Thank you for your support of This Wild Season!

Salted Brown Butter Heath Chip Cookies by thiswildseason.com

Filed Under: Dessert Tagged With: cookies, crowd pleaser, dessert

Banana Chocolate Chip Bread

May 28, 2015 by Asharae Leave a Comment

We have these friends, Brandon and Christy, who are extraordinary question-askers. They are the kind of people who ask questions that make those around them feel known. It’s such a gift. I’m not even sure they’re aware that they’re doing anything different – they’re genuinely curious and they truly care about their friends and family – but it really shows through the questions they choose to ask. Again and again we have felt so cared for by them because they ask good questions and they listen well.

I aspire to ask questions like these friends of ours. I want to learn how to ask the questions that dig a little deeper, rather than taking the easy way out and simply asking “how’s it going?” I always hesitate when asked that question – how much do you really want to know? What sort of answer are you looking for? Do I spill my guts and tell you how utterly overwhelmed I am? You probably weren’t looking for that, so do I just say that I’m fine? Is there some better way to answer that question?

I’ve been having all these thoughts rolling around my head lately and I happened upon this article over on Donald Miller’s Storyline blog. I love this quote from Melton’s article:

We learned that if we really want to know our people, if we really care to know them – we need to ask them better questions and then really listen to their answers.

We need to ask questions that carry along with them this message: “I’m not just checking the box here. I really care what you have to say and how you feel. I really want to know you.”

Isn’t that what we all crave? To be known? Not just to have people that know our favorite foods and our birthday, but to have people that know our dreams and our fears. It’s such a treasure if you have people that ask you those questions. But why not also be the person that asks those questions?

Instead of simply waiting for someone to enter into our world and ask us those questions – why don’t we put ourselves out there and ask someone else the difficult, potentially awkward questions. It’s in that space that growth happens. The process of knowing one another and truly being known can feel so extraordinarily uncomfortable. But the reward of deeper relationships far outweighs any potential awkwardness along the way.

Chocolate Chip Banana Bread by thiswildseason.com -2 Chocolate Chip Banana Bread by thiswildseason.com -3 Chocolate Chip Banana Bread by thiswildseason.com -4 Chocolate Chip Banana Bread by thiswildseason.com -5

Confession time – I’ve been holding out on you guys. This is one of my absolute favorite recipes. One fateful day in college my roommate Anna returned from a quick trip home and brought with her the most incredible loaf of chocolate chip banana bread. We sat on our little futon in our room, hunched over the foil wrapper of heavenly crumbs. I’d never had banana bread with chocolate chips in it before and I’m pretty sure I ate half the loaf with no shame at all. I vowed then to learn how to make banana bread that was at least half as delicious – I like to think this one has turned out pretty great.

This banana bread doesn’t look like much, but don’t let that fool you. It’s so so good. I’ve been making it since college and it always gets good reviews. You can always add walnuts or pecans as well – I recommend 1/2 c nuts and reducing your chocolate chips to 1/2 c as well if you go that route! And if you find you’ve always got bananas on-hand, you can put the extra brown ones in the freezer to use in this recipe later. Peel the bananas and place them in a freezer-safe bag before putting them in the freezer. Thaw them before using and then use the same way you would use fresh bananas. Fair warning – they’ll look totally gross once thawed, but they’ll taste just as good once you bake them into the bread!

This bread is best eaten while it’s still warm from the oven or the next day. Be sure to wrap the loaf of banana bread tightly with plastic wrap – this keeps the bread moist and delicious. I like to think it also locks the flavor in as it gets better a day or two after you bake it. This is a great breakfast treat, dessert, or any-time kind of snack. It’s especially good for those late-night-I’m-avoiding-studying-baking-sessions in college. I speak from experience. Enjoy.

Banana Chocolate Chip Bread

Adapted from Food Network
Print Recipe Pin Recipe
Prep Time 15 mins
Cook Time 50 mins
Total Time 1 hr 5 mins

Ingredients
  

  • 1 1/4 c all purpose flour
  • 1 tsp baking soda
  • 1/2 tsp fine salt
  • 2 large eggs
  • 1/2 tsp vanilla extract
  • 1/2 c unsalted butter at room temperature
  • 1 c sugar
  • 2 very ripe bananas peeled and mashed
  • 1 c chocolate chips

Instructions
 

  • Mix flour, baking soda, and salt in a medium bowl and set aside.
  • In a small measuring cup with a spout, whisk eggs and vanilla together.
  • Grease and flour a 9x5x3 inch bread loaf pan and preheat the oven to 350 degrees F.
  • Using an electric hand mixer (or a stand mixer with a paddle attachment) cream butter and sugar together till light and fluffy. Slowly add the egg and vanilla mixture, mixing till combined. To save on dishes, use the same measuring cup to mash the two bananas with a fork. Add the bananas to your mixture, combine well. At this point the mixture will look a bit lumpy and curdled - that's okay!
  • Remove the bowl from the mixer and use a rubber spatula to add the flour mixture and stir until just combined. Fold in the chocolate chips and pour batter into floured pan.
  • Bake for 50-55 minutes, or until a toothpick comes out clean. Cool the bread for 5-10 minutes before removing it from the pan. Let cool completely (if you can resist) and then wrap bread tightly in plastic wrap to store (this is VERY important to keep the banana bread moist and delicious.)


Filed Under: Breakfast/Brunch, Dessert, Personal Tagged With: breakfast recipe, brunch recipe, crowd pleaser, dessert, fears, friendship, relationship, shared meals

Pumpkin Cheesecake with Pecan Caramel Sauce

December 5, 2014 by Asharae 3 Comments

I do not exaggerate when I say that this cheesecake is the best dessert I’ve ever made. Ever ever. Even better than these cookies. I can’t take credit for the recipe though – the original was posted here on Food & Wine – feel free to hop over there for further instructions!

I know that I’m a little behind the times – hopping on the pumpkin bandwagon when it’s already December. But quite frankly, I don’t care. Because this pumpkin cheesecake is worth it. I’ve made this for two Friendsgivings in a row the past two years, and I have a feeling it’ll become a tradition. It’s just that good. It tastes like fall in the best way possible. I’m not sure what else to tell you to convince you to make this for your next holiday party…perhaps the photos will convince you?

Pumpkin Cheesecake with Pecan Caramel Sauce - thiswildseason.com -3 Pumpkin Cheesecake with Pecan Caramel Sauce - thiswildseason.com -2 Pumpkin Cheesecake with Pecan Caramel Sauce - thiswildseason.com -4 Pumpkin Cheesecake with Pecan Caramel Sauce - thiswildseason.com -5 Pumpkin Cheesecake with Pecan Caramel Sauce - thiswildseason.com -6

Okay and if the photos didn’t convince you, the long list of instructions certainly won’t. Don’t be discouraged though! This cheesecake has lots of steps but none of them are difficult. According to the original recipe’s author, the most important step is that you have all your ingredients at room temperature. Make this the day before your party, refrigerate it overnight, and serve drizzled with warm pecan caramel sauce. You can thank me later.

A lot of cheesecake recipes call for placing the springform pan in a bath of water, and baking it that way. I’ve read complaints of leaky springform pans, convoluted methods of sealing your pan with tinfoil, etc. It all sounds very tedious. And I don’t do tedious very well. But I do like cheesecake. So this recipe is the perfect compromise. No water baths. No aluminum foil. Just patience. Lots of patience. Trust me, it’s worth it.

In other news, I have a feeling my cheesecake shouldn’t have cracked while baking – there’s gotta be a scientific explanation for it and probably a way to correct for it, but I’m just going to let you know that it’s just as delicious with the cracks in the middle.

Enjoy this recipe. Take it to a party and I promise you’ll make new friends.

Pumpkin Cheesecake with Pecan Caramel Sauce

Katherine Beto
Print Recipe Pin Recipe

Ingredients
  

For the Cheesecake

  • One 15-ounce can pumpkin puree
  • 8 whole graham crackers
  • 1/2 cup pecans
  • 1 tablespoon light brown sugar
  • 5 tablespoons unsalted butter melted, plus more for greasing the pan
  • 1 1/2 cups cream cheese 14 ounces, at room temperature
  • 1 1/2 cups granulated sugar
  • 1 teaspoon salt
  • 1 teaspoon cinnamon
  • 1/4 teaspoon freshly ground nutmeg
  • 1/4 teaspoon ground cloves
  • 1/4 teaspoon ground allspice
  • 5 large eggs at room temperature
  • 1 cup heavy cream at room temperature
  • 1 tablespoon fresh lemon juice
  • 2 teaspoons pure vanilla extract

For the Pecan Caramel Sauce

  • 1 1/2 sticks unsalted butter
  • 3/4 cup dark brown sugar
  • 1/2 cup heavy cream
  • 1/4 teaspoon salt
  • 2 cups pecans

Instructions
 

For the Cheesecake

  • Take your "cold" ingredients out of the fridge and let them come to room temperature while you prep the pumpkin puree and bake the crust.
  • Line a large strainer (what you use to drain pasta) with two paper towels. Use a spatula to spread the pumpkin puree onto the paper towels. Let drain for 2 hours - the pumpkin puree should be fairly dry.
  • Preheat the oven to 500 degrees F and butter the bottom and sides of a 9 inch springform pan.
  • Use a blender or food processor to grind the graham crackers till they are a consistent texture - you're going for the texture of course sand. Add pecans and brown sugar and blend until finely ground. Add melted butter, pulse until combined, pour mixture into your springform pan, and press into the bottom of the pan. Bake the crust 3-5 minutes, until lightly browned. (The original recipe called to bake the crust for 8 minutes, but the edges of mine always start to burn around 4 minutes, so I take it out then.) Let the crust cool completely.
  • In a small bowl, stir together the sugar, salt, cinnamon, nutmeg, cloves and allspice. Set aside.
  • Use a standing electric mixer with the paddle attachment to beat the cream cheese until smooth. With the machine running, add the spiced sugar mixture and combine until smooth, scraping down the sides of the bowl as you go. Add the drained pumpkin puree and combine until smooth again. Add the eggs, one at a time. Scrape down the sides of your bowl between each egg. (I like to break the eggs in a separate bowl, one at a time, and then pour each egg into the mixing bowl - this ensures no pesky eggshells make their way into my cheesecake!) Beat well before adding each additional egg. Add heavy cream, lemon juice, and vanilla, and beat until smooth.
  • Pour cheesecake mixture over cooled crust. Bake for 12 minutes at 500 degrees F, then lower the oven temperature to 225 degrees F. Bake the cheesecake for 3 more hours, until an instant read thermometer measures 150 degrees. The center will still be slightly jiggly, but it shouldn't be liquidy.
  • Let the cheesecake cool, then cover with plastic wrap and refrigerate overnight or at least 8 hours.
  • The easiest way I've read (and tried) to remove the cheesecake from the pan is to run hot water over a knife (a butter knife works just great for this), dry it off, and immediately slide it between the edge of your cheesecake and the side of the springform pan. If the knife cools off, run it under hot water again, dry it off, and continue until you've loosened it from the pan. At that point you can remove the springform ring and cut and serve your cheesecake with the pecan caramel sauce. A hot knife works great for cutting the cheesecake as well! I've also heard of using floss to cut cheesecake, but I've never tried it - let me know if it works for you!

For the Pecan Caramel Sauce

  • While your cheesecake is cooling (or beforehand, while draining your pumpkin puree) set the oven to 350 degrees F. On a rimmed baking sheet spread the pecans in a single layer. Toast until lightly browned and fragrant, about 8 minutes. I like to stir them about 4 minutes in to be sure they don't burn. Check them toward the end of the 8 minutes in case your oven runs a little hot. Set aside to cool.
  • Combine butter and brown sugar in a saucepan over medium heat. Stir until smooth. Add heavy cream and salt, stir and bring to a boil. Lower heat and simmer until slightly thickened, around three minutes. Let cool.
  • Coarsely chop the pecans. Once caramel has cooled a bit, add the nuts and stir to combine.
  • Store in an airtight container and use the extra (if you manage to have any extra) to top your waffles and pancakes!
  • When ready to serve, heat caramel sauce slightly and pour over each individual slice of cheesecake. Take this to your next small group, family gathering, or church potluck and be prepared to make friends.

Notes

Apparently in the world of cheesecake-making it's very important that all your ingredients are at room temperature. I'm sure there's a perfectly good scientific reason for this which I am not prepared to give you. Just know that it's an important step!


Filed Under: Dessert Tagged With: crowd pleaser, dessert, holiday, holiday meal, shared meals

  • 1
  • 2
  • Next Page »

Hello there!

My name is Asharae. I’m a photographer by trade, wife to an amazing man, and mama to three little ones. I am passionate about creating good food, sharing meaningful conversation around the table, trying new things, and encouraging others to do the same.

Welcome to This Wild Season! This is a place for sharing what I’m learning in the kitchen and outside of it. Most of all, it is a challenge to myself and to you to slow down, be present in the moment, and re-learn how to savor food and conversation around the table.

About

Search

Connect

  • Facebook
  • Instagram
  • Pinterest
  • Twitter
  • Vimeo

Find my book on Amazon:

Recent Posts

  • Emmeline’s Birth Story, The Story of Her Name
  • Emmeline’s Birth Story, Birth Day Part 2
  • Emmeline’s Birth Story, Birth Day Part 1
  • Emmeline’s Birth Story, My Pregnancy
  • Emmeline’s Birth Story, An Introduction
Follow on Bloglovin
Visit This Wild Season's profile on Pinterest.

Copyright © 2025 · Foodie Child Theme by Shay Bocks · Built on the Genesis Framework · Powered by WordPress