This Wild Season

Sharing what I'm learning in the kitchen as well as outside of it.

Navigation
  • Home
  • Blog
  • Recipes
    • Appetizer
    • Breakfast/Brunch
    • Side Dish
    • Main Course
    • Dessert
    • Drinks
    • Personal
  • About

DIY Handlettered Menu

September 3, 2015 by Asharae 1 Comment

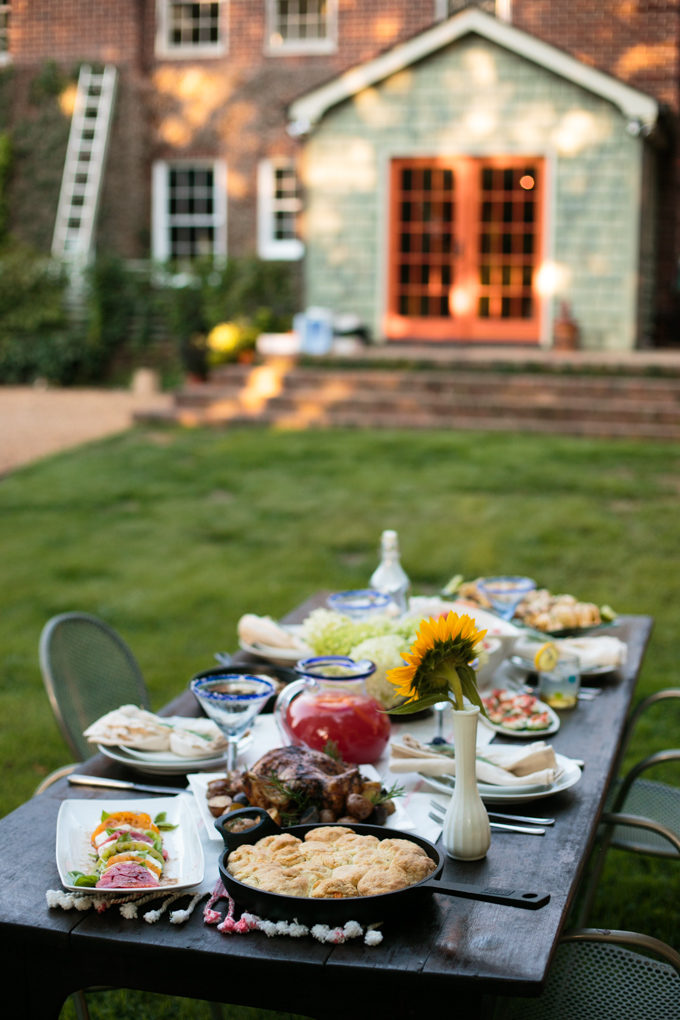
Last Friday I shared a bit about the summertime dinner party I got to put together with Susannah from Feast + West, Julia from Tag & Tibby, and Katie from Twin Stripe. We had the best time brainstorming a fabulous menu full of in-season fruits and veggies, local ingredients, and delicious recipes.

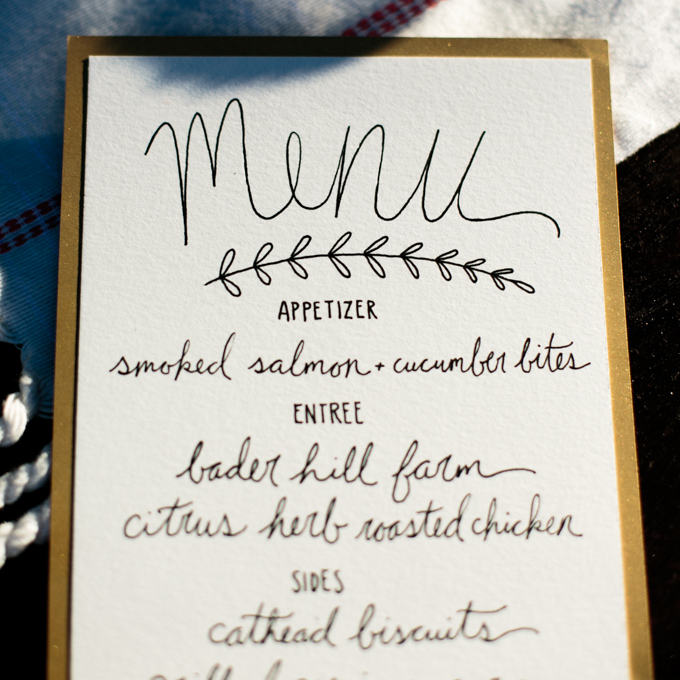
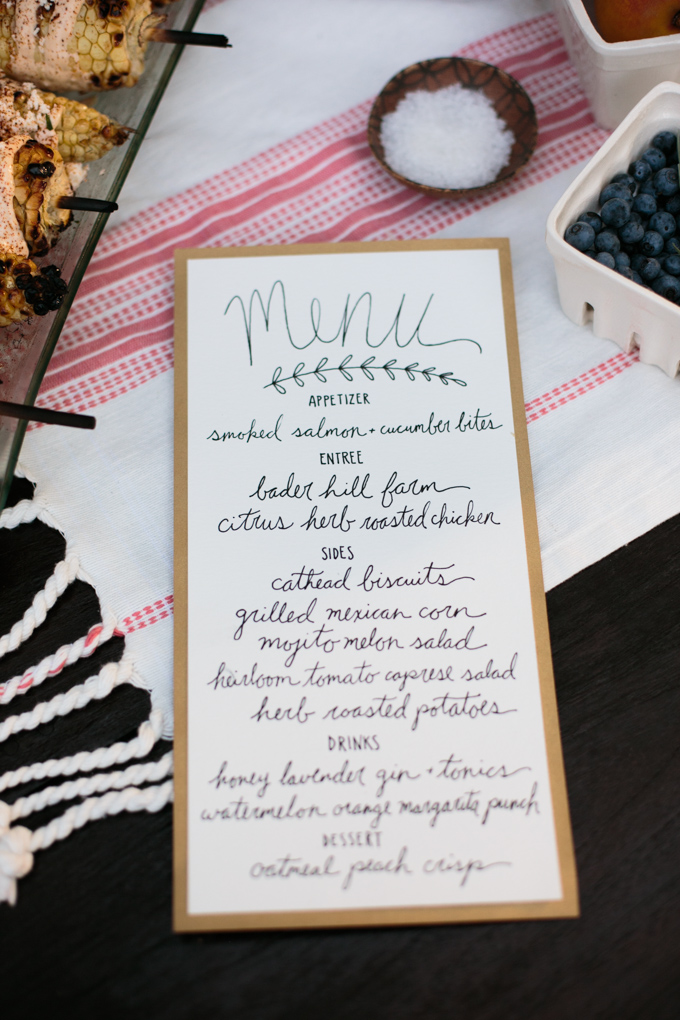
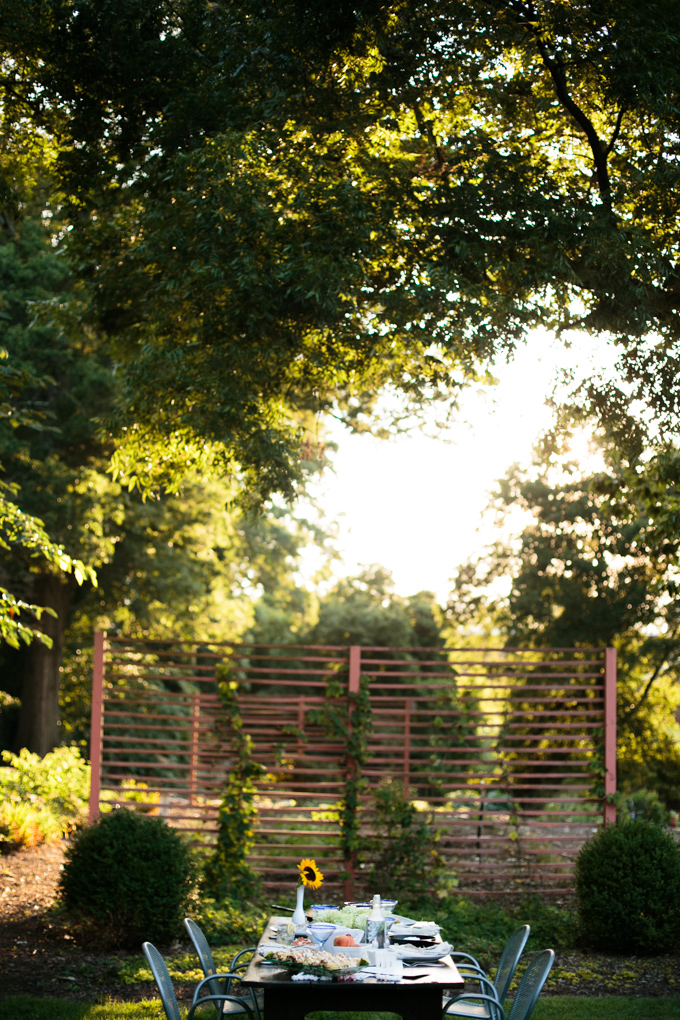
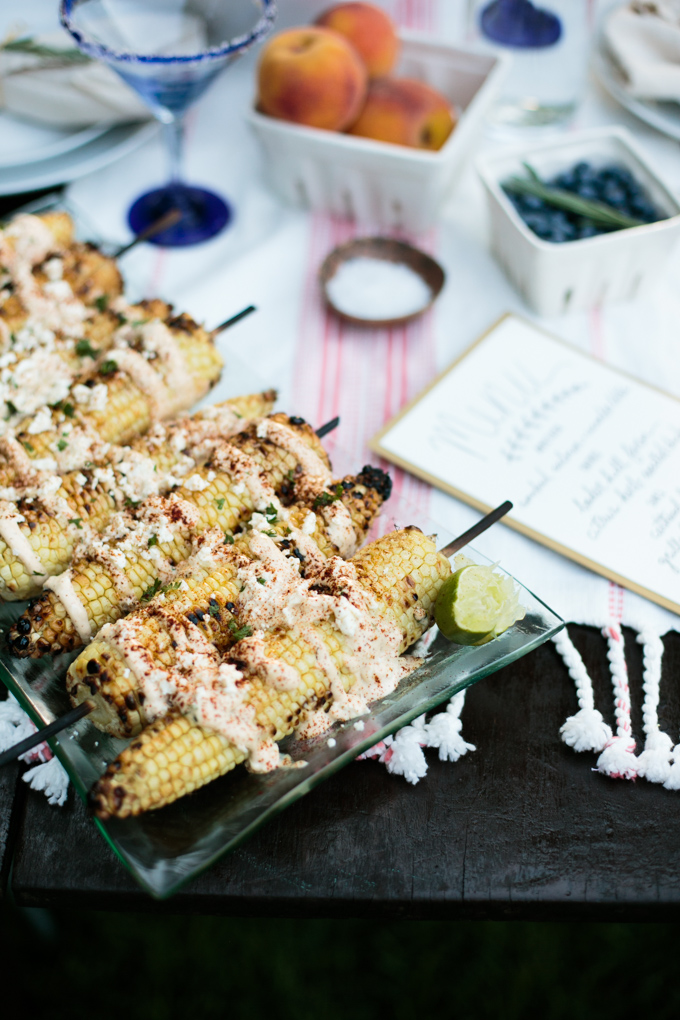
While Susannah was grilling her delicious corn on the grill, and Julia and Katie were hard at work on the table decor for our dinner, I sat down and created a handlettered menu to showcase each recipe that we’d created.

As some of you know, I’m currently co-authoring a DIY Handlettering book. (I still can’t believe it!) So I figured this sweet little handlettered menu was a great way to give you all a tiny sneak peek into everything I’ve been working on!

Follow along below for a list of supplies you’ll need and some simple instructions for creating your own handlettered menu for your next dinner party!

DIY Hand Lettered Menu - thiswildseason.com -2

The tools you need:

Pencil with a good eraser

Pen or Marker

Paper you plan to write your menu on (I used watercolor paper that had some texture to it and I glued that to a larger sheet of gold paper to give it a pretty border.)

DIY Hand Lettered Menu - thiswildseason.com -3 DIY Hand Lettered Menu - thiswildseason.com -4 Steps:

1. Using a pencil, gently sketch a general outline of how you’d like to layout your menu. Be sure to leave enough space for each item on your menu. If you find you’ve spaced your lines out too much, feel free to erase and start again.

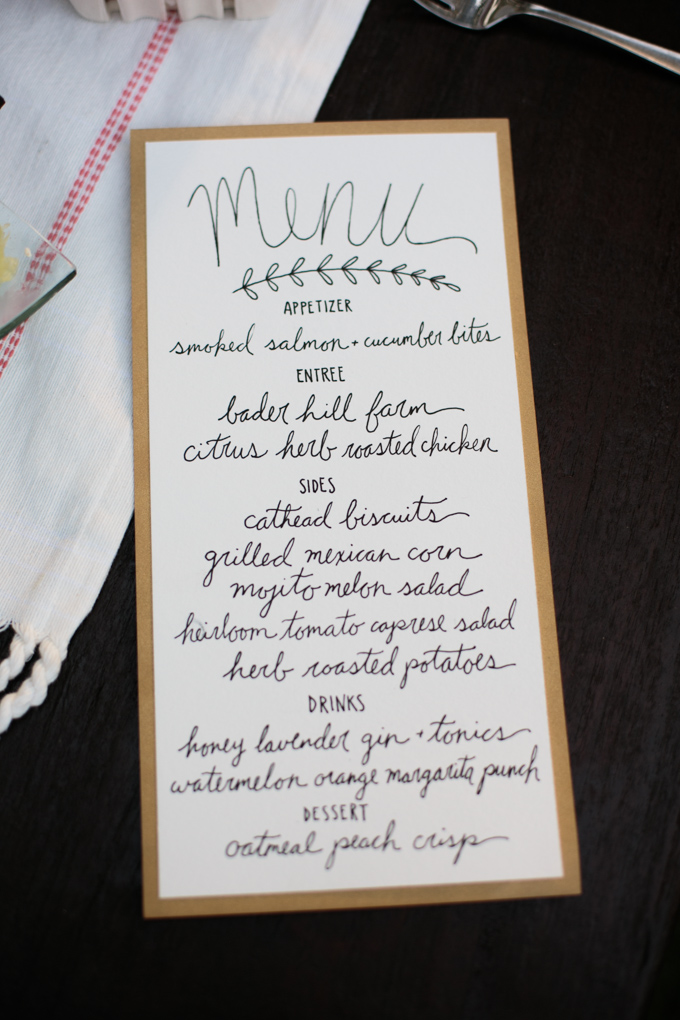
2. Once you have a general outline, begin to sketch the lettering for each of your menu items. I chose a loose flowy cursive style for the title and recipe names, and combined that with a skinny upright all-caps style for the name of each course. I recommend very lightly sketching this in so it’s easier to erase later!

DIY Hand Lettered Menu - thiswildseason.com -5 3. When you’re confident you’ve got a good layout for your menu and lettering, go over your pencil lines with a pen or marker. Be sure to wait till your lettering is completely dry before erasing your pencil lines.

4. Once your lettering is finished and pencil lines erased, feel free to use a pretty sheet of scrapbooking paper as a border or background to your menu. I simply cut the paper 1/4 inch larger than my menu on each side and then attached them together using a glue stick.

DIY Hand Lettered Menu - thiswildseason.com -6

I’ll be updating the links below as each new blog post from our summer supper collaboration goes up! Be sure to check back soon for more great recipes! You can also follow along on Instagram and other social media with the hashtag #sweetsummersupper

Appetizer

Smoked Salmon and Cucumber Bites // Twin Stripe

Entree

Bader Hill Farm Citrus Herb Roasted Chicken

Sides

Cathead Biscuits // Feast + West

Grilled Mexican Corn // Feast + West

Mojito Melon Salad // This Wild Season

Heirloom Tomato Caprese Salad // Tag & Tibby

Drinks

Honey Lavender Gin + Tonics // Twin Stripe

Watermelon Orange Margarita Punch // Feast + West

Dessert

Oatmeal Peach Crisp // Tag & Tibby


Filed Under: DIY, How To Tagged With: craft, crafting, DIY, DIY Handlettering, hand lettering, handlettering, meal planning, menu, shared meals

Banana Chocolate Chip Bread

May 28, 2015 by Asharae Leave a Comment

We have these friends, Brandon and Christy, who are extraordinary question-askers. They are the kind of people who ask questions that make those around them feel known. It’s such a gift. I’m not even sure they’re aware that they’re doing anything different – they’re genuinely curious and they truly care about their friends and family – but it really shows through the questions they choose to ask. Again and again we have felt so cared for by them because they ask good questions and they listen well.

I aspire to ask questions like these friends of ours. I want to learn how to ask the questions that dig a little deeper, rather than taking the easy way out and simply asking “how’s it going?” I always hesitate when asked that question – how much do you really want to know? What sort of answer are you looking for? Do I spill my guts and tell you how utterly overwhelmed I am? You probably weren’t looking for that, so do I just say that I’m fine? Is there some better way to answer that question?

I’ve been having all these thoughts rolling around my head lately and I happened upon this article over on Donald Miller’s Storyline blog. I love this quote from Melton’s article:

We learned that if we really want to know our people, if we really care to know them – we need to ask them better questions and then really listen to their answers.

We need to ask questions that carry along with them this message: “I’m not just checking the box here. I really care what you have to say and how you feel. I really want to know you.”

Isn’t that what we all crave? To be known? Not just to have people that know our favorite foods and our birthday, but to have people that know our dreams and our fears. It’s such a treasure if you have people that ask you those questions. But why not also be the person that asks those questions?

Instead of simply waiting for someone to enter into our world and ask us those questions – why don’t we put ourselves out there and ask someone else the difficult, potentially awkward questions. It’s in that space that growth happens. The process of knowing one another and truly being known can feel so extraordinarily uncomfortable. But the reward of deeper relationships far outweighs any potential awkwardness along the way.

Chocolate Chip Banana Bread by thiswildseason.com -2 Chocolate Chip Banana Bread by thiswildseason.com -3 Chocolate Chip Banana Bread by thiswildseason.com -4 Chocolate Chip Banana Bread by thiswildseason.com -5

Confession time – I’ve been holding out on you guys. This is one of my absolute favorite recipes. One fateful day in college my roommate Anna returned from a quick trip home and brought with her the most incredible loaf of chocolate chip banana bread. We sat on our little futon in our room, hunched over the foil wrapper of heavenly crumbs. I’d never had banana bread with chocolate chips in it before and I’m pretty sure I ate half the loaf with no shame at all. I vowed then to learn how to make banana bread that was at least half as delicious – I like to think this one has turned out pretty great.

This banana bread doesn’t look like much, but don’t let that fool you. It’s so so good. I’ve been making it since college and it always gets good reviews. You can always add walnuts or pecans as well – I recommend 1/2 c nuts and reducing your chocolate chips to 1/2 c as well if you go that route! And if you find you’ve always got bananas on-hand, you can put the extra brown ones in the freezer to use in this recipe later. Peel the bananas and place them in a freezer-safe bag before putting them in the freezer. Thaw them before using and then use the same way you would use fresh bananas. Fair warning – they’ll look totally gross once thawed, but they’ll taste just as good once you bake them into the bread!

This bread is best eaten while it’s still warm from the oven or the next day. Be sure to wrap the loaf of banana bread tightly with plastic wrap – this keeps the bread moist and delicious. I like to think it also locks the flavor in as it gets better a day or two after you bake it. This is a great breakfast treat, dessert, or any-time kind of snack. It’s especially good for those late-night-I’m-avoiding-studying-baking-sessions in college. I speak from experience. Enjoy.

Banana Chocolate Chip Bread

Adapted from Food Network
Print Recipe Pin Recipe
Prep Time 15 mins
Cook Time 50 mins
Total Time 1 hr 5 mins

Ingredients
  

  • 1 1/4 c all purpose flour
  • 1 tsp baking soda
  • 1/2 tsp fine salt
  • 2 large eggs
  • 1/2 tsp vanilla extract
  • 1/2 c unsalted butter at room temperature
  • 1 c sugar
  • 2 very ripe bananas peeled and mashed
  • 1 c chocolate chips

Instructions
 

  • Mix flour, baking soda, and salt in a medium bowl and set aside.
  • In a small measuring cup with a spout, whisk eggs and vanilla together.
  • Grease and flour a 9x5x3 inch bread loaf pan and preheat the oven to 350 degrees F.
  • Using an electric hand mixer (or a stand mixer with a paddle attachment) cream butter and sugar together till light and fluffy. Slowly add the egg and vanilla mixture, mixing till combined. To save on dishes, use the same measuring cup to mash the two bananas with a fork. Add the bananas to your mixture, combine well. At this point the mixture will look a bit lumpy and curdled - that's okay!
  • Remove the bowl from the mixer and use a rubber spatula to add the flour mixture and stir until just combined. Fold in the chocolate chips and pour batter into floured pan.
  • Bake for 50-55 minutes, or until a toothpick comes out clean. Cool the bread for 5-10 minutes before removing it from the pan. Let cool completely (if you can resist) and then wrap bread tightly in plastic wrap to store (this is VERY important to keep the banana bread moist and delicious.)


Filed Under: Breakfast/Brunch, Dessert, Personal Tagged With: breakfast recipe, brunch recipe, crowd pleaser, dessert, fears, friendship, relationship, shared meals

Guest Post by Lauren Lee: Fresh Spring Pea Soup With Crème Fraiche & Garlic Croutons

March 19, 2015 by Asharae Leave a Comment

I’m so excited to have one of my dear friends share a fantastic springtime recipe here today! I have looked up to Lauren for a long time for her confidence in the kitchen, her love of cooking and sharing meals with others, and her fabulous restaurant recommendations. Our stories overlap back and forth, starting before she was even in college when we worked at the same camp together, extending to shooting her wedding a couple years ago, with a whole lot in between!

You might remember that I mentioned her family in a post last summer on stovetop popcorn – they get complete credit for inspiring me to learn how to make it!

I absolutely love that Lauren and her husband have ended up in North Carolina, not too far from us. If you’re ever in the Chapel Hill area and need a good restaurant suggestion, Lauren is the person to talk to!

I can attest that this soup is totally fresh and delicious. It’s perfect for these days lately that have been hinting at spring, but still get chilly in the evenings.

Without further ado, I’ll hand it over to Lauren!

Spring has arrived in North Carolina! It’s hard to believe that just three short weeks ago there were several inches of snow on the ground.

In honor of spring, I would like to share a recipe for Fresh Spring Pea Soup. I know that peas can get a bad rap, but this soup is amazingly flavorful, healthy, and shockingly green! It’s also a bit impressive when serving it to friends, but super simple (and quick) to make.

The origin of this soup comes from my favorite chef- Ina Garten, also known as The Barefoot Contessa. I love Ina for her classic and “Foolproof” recipes, and of course for her love of Paris. Paris and recipes aside, I believe my (more than minor) infatuation* with The Barefoot Contessa comes from the way that her food unites my family as we live states apart.

Every week my sister (Chelsy), my mom, and I share food stories over the phone. For me, the joy of making a great meal is only multiplied when I am able to share the details with them. Although we can’t physically sit down to eat dinner together, we love poring over recipes and meal ideas, laughing & learning from each other’s cooking fails, and celebrating successful dinners together.

I can’t quite remember if it was my sister or my mom who sent me this recipe the first time, but we’ve all made it at some point, and have decided to put it in our arsenal of good soup recipes. I hope you enjoy making & eating it, and that you find yourself sharing it with your favorite foodie friend.

*Chelsy and I have (somewhat jokingly) dreamed of going to the Hamptons to stalk Ina at her gorgeous home 🙂

Fresh Spring Pea Soup at thiswildseason.com -2 Fresh Spring Pea Soup at thiswildseason.com -3 Fresh Spring Pea Soup at thiswildseason.com -4 Fresh Spring Pea Soup at thiswildseason.com -5

Fresh Spring Pea Soup With Crème Fraiche & Garlic Croutons

Adapted from Ina Garten
Print Recipe Pin Recipe
Prep Time 15 mins
Cook Time 20 mins
Total Time 35 mins
Servings 4 -6

Ingredients
  

  • 2 tablespoons unsalted butter
  • 2 cups chopped leeks white and light green parts (about 2-3 leeks) (Asharae's note - if you're unfamiliar with leeks, fear not! They're easy to use - be sure to check out this video on how to clean your leeks before you get started!)
  • 1 cup chopped yellow onion
  • 4 cups chicken stock homemade or store-bought
  • 2 10-ounce packages frozen peas (the freezing process locks in freshness)
  • 2/3 cup chopped fresh mint leaves
  • 2 teaspoons kosher salt
  • 1 teaspoon freshly ground black pepper
  • ½ cup crème fraiche
  • ½ cup chopped fresh chives
  • Garlic croutons for topping (see recipe below)

Instructions
 

  • Melt the butter in a large saucepan.
  • Add the leeks and onion. Cook on medium-low heat for 5 to 10 minutes until the onion is tender.
  • Add the chicken stock, and turn the heat to high to bring it to a boil.
  • Add the peas and cook for about 3 minutes, or until the peas are tender.
  • Turn off the heat, and add the mint, salt, and pepper. Stir to combine.
  • Next is the fun part- Pureeing the soup until smooth. As Asharae has mentioned in her previous posts, the immersion blender is a great tool for soups like this. If you don’t have an immersion blender, you can use your regular blender or food processor to puree the soup until smooth. Just be careful when transferring the extremely hot liquid.
  • Whisk in the crème fraiche and chives and add more salt and pepper to your preference.
  • Serve hot with garlic croutons, a tiny dollop of crème fraiche, a sprinkle of snipped chives, and a drizzle of olive oil.

Asharae’s Note: If you’re looking for the immersion blender I recommend, check out this one. I seriously use it all the time.


Garlic Croutons

Adapted from Martha Stewart
Print Recipe Pin Recipe
Prep Time 5 mins
Cook Time 15 mins
Total Time 20 mins

Ingredients
  

  • ½ loaf of crunchy bakery bread my favorite is a rustic Italian or French loaf, and day or two old works great
  • 2 tablespoons chopped garlic
  • 2-4 tablespoons olive oil
  • Kosher salt and freshly ground black pepper

Instructions
 

  • Heat your oven to 400 degrees.
  • (You can make croutons in a skillet on the stove or in the oven. If making on the stove, read more about that method here.)
  • Cut the bread into cubes. I never make mine look perfect- always going for that easy, rustic feel.
  • Toss the bread cubes in a large bowl with a generous amount of olive oil (I tend to use a lot). Then add the garlic, a heavy pinch of salt, and several cracks of pepper to the bowl and mix it all together.
  • Spread your croutons on a foil lined rimmed baking sheet (rimmed sheets are great for keeping these little guys from slipping off the pan, and foil makes the clean-up process way easier). You want them spread out and not too crowded.
  • Bake for about 10-15 minutes until golden brown and crunchy. You will want to give them a good stir or shake about half way through to get all of the sides browned.
  • Set aside to cool while you make your soup.

Notes

These babies are also awesome on salads (often with a bit of parm melted on them)

This post contains affiliate links, but all opinions are my own.

Filed Under: Guest Posts, Main Course Tagged With: comfort food, easy recipe, Guest Post, shared meals, simple recipe, soup

Pumpkin Cheesecake with Pecan Caramel Sauce

December 5, 2014 by Asharae 3 Comments

I do not exaggerate when I say that this cheesecake is the best dessert I’ve ever made. Ever ever. Even better than these cookies. I can’t take credit for the recipe though – the original was posted here on Food & Wine – feel free to hop over there for further instructions!

I know that I’m a little behind the times – hopping on the pumpkin bandwagon when it’s already December. But quite frankly, I don’t care. Because this pumpkin cheesecake is worth it. I’ve made this for two Friendsgivings in a row the past two years, and I have a feeling it’ll become a tradition. It’s just that good. It tastes like fall in the best way possible. I’m not sure what else to tell you to convince you to make this for your next holiday party…perhaps the photos will convince you?

Pumpkin Cheesecake with Pecan Caramel Sauce - thiswildseason.com -3 Pumpkin Cheesecake with Pecan Caramel Sauce - thiswildseason.com -2 Pumpkin Cheesecake with Pecan Caramel Sauce - thiswildseason.com -4 Pumpkin Cheesecake with Pecan Caramel Sauce - thiswildseason.com -5 Pumpkin Cheesecake with Pecan Caramel Sauce - thiswildseason.com -6

Okay and if the photos didn’t convince you, the long list of instructions certainly won’t. Don’t be discouraged though! This cheesecake has lots of steps but none of them are difficult. According to the original recipe’s author, the most important step is that you have all your ingredients at room temperature. Make this the day before your party, refrigerate it overnight, and serve drizzled with warm pecan caramel sauce. You can thank me later.

A lot of cheesecake recipes call for placing the springform pan in a bath of water, and baking it that way. I’ve read complaints of leaky springform pans, convoluted methods of sealing your pan with tinfoil, etc. It all sounds very tedious. And I don’t do tedious very well. But I do like cheesecake. So this recipe is the perfect compromise. No water baths. No aluminum foil. Just patience. Lots of patience. Trust me, it’s worth it.

In other news, I have a feeling my cheesecake shouldn’t have cracked while baking – there’s gotta be a scientific explanation for it and probably a way to correct for it, but I’m just going to let you know that it’s just as delicious with the cracks in the middle.

Enjoy this recipe. Take it to a party and I promise you’ll make new friends.

Pumpkin Cheesecake with Pecan Caramel Sauce

Katherine Beto
Print Recipe Pin Recipe

Ingredients
  

For the Cheesecake

  • One 15-ounce can pumpkin puree
  • 8 whole graham crackers
  • 1/2 cup pecans
  • 1 tablespoon light brown sugar
  • 5 tablespoons unsalted butter melted, plus more for greasing the pan
  • 1 1/2 cups cream cheese 14 ounces, at room temperature
  • 1 1/2 cups granulated sugar
  • 1 teaspoon salt
  • 1 teaspoon cinnamon
  • 1/4 teaspoon freshly ground nutmeg
  • 1/4 teaspoon ground cloves
  • 1/4 teaspoon ground allspice
  • 5 large eggs at room temperature
  • 1 cup heavy cream at room temperature
  • 1 tablespoon fresh lemon juice
  • 2 teaspoons pure vanilla extract

For the Pecan Caramel Sauce

  • 1 1/2 sticks unsalted butter
  • 3/4 cup dark brown sugar
  • 1/2 cup heavy cream
  • 1/4 teaspoon salt
  • 2 cups pecans

Instructions
 

For the Cheesecake

  • Take your "cold" ingredients out of the fridge and let them come to room temperature while you prep the pumpkin puree and bake the crust.
  • Line a large strainer (what you use to drain pasta) with two paper towels. Use a spatula to spread the pumpkin puree onto the paper towels. Let drain for 2 hours - the pumpkin puree should be fairly dry.
  • Preheat the oven to 500 degrees F and butter the bottom and sides of a 9 inch springform pan.
  • Use a blender or food processor to grind the graham crackers till they are a consistent texture - you're going for the texture of course sand. Add pecans and brown sugar and blend until finely ground. Add melted butter, pulse until combined, pour mixture into your springform pan, and press into the bottom of the pan. Bake the crust 3-5 minutes, until lightly browned. (The original recipe called to bake the crust for 8 minutes, but the edges of mine always start to burn around 4 minutes, so I take it out then.) Let the crust cool completely.
  • In a small bowl, stir together the sugar, salt, cinnamon, nutmeg, cloves and allspice. Set aside.
  • Use a standing electric mixer with the paddle attachment to beat the cream cheese until smooth. With the machine running, add the spiced sugar mixture and combine until smooth, scraping down the sides of the bowl as you go. Add the drained pumpkin puree and combine until smooth again. Add the eggs, one at a time. Scrape down the sides of your bowl between each egg. (I like to break the eggs in a separate bowl, one at a time, and then pour each egg into the mixing bowl - this ensures no pesky eggshells make their way into my cheesecake!) Beat well before adding each additional egg. Add heavy cream, lemon juice, and vanilla, and beat until smooth.
  • Pour cheesecake mixture over cooled crust. Bake for 12 minutes at 500 degrees F, then lower the oven temperature to 225 degrees F. Bake the cheesecake for 3 more hours, until an instant read thermometer measures 150 degrees. The center will still be slightly jiggly, but it shouldn't be liquidy.
  • Let the cheesecake cool, then cover with plastic wrap and refrigerate overnight or at least 8 hours.
  • The easiest way I've read (and tried) to remove the cheesecake from the pan is to run hot water over a knife (a butter knife works just great for this), dry it off, and immediately slide it between the edge of your cheesecake and the side of the springform pan. If the knife cools off, run it under hot water again, dry it off, and continue until you've loosened it from the pan. At that point you can remove the springform ring and cut and serve your cheesecake with the pecan caramel sauce. A hot knife works great for cutting the cheesecake as well! I've also heard of using floss to cut cheesecake, but I've never tried it - let me know if it works for you!

For the Pecan Caramel Sauce

  • While your cheesecake is cooling (or beforehand, while draining your pumpkin puree) set the oven to 350 degrees F. On a rimmed baking sheet spread the pecans in a single layer. Toast until lightly browned and fragrant, about 8 minutes. I like to stir them about 4 minutes in to be sure they don't burn. Check them toward the end of the 8 minutes in case your oven runs a little hot. Set aside to cool.
  • Combine butter and brown sugar in a saucepan over medium heat. Stir until smooth. Add heavy cream and salt, stir and bring to a boil. Lower heat and simmer until slightly thickened, around three minutes. Let cool.
  • Coarsely chop the pecans. Once caramel has cooled a bit, add the nuts and stir to combine.
  • Store in an airtight container and use the extra (if you manage to have any extra) to top your waffles and pancakes!
  • When ready to serve, heat caramel sauce slightly and pour over each individual slice of cheesecake. Take this to your next small group, family gathering, or church potluck and be prepared to make friends.

Notes

Apparently in the world of cheesecake-making it's very important that all your ingredients are at room temperature. I'm sure there's a perfectly good scientific reason for this which I am not prepared to give you. Just know that it's an important step!


Filed Under: Dessert Tagged With: crowd pleaser, dessert, holiday, holiday meal, shared meals

  • 1
  • 2
  • Next Page »

Hello there!

My name is Asharae. I’m a photographer by trade, wife to an amazing man, and mama to three little ones. I am passionate about creating good food, sharing meaningful conversation around the table, trying new things, and encouraging others to do the same.

Welcome to This Wild Season! This is a place for sharing what I’m learning in the kitchen and outside of it. Most of all, it is a challenge to myself and to you to slow down, be present in the moment, and re-learn how to savor food and conversation around the table.

About

Search

Connect

  • Facebook
  • Instagram
  • Pinterest
  • Twitter
  • Vimeo

Find my book on Amazon:

Recent Posts

  • Emmeline’s Birth Story, The Story of Her Name
  • Emmeline’s Birth Story, Birth Day Part 2
  • Emmeline’s Birth Story, Birth Day Part 1
  • Emmeline’s Birth Story, My Pregnancy
  • Emmeline’s Birth Story, An Introduction
Follow on Bloglovin
Visit This Wild Season's profile on Pinterest.

Copyright © 2025 · Foodie Child Theme by Shay Bocks · Built on the Genesis Framework · Powered by WordPress