This Wild Season

Sharing what I'm learning in the kitchen as well as outside of it.

Navigation
  • Home
  • Blog
  • Recipes
    • Appetizer
    • Breakfast/Brunch
    • Side Dish
    • Main Course
    • Dessert
    • Drinks
    • Personal
  • About

Blueberry Streusel Muffins

March 14, 2014 by Asharae 4 Comments

Saturday mornings are sort of a sacred thing in our home. It’s becoming increasingly rare that we have a free Saturday morning with nowhere to be, no wedding or engagement session to photograph, no video projects to work on, no school events to attend to. So when we are home on a Saturday, with no commitments to fulfill, we savor it. Or we try our best to at least.

During our year in Seattle Tim and I had crazy schedules – we were waking up before 3 AM to go to work and would see each other for a few hours before bed each night, just to do it all over again. It was awful. We are all about having time together. Even if we’re simply in the same room working on different things, it’s a thousand times better than if we were apart. I would venture to say I fiercely guard my time with Tim – when we’re apart I feel disconnected from him. He’s brings stability to our marriage where my wild imagination flutters about, thinking of all the things that could go wrong, and all the ways they could go right. He encourages me when I dream big – he’s the practical one that’ll look for a way to make it happen. He gently challenges me when my naturally undisciplined nature takes over and I waste my energy on unnecessary things. And he helps me to focus when my thoughts are jumbled and confused.

After Seattle, we learned that we couldn’t do that again. The crazy schedules and the never seeing one another. Even if we had to make “career sacrifices” or anything of the sort, we knew we valued our time with one another more than that. Our typical Saturday morning routine stems from our need to connect and just spend time together after a long week of work (teaching for Tim, our photo/video business for me).

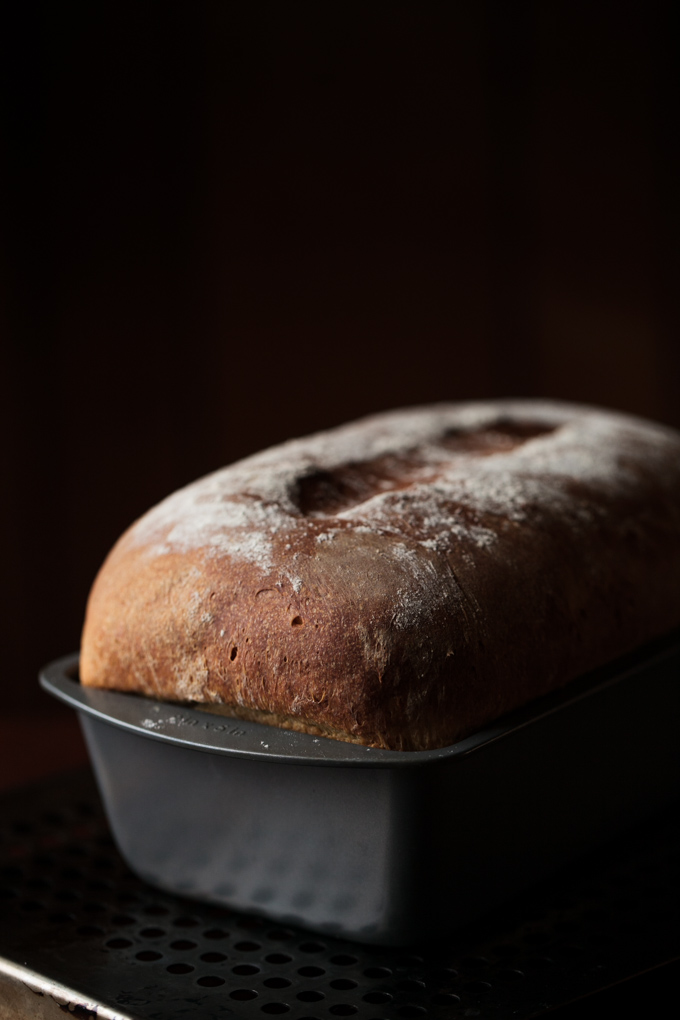
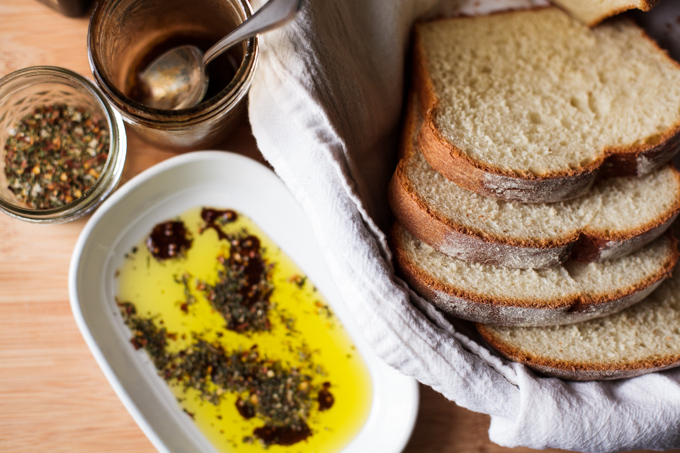
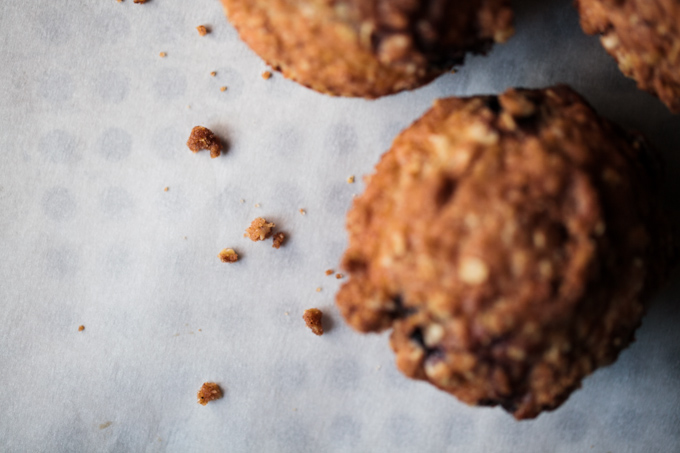
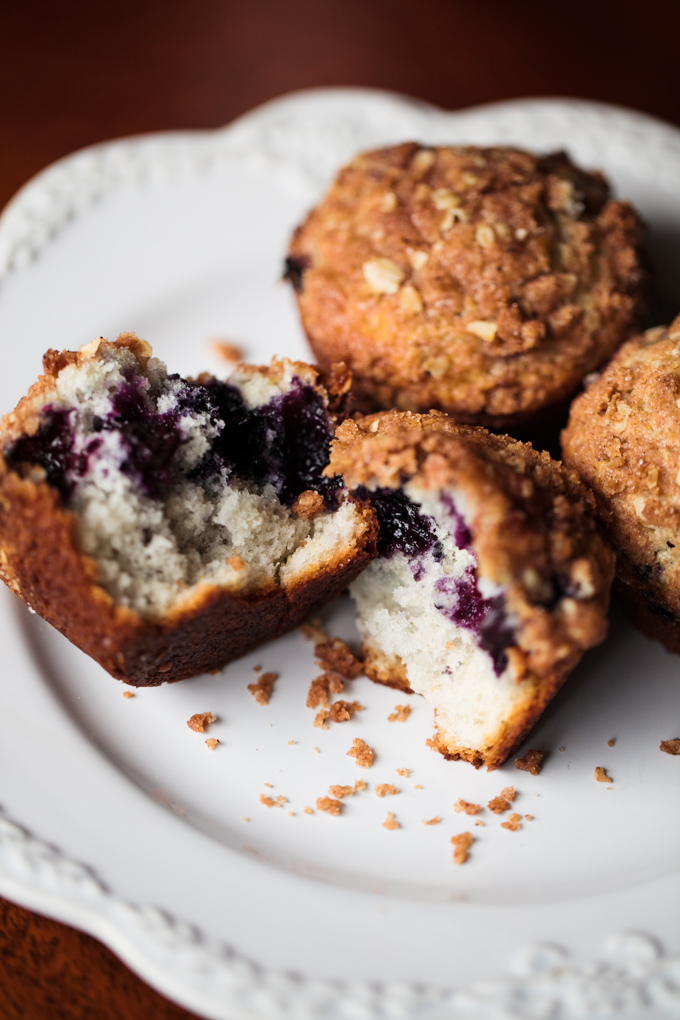
When we’re not off to a wedding or other event, we wake up slow. Tim makes coffee. I lazily get out of bed. On a good day I’ll make muffins or something that takes a little more time. On a morning when we’re hungrier, we’ll toast a bagel, grab a bowl of cereal, or scramble some eggs if we can stand being that patient. I’m trying to learn how to make an omelet, so that’s what I attempted last Saturday – an omelet with mushrooms, spinach, green onions, feta, and a little pesto on top.  It was a semi-success. As in – it looked like an omelet till I flipped it. Oh well, at least it tasted delicious. One day I will conquer you, little omelet. But not today. Today is blueberry muffin day.

I encourage you to wake up slow tomorrow, stay in your pajamas, sip your coffee slowly, enjoy the aromas and the warmth of it all. Make something worth eating. Enjoy it with someone you love. Slow down and soak up the goodness of this day.

I for one am VERY excited about tomorrow – two of my college roommates are visiting for the weekend! We are very good at relaxing and drinking copious amounts of coffee when we’re together. I’m certain this will be a good weekend full of good food and great conversation. What are your plans for this weekend? Perhaps they should include these muffins!

Blueberry-Muffin-Recipe_This-Wild-Season-2 Blueberry-Muffin-Recipe_This-Wild-Season-3 Blueberry-Muffin-Recipe_This-Wild-Season-4 Blueberry-Muffin-Recipe_This-Wild-Season-5 Blueberry-Muffin-Recipe_This-Wild-Season-6 Blueberry-Muffin-Recipe_This-Wild-Season-7 Blueberry-Muffin-Recipe_This-Wild-Season-8 Blueberry-Muffin-Recipe_This-Wild-Season-9 Blueberry-Muffin-Recipe_This-Wild-Season-10 Blueberry-Muffin-Recipe_This-Wild-Season-11

Blueberry Streusel Muffins

Adapted from This Mommy Cooks
Print Recipe Pin Recipe
Course Muffins

Ingredients
  

For the Muffins

  • 1 ½ cups all purpose flour
  • ¾ cup sugar
  • ½ teaspoon salt
  • 2 teaspoon baking powder
  • 1/3 cup vegetable oil
  • 1 egg
  • Approximately 1/3 cup milk
  • 1 cup blueberries
  • 1/2 cup unsweetened apple sauce only if needed or if substituting whole wheat flour (I didn't use it for mine)

For the Streusel Topping

  • 2 Tbs sugar
  • 2 Tbs brown sugar
  • 2 Tbs oats
  • 2 Tbs and 2 teaspoon flour
  • 2 Tbs butter cubed
  • ¾ teaspoon cinnamon

Instructions
 

  • Combine flour, sugar, salt and baking powder.
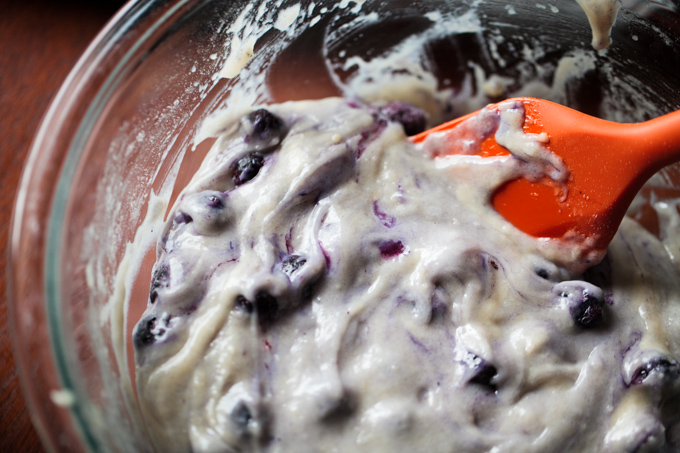
  • Place vegetable oil into a 1 cup measuring cup; add the egg and enough milk to fill the one cup measurement. Mix this with flour mixture.
  • If your mixture still seems dry, (or you use whole wheat flour instead of AP flour) add up to 1/2 cup unsweetened apple sauce.
  • If you're using frozen blueberries, gently toss the blueberries in about a tablespoon or so of flour to coat them. This will keep your whole muffin from turning blue. (I tried this method and my batter still turned blue. The muffins looked great when finished though!)
  • Fold blueberries into batter.
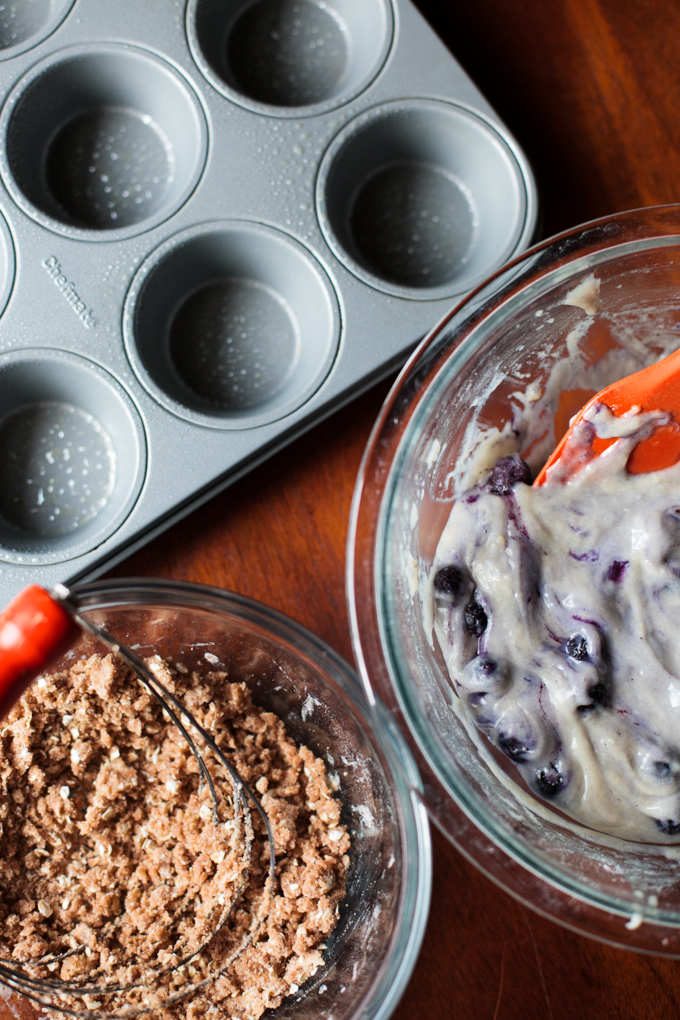
  • Divide batter into 12 greased or lined muffin cups.
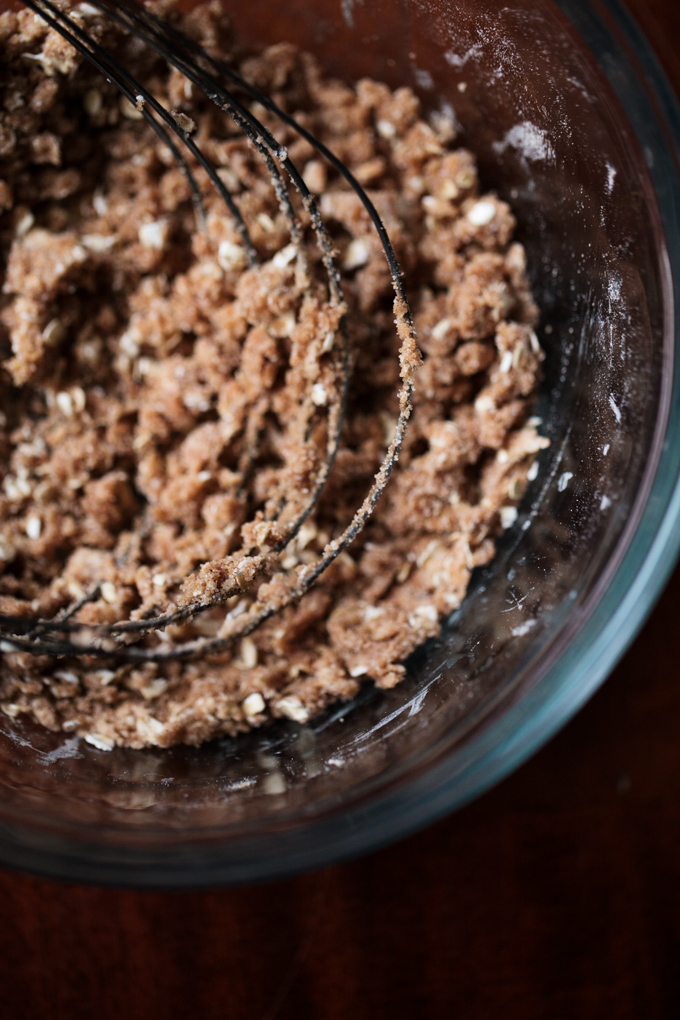
  • Combine streusel ingredients and mix well with a fork or pastry cutter until crumbly.
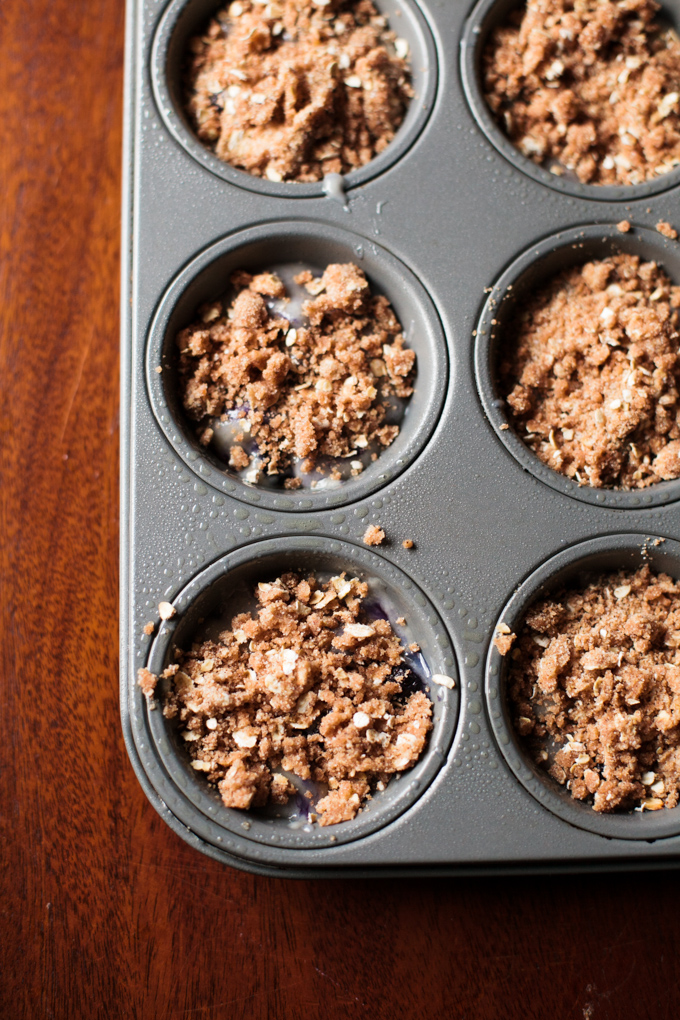
  • Sprinkle over tops of muffins before baking.
  • Bake at 400° for 20-25 minutes.


Filed Under: Breakfast/Brunch Tagged With: breakfast recipe, brunch recipe, muffins

Simple Crockpot Chili

March 13, 2014 by Asharae 9 Comments

At the beginning of our marriage, Tim and I moved to Seattle for a year so I could intern with the fabulous husband-wife photography team now known as We Are the Rhoads. It was the most incredible opportunity and was exactly where we were supposed to be that year. I’m grateful everyday for the photography/business/marriage/life/pursue-your-dreams wisdom Chris and Sarah shared with me throughout that year. I love looking back and seeing how other people’s stories have affected my own – where their lives intersected with mine, even if just for a short time. It’s incredible the ways we can grow and be challenged by seeing the way other people live their lives, run their businesses, whatever it might be.

That year in Seattle was a hard one for us in many ways. We were still figuring out what it meant to be married, to be college graduates, to do the whole job-search thing, to pay bills and rent and student loans, to live 3000 miles away from our families and everything familiar. Oh and let’s not forget the whole getting-up-for-4-am-shifts learning curve. That one was steep. While in Washington, we always knew it would be temporary – we thought we’d probably stay two or three years and then move back east to “settle” closer to family. I struggled with a weird sort of guilt when we moved after only a year – a teaching job back in NC calling us back east and back toward family.

We see now that we sorta kept to ourselves that year, too afraid to invest much in our church and too fearful and shy to invest deeply in our friendships, knowing we’d have to say goodbye soon. We laugh that most of the friends we made while in Seattle were actually from North Carolina. Go figure. Instead of reaching out, we clung to each other. I remember many early mornings with tears and exhaustion, feeling the guilt of not trying hard enough to invest in the here and the now, and the weariness of just trying to get by with crummy part-time jobs. Someone once told us that perhaps our season in Seattle was difficult for a reason. Perhaps we weren’t meant to stay there for very long, and that’s okay. That was an incredibly freeing thought – to realize that some things are just for a season (most are really), and it’s okay take what you’ve learned, move on, and let things go. Oh the freedom!

Even now we’re still figuring out what it means to invest in what feels like a temporary place. It’s hard when our ideas of where we think we “should” be don’t match up with what actually unfolds. But are we going to live in this in-between place, never fully grounded, never fully accepting that we are here, we are here now, and we are here for a reason? That would be an awfully sad existence. Perhaps today, together, we can find one small way to invest in our here and now. Perhaps that means calling your friend and asking them to dinner rather than just thinking about it. Maybe it’s reaching out to your co-worker and being curious about their story. Maybe it’s slowing down and writing that letter to your grandmother. It’s quite possible it means less Netflix and less Instagram, less of having our eyes on our phones, and more of having them on those around us instead.

A lady once described Seattle to me as a gray old man, with a long gray beard, grumbling away in his home on a gray rainy day. I laughed. And completely agreed with her. But I also had a saying – “when Seattle is beautiful, it is BEAUTIFUL,” and there’s no where else you’d rather be. When the sun is shining and you see mountains in both directions, when you smell the salty air, and feel the wind in your hair – there’s no where else you’d rather be. Really and truly. On that note, when you go to Seattle, go as a visitor – it’s always sunny when visitors come. Most every other day is a mysterious misty gray, a drab depressing gray, or a drizzly cozy sort of gray – and enjoying it is very much about what you choose to do with the gray (and whether or not you’re taking Vitamin D pills). Anyway, enough reminiscing about my love-hate relationship with Seattle. On to the food!

Chili-Recipe_This-Wild-Season-2 Chili-Recipe_This-Wild-Season-3 Chili-Recipe_This-Wild-Season-4 Chili-Recipe_This-Wild-Season-5 Chili-Recipe_This-Wild-Season-6 Chili-Recipe_This-Wild-Season-7

This recipe is an ode to one I first made while we lived in Seattle. We had one final dinner-party-hurrah before we moved, and this was the simplest thing I could think to make for our Seattle friends! It’s perfect for a cold winter day, or a dreary rainy Seattle one for that matter. Winter is still flirting with us here in North Carolina, and I’m sure we’ll have a few more chilly days before spring really makes an appearance. The wonderful thing about this recipe is that it takes just a few minutes of preparation and then you toss everything in the crockpot to get happy! You can even prep everything the night before, put it all in the bowl of your slow cooker and leave it in the fridge overnight. Just set it on low when you leave for work in the morning and you’ll have a delicious dinner waiting for you when you return! You can substitute ground turkey for a healthier option, or if you have leftover pork shoulder that’s also delicious in this recipe! I love to serve this with cheese, tortilla chips, lime, and cilantro, but you can enjoy it with saltines, or this bread goes really well with it too!

Simple Crockpot Chili

Asharae Kroll
After a short prep, toss all the ingredients in the slow cooker and enjoy a warm, hearty dinner in the evening!
Print Recipe Pin Recipe
Course Chili

Ingredients
  

  • 1 lb ground beef
  • 1 yellow onion diced
  • 2 15 oz cans diced tomatoes with juice
  • 2 15 oz cans red kidney beans drained and rinsed
  • 1 15 oz can black beans drained and rinsed
  • 1 15 oz can corn drained
  • 1 15 oz can tomato sauce or 1 small can tomato paste, and add 1-2 small cans water
  • 2 Tbs chili powder
  • 1 tsp red pepper flakes
  • 1 1/2 tsp garlic powder
  • 1 1/2 tsp cumin
  • A pinch of black pepper
  • A pinch of allspice
  • Salt to taste
  • 1-2 cans of water if you don't want your chili to be so thick

Instructions
 

  • Brown ground beef over medium heat. Drain and add to slow cooker.
  • Saute onions in the same pan until tender. Add to slow cooker.
  • Add the rest of the ingredients. Stir to combine.
  • Cook 8 hours on low or 4 hours on high.
  • Alternately, you can prep everything the night before, combine it all in your slow cooker pot, place it all in the fridge, and put it on to cook in the morning. I like to think this helps the flavors get happy overnight!
  • Serve with your choice of tortilla chips, lime, cilantro, cheese, crackers, hot sauce (for those who like it spicier), or whatever makes you happy!

Notes

Adjust this recipe to your tastes - if you like it spicier, add more red pepper flakes, if you want it mild, eliminate them all together! Play around with the amount of spices and the types of beans you add. Maybe add jalapeños or sautéed green bell pepper! Let me know if you try something new that you really enjoy! I'd love to hear about it!


Filed Under: Main Course Tagged With: chili, crockpot, easy recipe, slow cooker

Basic Bread Recipe for Bread Machine

March 12, 2014 by Asharae 9 Comments

Hunger is the most basic of needs. We all feel hungry at some point. Some more often than others. Some with more intensity than others. We hunger for food, for relationship, for stability, for safety, and for peace in our lives. I lived in Costa Rica for a summer, and my host mom there would always pray before meals “Danos hambre y sed para tí Dios” – Give us hunger and thirst for you Lord. She’d pray, not just thanking Him that our everyday need of hunger was satisfied and our thirst satiated, but asking Him for more feelings of hunger and thirst. This has stuck with me for years. A need, not just for food, but a need for the Lord. That’s exactly what it should be and what it becomes if you let it – a hunger and thirst for the Lord – the most basic of needs. He is our most basic of needs. He is present with us, and we need Him every day.

This blog is an outpouring of many things – my heart mostly, my desire to bring friends and family together with food, my love for deep conversation shared over drinks and dessert, and my longing to cultivate a home that is warm and welcoming, where people feel comfortable to simply be themselves. One of the chief goals I have in creating this blog though, is not just to be an excuse to make and eat good food, but also to use it as a way to provide for others who hunger. I am so privileged to have food in my pantry and filling up my fridge, but not all are quite so blessed. It’s only fitting that what is shared here – the stories and the recipes surrounding community and joining around the table – benefit not just my little community in my own home, but the community beyond my four walls.

I know that blogs can take a while to get going, to get followers, advertising, and sponsors to the point where they turn any kind of profit, but my goal is that once we’re to that point, we’ll donate a portion of what we make to provide for people who hunger – those who hunger for food, for shelter, for security, for the Lord. My thought right now is that each quarter we’ll choose a different non-profit to donate to, and we’ll highlight them here on our blog so you’ll be able to donate directly if you wish! So go ahead, share this blog with your friends! Follow us on Pinterest, Facebook, Twitter, and Instagram! Every bit helps!

Let me know if you’re familiar with any wonderful organizations that provide for those who hunger! I would love to compile a list of non-profits and such that we could potentially give to!

Since we’re talking about our most basic needs, I thought it was appropriate to share a recipe for the most basic of foods – bread! If the thought of making bread terrifies you, fear not! This is the EASIEST bread I have ever ventured to make. My goal is to learn how to make one of those round crusty artisan loaves that crunches when you break it open. Mmmmm. One day. For now we’ll settle for this bread, which is pretty darn delicious straight out of the oven. If you have a bread machine (or can borrow one from a friend – I’ve been “borrowing” my mom’s since Christmas) then you’re in luck! This recipe specifically calls to use the Dough setting on your bread machine, and then you can bake it in a well-greased 9×5 pan in the oven to get a beautiful loaf of bread! I’ve been making this at least twice a week for the past month or so and it always disappears quickly! It’s great for sandwiches, french toast, dipping in olive oil and spices (bonus if you add in the vinaigrette we made yesterday!) I’m sure this bread would be delicious with parmesan and garlic mixed into the dough – I’ll let you know how it turns out when I try it!

Fun fact: This bread made its internet debut in a styled shoot we did last month! Check out the featured post on The Lovely Find and the full story on our photography site!

Basic-Bread_This-Wild-Season-2 Basic-Bread_This-Wild-Season-4 Basic-Bread_This-Wild-Season-6 Basic-Bread_This-Wild-Season-7 Basic-Bread_This-Wild-Season-8 Basic-Bread_This-Wild-Season-9 Basic-Bread_This-Wild-Season-10 Basic-Bread_This-Wild-Season-12 Basic-Bread_This-Wild-Season-13 Basic-Bread_This-Wild-Season-11 Basic-Bread_This-Wild-Season-14

Basic Bread Recipe for Bread Machine

Asharae Kroll
A super simple bread recipe for the bread machine.
Print Recipe Pin Recipe
Prep Time 2 hrs
Cook Time 25 mins
Total Time 2 hrs 25 mins
Course Bread

Ingredients
  

  • 1 cup warm water
  • 2 Tbs butter softened (or shortening for crispier bread)
  • 1 tsp salt
  • 2 Tbs honey or sugar
  • 2.5 cups bread flour
  • 1 packet yeast 2 1/4 tsp

Instructions
 

  • Place ingredients into bread machine in the order recommended by the manufacturer.
  • Mine recommends to put the water, salt, butter, and honey in first.
  • Add the flour on top of that.
  • Make a small well in the flour and add the yeast.
  • Adjust your bread machine to the Dough setting, 1.5lb loaf and let it run. I like to check on it about 5 minutes in to make sure it's not too wet or too dry. If it looks too wet and sticky, add a tablespoon or two of flour. If too dry and flaky-looking, add a tablespoon or two of water. Let the machine run through its whole cycle and try not to peek at it too much! (Bread machines heat up slightly which helps the rising process, each time you open it you let some of the heat out which can cause it to rise slower.)
  • Once the dough cycle is finished, turn dough out onto a floured surface. Gently press into a rectangle about 9-10 inches long (you can measure it along the side of your 9x5 pan). Fold one of the long sides in toward the center and fold the other long side on top of that - you're essentially folding it in thirds. Gently place the dough, seam side down, in your well-greased 9x5 pan. Use a knife to cut a small slit (about 1/4 inch deep) down the middle of the dough - this will allow it to expand.
  • Let the dough rise for 30 minutes or so until it looks good. If your house is colder, this could take up to an hour or more. I like to heat my oven for a few minutes, turn it off, and place the dough in for about 30 min to speed up the process. Whatever it looks like now is approximately the size it'll be when it's done baking. Toward the end of this final rising, preheat your oven to 375 degrees. (Take the bread out at this time if you used the oven to let it rise.)
  • Once dough is finished rising, bake for 25 minutes at 375.
  • Bread is finished when you tap it with your finger and it sounds hollow.


Filed Under: Appetizer, Side Dish Tagged With: bread, bread machine, simple recipe

Basic Vinaigrette and Salad

March 11, 2014 by Asharae 8 Comments

I recently read Bread & Wine by Shauna Niequist. If you haven’t already read this little beauty, you need to get your hands on a copy. Like, yesterday. The way she writes, speaks about food and conversation around the table, shares about life and loss and the beauty of walking alongside your friends and family through it all – well, it is simply beautiful. She puts things into words that I never would have been able to speak so eloquently. Many, many times as I read this book, I found myself saying, “Yes! My thoughts exactly!” Although I’d never been able to put many of those thoughts into words before now.

The name of this blog actually comes from a quote out of Bread & Wine:

“Let’s be courageous in these days. Let’s choose love and rest and grace. Let’s use our minutes and hours to create memories with the people we love…I pray that we’ll live with intention, hope, and love in this wild season and in every season, and that the God who loves us will bring new life to our worn-out hearts this year and every year, that we’ll live, truly and deeply, in the present, instead of waiting, waiting, waiting for perfect.”

Isn’t that just beautiful? When the world tells us to be constantly on the go, competing for the top, always available and accessible, unforgiving to those who disagree with us, and constantly distracted – what a beautiful call this is to do just the opposite. A call to slow down, be present, let go of the worries of the future, love on those around us here and now. Just soak that up for a moment.

This season is wild. For us it certainly is, and for you I’m sure. My husband, Tim, and I never dreamed we’d end up back in the town I grew up in, him teaching at the high school I attended, us living in the actual house I grew up in. What a crazy life this is. This season isn’t at all what we would have chosen for ourselves, and yet it is beautiful. We’re learning in the midst of the unexpected. We’re stumbling and making mistakes and growing through the ups and downs. And even though we’re excited for what’s next, we’re also struggling and striving to see what God has for us here and now. May we all “live, truly and deeply, in the present, instead of waiting, waiting, waiting for perfect.”

Are you striving to live in the present? To just be? To allow yourself to rest and let go of your fears and worries?

Today’s recipe is a simple vinaigrette found in Shauna’s Bread & Wine. I made it for the first time the other week and feel it will become a staple in our fridge. It’s ridiculously simple to make – no whisking or blending of ingredients – simply toss it all in a jar and shake. I was actually surprised how well my dressing stayed mixed together – I always think of vinaigrettes separating and needing to be shaken before each use. Not this one though. If you like your vinaigrette a little less “puckery,” you can add more olive oil to mellow it out. I personally liked this just the way it was!

I drizzled this over a salad of spinach, red onion, sunflower seeds, and feta cheese. It was delicious! Use it however you like – I think it’d be great on a salad topped with walnut and dried cranberry as well! Come back tomorrow – we’ll be featuring a super-duper simple recipe and another use for this delicious vinaigrette!

Simple-Vinaigrette_This-Wild-Season-2 Simple-Vinaigrette_This-Wild-Season-3 Simple-Vinaigrette_This-Wild-Season-4 Simple-Vinaigrette_This-Wild-Season-5 Simple-Vinaigrette_This-Wild-Season-6 Simple-Vinaigrette_This-Wild-Season-7 Simple-Vinaigrette_This-Wild-Season-8 Simple-Vinaigrette_This-Wild-Season-9

Basic Vinaigrette and Salad

Shauna Niequist
A simple vinaigrette recipe
Print Recipe Pin Recipe

Ingredients
  

  • 1 Tbs Dijon
  • 1/4 cup balsamic vinegar
  • 1/4 tsp salt
  • 1/8 tsp pepper
  • 1/2 cup olive oil

Instructions
 

  • Spoon dijon into a jar, then add vinegar and salt and pepper.
  • Screw on the lid tightly and shake vigorously.
  • Then add the oil, replace the lid, and shake again.
  • Adjust to taste.


Filed Under: Main Course, Side Dish Tagged With: salad, salad dressing, vinaigrette

Welcome! And Samoa Donuts!

March 10, 2014 by Asharae 7 Comments

Welcome to This Wild Season! The idea for this food blog has been rolling around in my head for several months now and I finally decided to just go for it. No more worrying about what could go wrong, where I’ll find time, who will even read it. Enough weighing the odds and wondering “what if?” I’m naturally a dreamer and at any given time have about fifteen ideas running through my mind about things I want to do, see, and accomplish. But when it comes to actually acting on my dreams, I tend to play it safe, sticking with what I know. Slowly, tentatively, I’m ready to let go of that.

Lately I started wondering what it would be like to start a personal blog as an outlet for my thoughts. I blog over on our photography and videography site, but sometimes I simply need to sit and process my own story, think through the things I’ve been learning, and reflect on the day or the season. I’m a firm believer that if we don’t take time to assess our situation, where we are in life, what we’re dreaming about and accomplishing and how they relate to one another, the years will pass and we’ll look back and wonder “what happened?” Where did the time go and what happened to those things we dreamed about? Sometimes our dreams are childish or selfish and it’s okay to let them go. I believe that other times God places passions and desires in our hearts, He gives us talents and gifts, He gives us big dreams that only He has the ability to accomplish. Those are the dreams we should dream. Not our selfish ones, but the ones we feel compelled to pursue, after careful and intentional prayer.

My husband and I are photographers and videographers by trade, but we also have a passion for cooking together. We love sharing what we create with others and especially teaching them how to do it themselves. We love trying new techniques, learning from our mistakes, and passing what we learn along to others who might feel a little tentative in the kitchen. It pains me when I hear my friends and family say “Oh I don’t like to cook,” “I’m afraid I’ll mess up,” “I’d rather sit down and have someone else feed me,” “I don’t have time or energy for that,” “It takes too much creativity to make a meal from scratch.” Although I can agree with each of those sentiments at one time or another, the fact is that those are often excuses. Excuses to avoid trying something new, keeping ourselves from learning and growing. The worst part is that this fear hinders us from creating food and nourishment for ourselves and the people we love.

Over time, the tradition of shared meals each night with family has turned into a habit of grabbing dinner on the run. We cram food in our faces as we run out the door or fly down the highway, and we speed through the drive-thru and get annoyed when they take more than two minutes to deliver our food. Now, there is a time and a place for quickly getting food and being on our way. Every day and every night is not that time. I challenge you to slow down, to embrace the here and the now, to re-learn to savor food and family and conversation around the table.

This blog is a place to share what I’m learning in the kitchen and out. I’d love for you to join me in learning, growing, and trying new things! Feel free to take the recipes shared here and make them your own! Let me know how they turn out for you in the comments below. And if you have any questions about techniques, a recipe request, or just want to send a message my way, use the contact page. Keep up with what we’re working on by following us on our Facebook page, Pinterest, Twitter, and Instagram!

In the spirit of trying new things and slowing down, here’s a recipe that needs a whole morning of devotion to bring together. It’s totally worth it. Make them on a Saturday morning when you have nowhere to be, when you’d rather lounge around the house in your pjs with your coffee in hand. I made these donuts the other week in the middle of a crazy snow storm we had, and I decided they were so pretty I needed to photograph them. Obviously. It was just the push I needed toward actually making this blog happen! Thanks, pretty donuts!

The original recipe came from two different sources – the coconut caramel topping is from The Urban Poser‘s guest post here on PaleOMG, and the actual donut batter recipe is from Top With Cinnamon, because the former called for almond flour and that stuff is expensive! We’re not gluten-free or anything so that wasn’t a concern. If it is a concern for you however, there are lots of alternative ingredients over on PaleOMG for you to swap out!

Samoa-Donuts_This-Wild-Season-2 Samoa-Donuts_This-Wild-Season-4 Samoa-Donuts_This-Wild-Season-3 Samoa-Donuts_This-Wild-Season-5 Samoa-Donuts_This-Wild-Season-6 Samoa-Donuts_This-Wild-Season-7

Drooling yet? Okay excellent, let’s get started!

A couple tips – you’ll need a donut pan for this one. I legitimately ordered this donut pan after seeing the photos on PaleOMG. For real. My excuse was that Tim’s birthday was just around the corner, and Samoas are one of his favorite girl scout cookies. Solid reasoning in my book. Also, be sure to use good chocolate chips – don’t buy the cheapest ones! Tim and I once tried to make chocolate covered pretzels with el-cheapo chocolate chips. It was a disaster. First of all, they took forever to melt, and once we dipped the pretzels in, the chocolate refused to re-harden. Bah! For this recipe I used Ghirardelli semi-sweet chocolate chips and they worked great! And one last tip – this recipe made enough batter for 6 regular-sized donuts or 12 mini donuts, but enough caramel topping for probably 3 times as many! I’m betting you could double or triple this recipe (just the donut batter) and have enough goodness to feed an army. If you try it, let me know how it goes!

Samoa Donuts

Adapted from The Urban Poser and Top With Cinnamon
A delicious take on the girl scouts' samoa cookies.
Print Recipe Pin Recipe
Course Breakfast/Brunch

Ingredients
  

For the Donuts

  • 1 cup flour
  • 3/4 tsp active dry yeast
  • 3/4 tsp baking powder
  • 1/4 tsp salt
  • pinch of baking soda
  • 1/4 cup butter
  • 6 tbsp sugar
  • 1 small egg
  • 1/2 tsp vanilla extract
  • 1 tbsp yogurt
  • 1/4 cup milk

For the Coconut Caramel Topping

  • 1 can full-fat coconut milk about 1½ cups
  • ½ cup mild flavored honey or maple syrup
  • A pinch of sea salt I used kosher salt
  • 1 rounded tablespoon butter
  • 2 teaspoons vanilla extract
  • ¼ cup finely shredded coconut plus 2 more tablespoons for garnishing

For the Dipping Chocolate

  • 1/2 bag of good chocolate chips

Instructions
 

For the Donuts

  • Stir together the flour, yeast, baking powder, salt and baking soda in a small bowl, set aside.
  • Preheat your oven to 350 degrees F and grease a donut pan (6 regular sized donuts or 12 mini donuts)
  • In a medium bowl, cream the butter and sugar together.
  • Beat in the egg, vanilla and yogurt.
  • Stir in 1/3 of the flour mixture, then mix in half the milk. Repeat this until you've added all of the flour mixture and the milk.
  • Pipe the mixture (or use a spoon) into the prepared donut pan (each should be filled about 2/3-3/4 of the way up) and let rest for 5 minutes.
  • Bake the donuts for 10-15 minutes until puffy and golden brown.
  • Let rest for 5 minutes then remove them from the pan and let cool completely.

For the Coconut Caramel

  • In a small-medium sauce pan, bring the coconut milk, honey and salt to a boil over medium high heat, being sure that they are well combined. Reduce to a medium heat, and let the mixture boil down for about 35-40 minutes.
  • Add the butter and vanilla, stirring it in till well incorporated. Continue cooking for another 5-15 minutes or as long as needed until it is a deep caramel color. Don’t rush the process. Depending on how hot your burner is this process could be faster or slower. Stir often toward the end to keep the bottom from burning too much. A little burning is fine as long as you are stirring it in to the mixture. It will give it a darker flavor.
  • Remove from heat, transfer to a bowl and let cool for 5 minutes then stir vigorously until it’s creamy, shiny and smooth.
  • While the caramel is cooking, spread the coconut out on an ungreased cookie sheet and toast it in a 325 degree oven. Stir often till golden, about 5-10 minutes. Remove from the oven and let cool.
  • Mix the toasted coconut into the caramel, reserving a tablespoon or so for garnishing later. Use coconut caramel while still warm for best spreading results.

For finishing the donuts

  • Carefully dip the top of each donut in the coconut caramel mixture and place on parchment paper
  • Sprinkle with the toasted coconut
  • While that is cooling, heat chocolate chips in the microwave 10-20 seconds at a time, stirring each time, until smooth. Alternately, you can use a double boiler if you're feeling fancy pants.
  • Once your chocolate is melted, carefully dip the bottom of each donut in the chocolate, returning to the parchment paper to harden.
  • Carefully spoon leftover chocolate into a pastry bag (or ziplock bag and cut a tiny hole in the corner). If the chocolate has cooled too much, you can put it back in the microwave before spooning it into the bag. Pipe the chocolate over the donuts in whatever pattern you wish!

Notes

If you're gluten free, vegan, paleo, or avoiding refined sugars, head over to PaleOMG where Jenni from The Urban Poser has shared all sorts of alternative ingredients to make these donuts friendly to all!

Be sure to come back tomorrow! I’ll be sharing a much simpler (and healthier) recipe!

Follow my blog with Bloglovin

Filed Under: Breakfast/Brunch Tagged With: donuts, girl scout cookies

  • « Previous Page
  • 1
  • …
  • 19
  • 20
  • 21

Hello there!

My name is Asharae. I’m a photographer by trade, wife to an amazing man, and mama to three little ones. I am passionate about creating good food, sharing meaningful conversation around the table, trying new things, and encouraging others to do the same.

Welcome to This Wild Season! This is a place for sharing what I’m learning in the kitchen and outside of it. Most of all, it is a challenge to myself and to you to slow down, be present in the moment, and re-learn how to savor food and conversation around the table.

About

Search

Connect

  • Facebook
  • Instagram
  • Pinterest
  • Twitter
  • Vimeo

Find my book on Amazon:

Recent Posts

  • Emmeline’s Birth Story, The Story of Her Name
  • Emmeline’s Birth Story, Birth Day Part 2
  • Emmeline’s Birth Story, Birth Day Part 1
  • Emmeline’s Birth Story, My Pregnancy
  • Emmeline’s Birth Story, An Introduction
Follow on Bloglovin
Visit This Wild Season's profile on Pinterest.

Copyright © 2025 · Foodie Child Theme by Shay Bocks · Built on the Genesis Framework · Powered by WordPress